If you think that “turkey is a dry meat” then I can confirm that you’re wrong! Only badly cooked turkeys are dry. My How to Roast Turkey guide has easy instructions to perfectly cook a wet brined turkey that’s not only succulent and moist, but blooming delicious too!

This post may contain affiliate links. Please refer to my Disclosures Page for more details.
90% of the preparation for the juiciest turkey you will ever eat can be done on Christmas Eve. Or the day before Thanksgiving or any other day that you fancy a good roast.
Which means like most of my turkey dinner, there is very little fuss on the actual day. And if we’re talking about days like Christmas Day, that can only be a good thing.
Brining the turkey is my main trick to succulent turkey but there are a few of other tricks which certainly help.

- Tricks to Cooking the Perfect Turkey
- What is a Wet Brined Turkey?
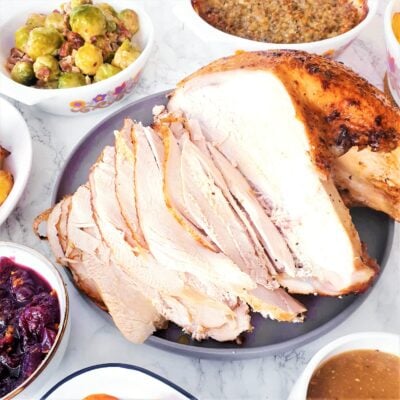
- How to Serve Roast Turkey Crown
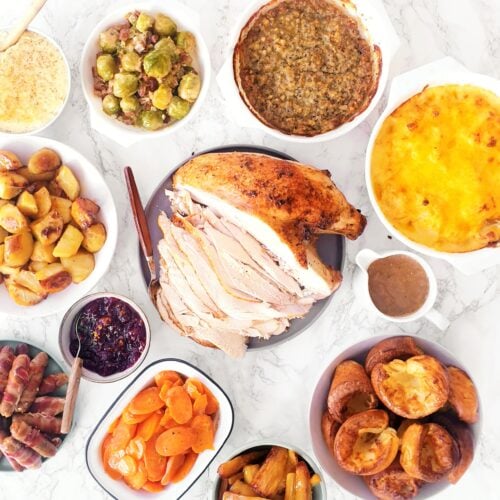
- Make Perfect Roast Turkey into a Feast
- Ingredients for The Perfect Roast Turkey
- Equipment Notes for Roasting a Turkey Crown
- Get Ahead
- Leftover Roast Turkey
- How to Wet Brine & Roast Turkey Tips
- Full Step-By-Step Recipe
Tricks to Cooking the Perfect Turkey
- Brine it. I prefer the wet brine method but a dry brine will work too.
- Don’t cook a whole turkey. The leg and breast meat doesn’t cook at the same rate. There is no need to forgo the tasty leg meat, but asking your butcher to remove and bone the legs is your best bet. You can then cook the legs separately.
- Don’t buy a massive turkey. Even if you have massive crowds to feed, you will ultimately be better off cooking 2 or more smaller turkeys. Cooking a massive turkey through properly whilst keeping it moist is an exercise in futility.
- Buy the best bird you can afford. Here in the UK that is going to be something like a Kelly Bronze. You will taste the difference. You can make a cheap bird from the supermarket freezer taste good, but it will never be A-mazing like a great free range bird.
- Do not be butter shy. Butter is your best friend. A roast turkey is not a time for slimming recipes. I don’t go in for excessive basting but I do start with a really good layer of flavoured butter under the skin. Plus your gravy will taste extra fabulous.
- Bring the turkey to room temp before cooking. This will take 1 to 2 hours depending on the size of your bird and how cold your room is. The oven heat will take much longer to cook the middle of the bird if it starts out cold. This goes for all meat that you’re cooking.
- Do not panic and roast the bird for too long. Once the juices run clear, its cooked. Do not give it extra time in the oven “for luck” or any other reason. Get that bird out.
- Rest the turkey properly. Your turkey can sit well covered for anything up to 2 hours. You must give it a minimum of 45 minutes. This allows everything to properly relax. Plus it frees up the oven to finish the roasties and make the yorkshires.
And thats it. No real magic or trickery!

What is a Wet Brined Turkey?
All this means is that the turkey is soaked in water mixed with a good amount of salt and sugar overnight before being roasted. I also add a little orange to ramp up the festive flavour.
Unlike the Nigella Lawson turkey in a bucket that we all went nuts for back in the 2010s, I don’t waste time and ingredients in the brine solution. I simply don’t think that you can taste 2 tbsp of maple syrup and 6 peppercorns in the final roast. So I don’t include them.
Because this recipe is roasting a turkey crown, you probably don’t need a massive bucket etc. I normally find that a good big mixing bowl or stock pot is sufficient. Thinking about what you’re going to use in advance is worth it however. You don’t really want to be digging around on Christmas eve.
It is worth noting that this same method also works perfectly for a chicken or other bird like capon. The cooking times will obviously vary.

How to Serve Roast Turkey Crown
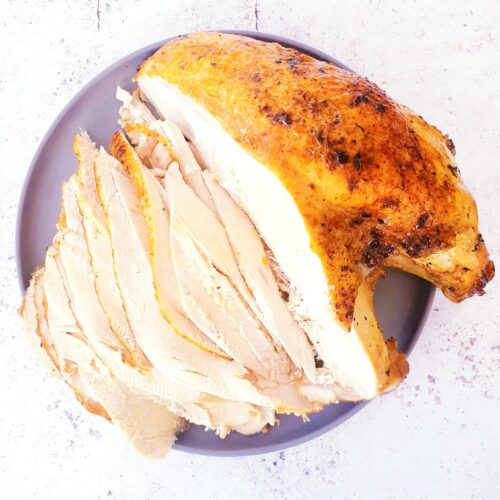
The big question here is – do you take the whole bird to the table and carve it in some kind of laborious ceremony? Or, carve it sensibly in the kitchen and deliver it to the table where it can be served immediately whilst everything else is still hot.
I suspect that you have gathered my preference! By all means take a photo for Instagram (I certainly cannot judge) and grab some guests to come and admire your handiwork. But then carve it and get the good stuff on a plate. Cover it with foil to keep some warmth in and serve.
As you will have a nicely rested turkey by that point, don’t forget to tip any accumulated juices into the gravy. And keep the carcass/bones aside ready to make stock later.

Make Perfect Roast Turkey into a Feast
I truly believe that you can make any dish into a proper feast! Whether thats a feast for one after work on a Tuesday, a casual feast for four on a Friday evening or a feast for 12 for a special occasion!
I spend huge parts of January to October begging everyone to not keep certain foods to only one day a year. And roast turkey is no different. It makes an excellent centrepiece at a Easter celebration or even just for larger families on a Sunday. Or Wednesday.
But I would also be foolish to pretend that there isn’t a 99% chance you are reading this because Thanksgiving or Christmas is coming up and you’re planning on cooking your once a year roast turkey!

So lets talk about other classic Christmas Day dishes that you’ll want to consider preparing:
- Pigs in Blankets (Bacon Wrapped Sausages)
- Sage & Onion Sausagemeat Stuffing or Homemade Paxo Stuffing
- Roast Potatoes
- The Best Roast Parsnips
- Vichy Carrots with Thyme
- Braised Red Cabbage
- Roast Sweet Potatoes
- Bread Sauce
- Get Ahead Gravy From Scratch
- Cranberry Sauce – smooth or chunky
- And don’t forget Yorkshire Puddings!
A cheeky Puff Pastry Mince Pie won’t go amiss either and don’t forget the Christmas Pudding (quick & easy microwave version)!

Don’t miss my comprehensive collection of ideas for classic Christmas sides. I’ve included simple basic recipes and ways to level up each dish.
There is everything from roast potatoes, numerous stuffing ideas and red cabbage dishes to cranberry sauces and even a veggie gravy option.
Of course I wouldn’t want to forget Thanksgiving or “Turkey Day” where the fixings are all rather different to Christmas in the UK. Except cranberry sauce which is apparently a universal accompaniment!
Why not try these dishes for something different:
If you want to really go full Americana, you’re actually going to want to scrap the roasting part of this recipe entirely and cook your turkey on the barbecue instead. Or deep fry it!
Don’t forget to head over to my Feast Collection pages to find all of my tips and tricks to help you host a fun and stress-free feast. Plus remember to check out my recipe index to create your own awesome Feast!
Ingredients for The Perfect Roast Turkey
The Turkey
I have touched on it above but you will not regret buying the best turkey you can afford. A free range kelly bronze is always a good bet if you are unsure. Check out local farms and farm shops selling direct. Or get your order in at your local butchers (if you are lucky enough to still have one).
Fresh is better, frozen is fine. If using frozen you must make sure to get it out of the freezer with a couple of days to go so it is properly thawed. No one wants to be recreating a scene out of a 70s sitcom come Christmas morning.
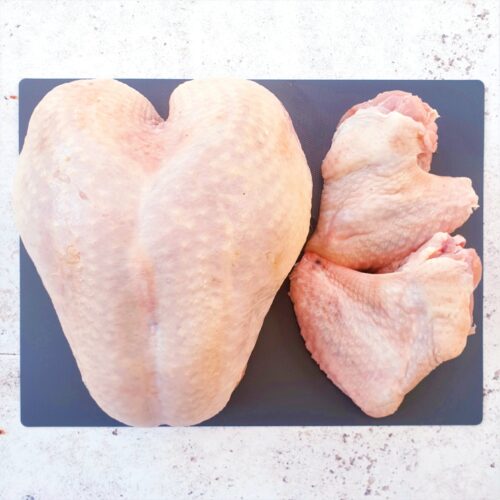
It is worth noting that I’ve recently found many turkey crowns being sold without bones. This is technically called a “turkey saddle” and not a “turkey crown”. So it is worth double checking.
Some crowns keep the wings attached which keeps the bird sitting more proudly upwards. I prefer to remove the wings and have it lay down in the roasting pan more. It just feels less risky getting it in and out of the oven.

Flavoured Butter
This butter goes under the skin of the turkey and flavours it from within. The flavours also transfer to the gravy to make it extra tasty.
So to really treat my turkey well, I buy really good butter. Or more likely I actually make my own Homemade Butter.
Any herbs that you use are really a personal preference. I’ve put my favourite flavour combo into the recipe here (sage, oregano and thyme) but do tailor it to your own preference. If you don’t fancy any herbs, simply leave them out.

Onions & Oranges
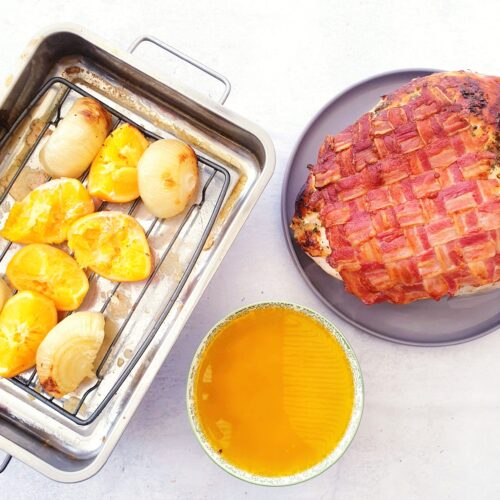
I include both onions and oranges in the brining mixture because the flavour does actually have an impact on the final flavour of the bird. Plus I pop the remnants under the turkey cavity so it flavours the inside of the bird as it cooks.
The orange does flavour the bird beautifully but if you don’t fancy an orangey tang you can leave them out of the roasting process. Do please still use them in the brine as the acid does good things to help tenderise the meat.
You can switch the oranges for lemons, just use half the amount. Or you can use any other orangey fruit like clementines or tangerines etc.
Use any onion you like.

Salt & Sugar
Salt and sugar are the primary ingredients of the brine. I use fine cheap table salt in the brine. Using an entire packet of Maldon sea salt flakes is a massive waste of money.
And any white sugar will do. Unbleached is fine but please avoid anything brown as this does have a flavour which will affect the final meat.
Bacon
The crowning glory of this bird is bacon. As always I favour unsmoked as smoked will add too much of a specific flavour.
The purpose of the bacon is twofold. Firstly by using the fattier streaky bacon, the fat melts over the bird as it cooks. This both flavours and keeps the breast meat moist. Secondly it protects the skin from overcolouring early in the roasting process. You will note that I don’t cover the bird when it is cooking.
How to Make a Bacon Lattice
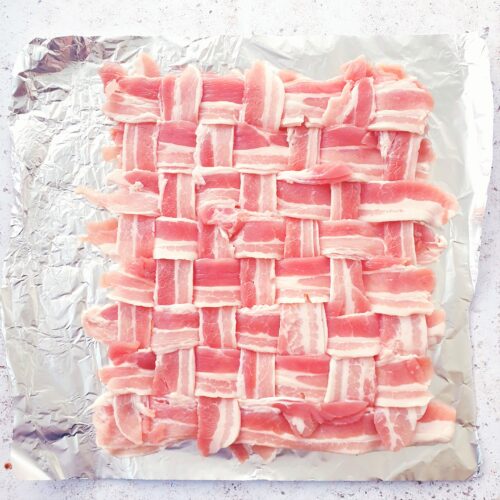
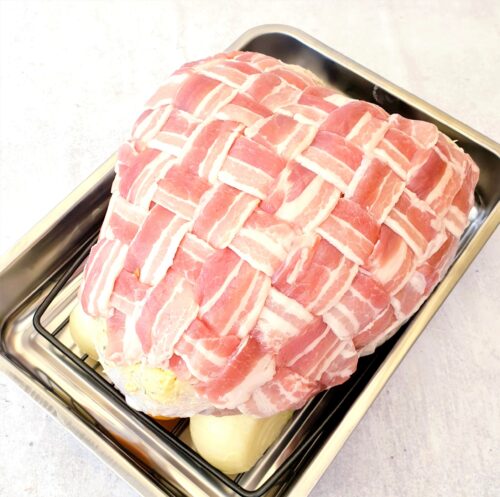
I make a cute lattice from the bacon and drape it over the turkey during the first part of the roasting process. Making the lattice is one of my favourite things to do, I find it quite therapeutic. But you could just lay strips over if you wish. For this reason I only use streaky bacon.
- To make the lattice simply lay strips (I used 8) of streaky bacon next to each other on a board.
- Fold every other strip back on itself to about halfway and lay another strip of bacon across the strips which are still on the board.
- Butt the strip up to the folded over strips. Replace the folded strips back to their original position.


- Now fold back the 4 strips of bacon you didn’t fold over the first time.
- Butt another strip of bacon up against the fold and replace the strips.
- Keep repeating with alternating folded strips until the last rasher is at the end of the original strips.
- And then repeat with the bottom half of the strips until you have no floppy ends of bacon.


You can of course leave the bacon lattice off but it really does elevate the turkey. And gives you cooked bacon to add into the sprouts. Or snack on and ruin your lunch.

Be Flexible
There are quite a few steps and elements to this recipe which all help to make it amazing. but such is life, you might want to switch up or leave out one or more of the elements. I’ve listed some of the options:
- Brine for less than 12 to 24 hours. But pretty please try to leave the turkey in the brine for at least a couple of hours.
- You can leave off the bacon lattice element if you wish.
- You don’t need to make the butter herby. Instead you can use straight up (salted) butter or add in other flavours.
- If you wish to play battle turkey skin, you can put the butter between the skin and breast meat rather than on top. I don’t think this makes any great difference and you risk tearing the skin.
- You don’t have to add the orange element to the roasting tray but please do so in the brine. Or switch the orange for lemons, that flavour works too.

Make it Vegetarian or Vegan
I am no magician and with the best will in the world, I can’t veganise a roast turkey. And you are unlikely to be reading this if you’re trying to.
But on the off chance you’re cooking a bird and still looking for a second option for a vegetarian guest, here are a few options you could try!
- Festive Butternut Roast from The Veg Space
- Lentil Nut Roast with Brazil Nuts from Tin & Thyme
- Mushroom Wellington from Veggie Desserts
- Butternut, Red Pepper & Potato Puff Pastry Plait from Tinned Tomatoes
- Chestnut and Cranberry Vegan Nut Roast from Cook Veggielicious
Make it Allergy Friendly
This recipe is free from egg, gluten and nuts.
Dairy Free: The only dairy in this recipe is the butter so switch that out and you’re golden. I would aim for a butter replacer rather than baking fat or spreadable margarine. The buttery flavour and harder texture is key if possible.
Please note that this recipe may contain other allergens not referred to above and any variations suggested have not been tested unless otherwise stated. For more information regarding any dietary information provided on this website, please refer to my Nutritional Disclaimer.

Equipment Notes for Roasting a Turkey Crown
First off I want to point out that you do not need a disposable foil roasting tray the size of a small boat. Why the supermarkets sell stacks of them every year is a mystery to me. What you are looking for is a roasting tray where the turkey crown just fits in with only a little room around it.
This means that the juices don’t spread far and wide and burn onto the bottom of the outer reaches of the tin. We want those juices for the turkey.
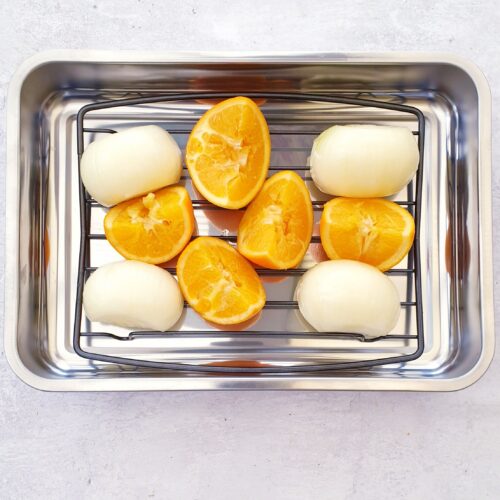
If you have one, using a roasting rack in the bottom of the tin is a really good idea. This allows the heat to circulate better from the underneath the bird. This is going to help it cook more evenly.
Otherwise everything you need is fairly standard kitchen equipment. I always talk about having a sharp knife and some heavy duty kitchen scissors will help with preparing the bird.
A comprehensive list of the equipment used to make this recipe is included in the main recipe card below. Click on any item to see an example. There are no hard and fast rules so many items can be sensibly substituted to achieve the same results.

Get Ahead
It is possible to brine and roast turkey then reheat the meat. Reheated turkey is fine but it is never as delicious as freshly cooked. So unless you really must cook a couple of days in advance or more if you are planning on freezing, it is best to roast the turkey fresh.
The nature of the recipe does mean that you have to plan ahead. The turkey ideally wants to be sat in the brine solution for a minimum of 12 hours. Anything up to 24 hours is great. I usually sort out the brine solution, prepare the turkey and get it in the afternoon before cooking.
It is worth remembering when doing backward maths from you planned mealtime that you need to take into account resting time, cooking time & coming up to room temp time. And then consider 12-24 hours before that.
But lets say you forget the plan and you only have 2 hours of possible brining time. Get it in. 2 hours is literally better than no hours!
As for the other bits and pieces, both the flavoured butter and bacon lattice can be made up to a couple of days in advance. I usually make them when I prepare and put the Turkey in the brine. Both can also be made much further in advance and frozen.

Leftover Roast Turkey
The options here deserve a whole post on their own. In fact Janice over at Farmersgirl Kitchen has written a great roundup of ideas so that’s saved me a job.
Don’t miss my Leftover Roast Dinner Pizza which is the perfect way to use up all manner of leftovers from any Sunday roast or Christmas dinner.
Christmas evening isn’t Christmas Day evening without a leftovers sandwich. I’m getting everything in between a couple of slices of white bread. Stuffing, cranberry sauce, Pigs in Blankets and even the Gravy and Bread Sauce all get nuked and piled in. Actually don’t nuke the cranberry sauce, that would be odd.
I also use leftovers anywhere that I would usually use leftover chicken. So some might get added to Egg Fried Rice or Chow Mein. Or thrown into a Korma Curry or Spaghetti Carbonara.
For something totally different and fresh you could replace the prawns with cold sliced turkey in Vietnamese Summer Rolls or coat it in Satay Sauce. Don’t forget to make some Satay Sprouts at the same time. Trust me!
How to Wet Brine & Roast Turkey Tips
For starters please go and check out my headline top tips at the top of this post. I don’t want to bore you by repeating myself.
Once you remove the bacon lattice don’t waste it. I usually crumble it into my spouts. Actually I have no self control so I eat half of it and the rest makes it into the sprouts!
If you know you have an oven that heats unevenly, be careful to turn the roasting tin every now and again for a more even cook. You might notice that I failed to do this is some of my photos. Whoops.
Don’t stress. It’s nice to take a little care and attention over a celebratory meal but at the end of the day, we’re talking about a big chicken. There is zero need to stress.

Don’t forget to let me know in the comments if you try making this recipe – I want to know what you think and if you made any substitutions, how did it turn out?
Still Have Questions?
Simple! Just contact me and I will do my best to help as quickly as I am able. Head over to my Contact Me page, any of my social media channels or post a comment at the bottom of this page and I’ll see what I can do.
Pin How to Roast Turkey (Wet Brined) For Later
Hit one of the share buttons to save this page to your Pinterest boards so you can come back and find it at anytime!

Keep Up to Date
Make sure you SUBSCRIBE to my newsletter and avoid missing out on any of my newest and bonus content. Don’t worry, I promise not to spam you or bombard you too often. Plus you’ll receive a copy of my FREE 7 Day International Meal Plan!
Also please don’t forget to follow me over on my social media channels over at Facebook, Twitter, Instagram and Pinterest. I love to interact with my followers and I’d love you to share my content with your friends too.
The Recipe
How to Roast Turkey (Wet Brined Crown)
Equipment
Ingredients
- 3 kg Turkey Crown
- 16 rashers Unsmoked Streaky Bacon
Brine
- 2 Orange
- 80 g Fine Salt
- 150 g Sugar
- 2 Onion
- 1 litre Boiling Water
- 1½ litre Cold Water
Flavoured Butter
- 250 g Salted Butter
- 1 tbsp Fresh Sage Leaves
- 1 tbsp Fresh or Dried Oregano
- 1 tbsp Fresh Thyme Leaves
- 2 tbsp Olive Oil
- 1 tsp Sea Salt Flakes
Instructions
Prepare and Brine the Turkey – 12 to 24 hours Before Cooking
- Pop the kettle onto boil.
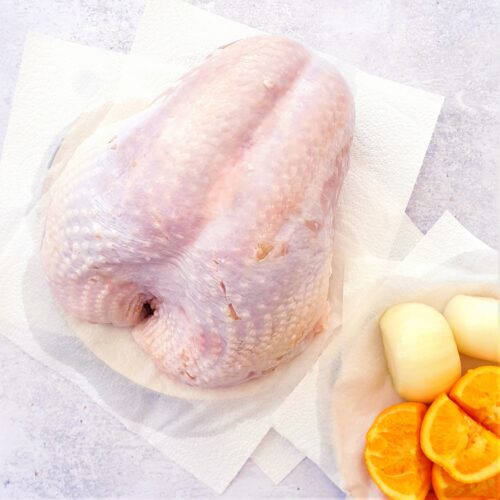
- Prepare your 3kg Turkey Crown by removing the packaging and drying off any juices. Use sharp scissors or a sharp knife to trim away and large pieces of excess skin. Remove the wings if still attached. Set aside while you make the brine.

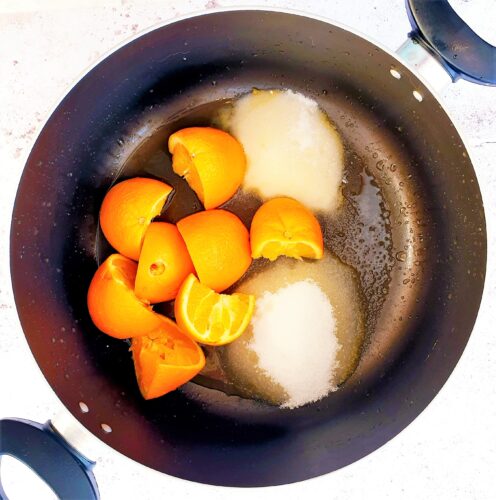
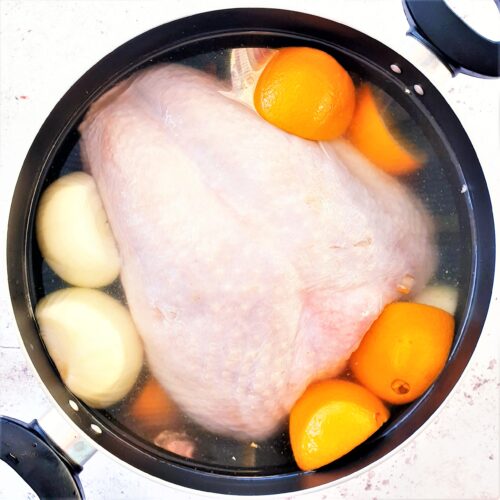
- Cut 2 Oranges into quarters and add them to a large stock pot. It needs to be big enough to fit in the crown with some liquid around it.
- Add 80g Fine Salt and 150g Sugar to the pot. Pour over 1 litre Boiling Water from the kettle. Stir until all the salt and sugar has dissolved.

- Peel and halve 2 Onions then add them to the pot. Pour over roughly 1.5 litres Cold Water and stir to mix. The overall water temperature should be not hot. It doesn’t need to be cold, just not hot.
- Put the turkey crown in the pot, add more cold water so it is fully covered if you need to. Set the turkey aside somewhere cold with a lid on. Make a lid out of foil, clingfilm or a large board. Whatever works.

Prepare the Flavoured Butter
- Cut fresh herbs so you have roughly 1 tbsp Sage, 1 tbsp Oregano and 1 tbsp Thyme.
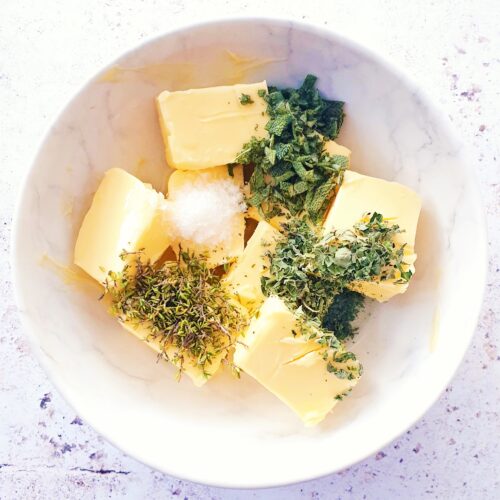
- Cut 250g Salted Butter into cubes and add to a mixing bowl with 2 tbsp Olive Oil, 1 tsp Sea Salt Flakes and the chopped herbs. Soften the butter a little first if you need to.

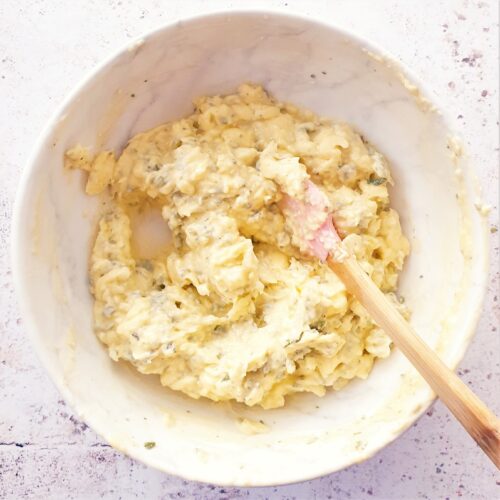
- Mix the ingredients together and pop in the fridge. I use my hands to mix – this is easiest.

Prepare the Bacon Lattice
- Use 16 Rashers Unsmoked Streaky Bacon to make a lattice. Further how-to instructions are given in the post. Store the lattice in 2 layers of foil or clingfilm in the fridge until needed.

Cook & Serve the Turkey
- Remove the turkey from its brine mixture 5 to 6 hours before you want to serve. Pat it dry with paper towels and set it aside to come up to room temperature (2 hours).

- Prepare a roasting tray by adding a rack and putting in the onion and orange pieces from the brine. Dry these off a little too. Dispose of the brine.

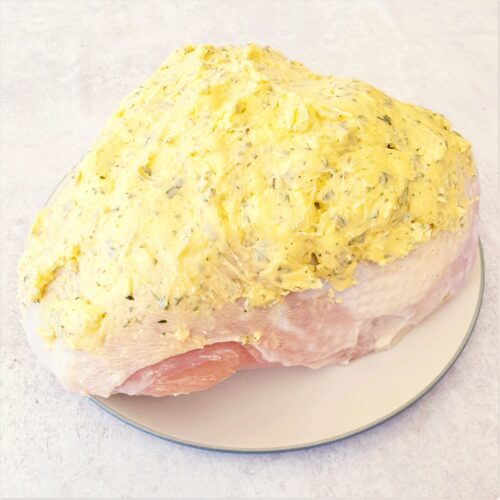
- Once the turkey is at room temp, preheat the oven to 190c fan | 200c | 375f. Smear the flavoured butter all over the visible top surface and skin. I just use my hands for this and smush on a chunk at a time.

- Carefully lay the bacon lattice over the top of the turkey and put the whole thing onto the prepared roasting tray/rack.

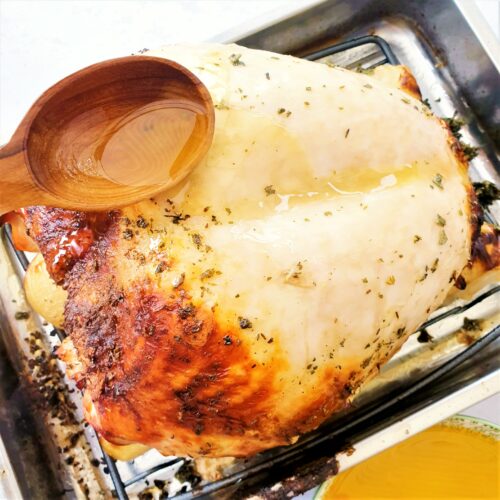
- Roast for 1 hour. If you oven is uneven like mine, you can turn the turkey tray in the oven every 20 minutes or so. If you want to use a spoon to baste the turkey every 20 minutes or so, you can do.
- After 1 hour take the turkey out of the oven and drain any juices/butter into a bowl. You might find it easier to briefly transfer the turkey crown onto a plate while you do this. I also remove the bacon lattice at this point.

- Replace the turkey into the roasting tray, spoon over a little of the drained butter and return to the oven for another 1 hour. Again it is a nice to baste the turkey every 20 minutes or so.

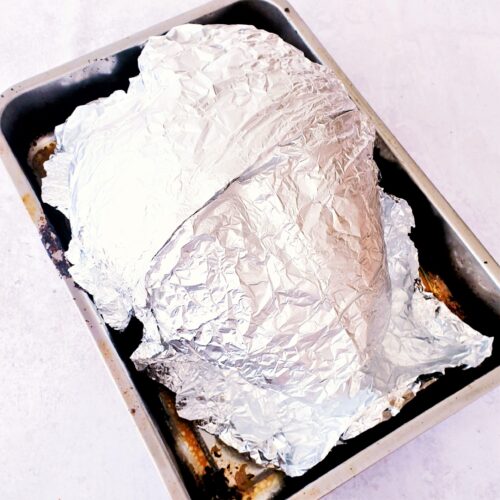
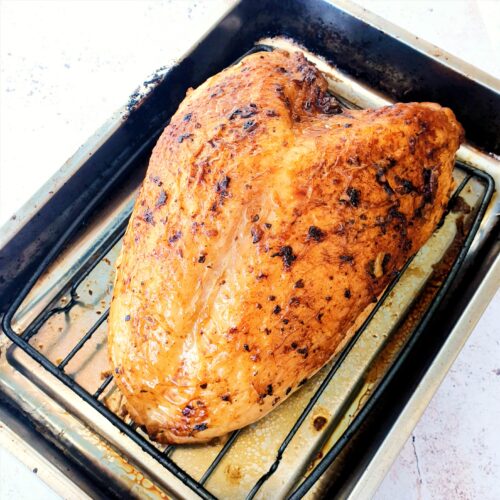
- Check that the turkey is cooked, you can make a cut from the underside. If the juices run clear then you are good to go. Drain any more juices which have collected in the pan and cover the whole thing with foil and a couple of towels.

- The turkey can now sit for up to two hours but please try to leave it for at least 1 hour to rest. Make sure to use the drained juices in your gravy.

- Once ready to serve you can either cut large slices from each side of the breast or remove each breast in one go then slice it on a board.


Sisley White says
This is the best way to roast a turkey. It’s such an important dish to get right and there are so many ways to cook it but this took all the faff out of it. It was simple, easy to follow and above all delicious. Thanks Chloe!
Chloe says
I’m so pleased you love it!!!
Rebecca - Glutarama says
Well that’s decided that then! This is how I’ll be preparing my crown this year thank you so much for this concise recipe – I’ll tag you into the final product…unless I forget about it and burn it, in which case I most certainly wont hahahaha
Chloe says
Amazing! Can’t wait to see how it goes (set a timer! – in fact, you can use the timers inbuilt into the recipe card!). Merry Christmas!
Helen - Cooking with my kids says
Getting my Mum to rest the turkey properly has made such a difference to our Christmas dinners in recent years! It’s not happening this year, but i’ll make sure she reads this guide before our next big Christmas dinner!
Chloe says
Oh it really does make such a difference! I can’t wait for next year!
Sisley White says
Turkeys always seemed so complicated to me and you have made it so simple. I can’t wait to try it at Christmas. When resting the turkey do you need to cover it with anything more than kitchen foil?
Chloe says
Hey Sisley, a covering of foil and then a couple of towels will keep the turkey good and toasty for a surprisingly long amount of time!
Jacqueline Meldrum says
How could anyone go wrong with so many easy tips?
Chloe says
That’s certainly the plan!
Cat says
This is such an informative recipe. I can imagine there will be a few more people than normal cooking their first roast turkeys this year and this will be a great help. It looks delicious.
Chloe says
Yes definitely lots of newbies, I hope I can help!
MANDY MAZLIAH says
What a comprehensive post! What you said about the dairy free butter is key. There are some really good block butter alternatives on the market now and they do make all the difference. Thanks for including my nut roast here.
Chloe says
Thanks Mandy! Yes its really great how the alternatives have really come on in the last few years.
Rosa says
Hi, thanks for the great info on how to cook a turkey. It sounds good.
Not understanding why the turkey has to rest for 1-2 hours?
Also, I imagine the turkey will be cold at the end of the resting time you suggest?
Chloe says
Hi Rosa, thanks for getting in touch. I’ve briefly touched on resting allowing the turkey to relax but I will expand and say that the relaxing allows all of the meat juices to properly reabsorb back through the whole of the meat which makes it nice and moist all the way through. This is true when cooking almost any meat. As for resting it for 1 to 2 hours, I recommend keeping it in its roasting tin so there is a little retained heat. I also advise to cover the turkey in foil and then a couple of towels. This is more than sufficient to keep most of the heat it. The turkey really doesn’t need to be piping hot when served, especially when being served with hot gravy. I hope that helps!