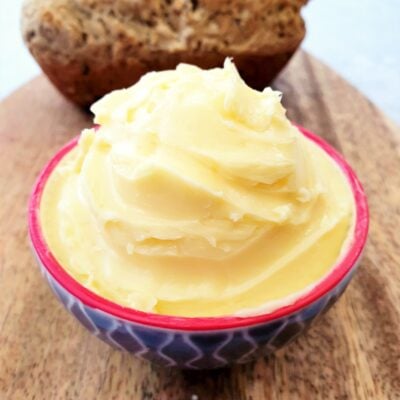
Homemade Butter is a revelation and I just can’t stop telling people how awesome it is. Or how ridiculously easy it is to make. It even works out cheaper than buying similar butter and takes 10 minutes tops. You have to try this!

This post may contain affiliate links. Please refer to my Disclosures Page for more details.
I just cannot believe that no one told me that butter was the easiest substance on earth to recreate. Not only is it waaaay tastier than anything I can find in the shops but I know exactly what has gone into it.
I’ll let you into the ingredient secret early. To make Homemade Butter, you need………double cream and salt. Or if you aren’t a fan of flavour, its literally just double cream. THAT IS IT! I’m just so mad that I’ve been buying butter for 32 years without knowing this.
The great news is that you also get a bonus cooking ingredient when making butter. Buttermilk. I know right. Hello pancakes and Breakfast Biscuits! Its also great to use in Soda Bread or even in cakes like this Lime Charlotte Cake from Casa Costello or Sticky Gingerbread from Charlotte’s Lively Kitchen. And then its great as a marinade, like with my Southern Baked Wings.
How to Make Butter From Double Cream – Step By Step Video
The Cost Benefit
Butter freezes so there is no excuse to make several batches and freeze some for later. Homemade butter lasts at least a week in the fridge so I normally keep at least 2 in the fridge and freeze a few more. If you ever see double or whipping cream in the reduced section – grab it!
The absolute cheapest any butter I can find at the moment (Oct 2019) is £1.49 for 250g. And that’s at Aldi, Asda & Tesco. The usual brands are running at nearer £2.00 for 250g.
A 600ml pot of double cream is around £2.00. Lets say each batch of my butter which makes between 240g and 290g costs £2.00 to make.
So homemade butter is around the same price as the brands but tastes way better. So far, so even. But then take into account you also have around 200ml buttermilk.
The cost of buttermilk varies quite wildly but taking the low end of an average of the major supermarket offerings, I think the buttermilk for each batch is worth about 40p.
April 2023 Update
The cheapest full price 600ml cream is currently £2.40 from Tesco or 2 x 300ml tubs from Aldi are £2.38. The cheapest butter is now £1.99 from various supermarkets. This means that making homemade butter is now the slightly more expensive option. But look out for reduced/yellow sticker cream and it can still be a saving. Still more delicious however!
October 2023 Update
The cheapest full price 600ml cream is currently £2.10 from Sainsbury’s. The cheapest butter is now down to £1.79. Which is slightly comforting if nothing else. Homemade butter remains the slightly more expensive option but also remains the tastiest.
February 2024 Update
At this point I’m just finding it quite interesting to check the movement of prices. The cheapest cream is now £1.95 from Tesco. Butter is now available for £1.69. Actually its £1.49 in Farmfoods and may well have been before but I wasn’t aware of it as they don’t have an online store. Nice price changes but its still cheaper to buy butter than make it!
How Long Does it Take to Make Homemade Butter?
10 minutes. Honestly. Pinkie promise. Swear to God. 10 minutes. Start to finish. From having a tub of cream in your hand to holding a pat of ready to eat butter. 10 minutes. Unless you get distracted but frankly, thats on you.
The last two batches I made took 4 minutes of whisking time. Lets say 5 minutes to include scraping down the sides of the bowl time. 1 minute to grab the solids and drain the buttermilk into a tub. 1 minute rinsing. 2 minutes drying, salting and shaping. Done.
There are of course variables. Whipping cream tends to take slightly longer to whip. The exact temperature of your cream when starting to whisk will affect the time it takes to separate.
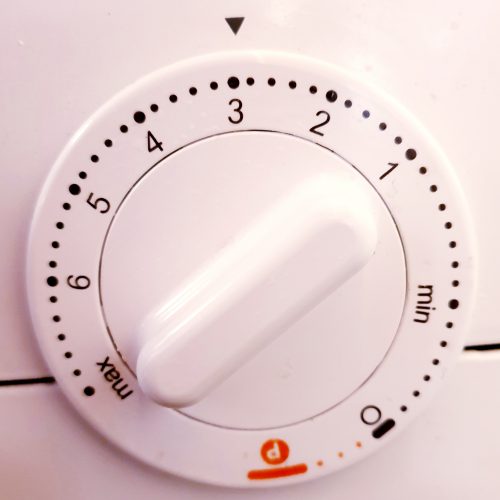
The speed of your whisk (I measured using setting 3 on my basic Kenwood stand mixer) will vary. Your propensity or otherwise to clear up as you go along will also affect your total making time.
How to Use Homemade Butter?
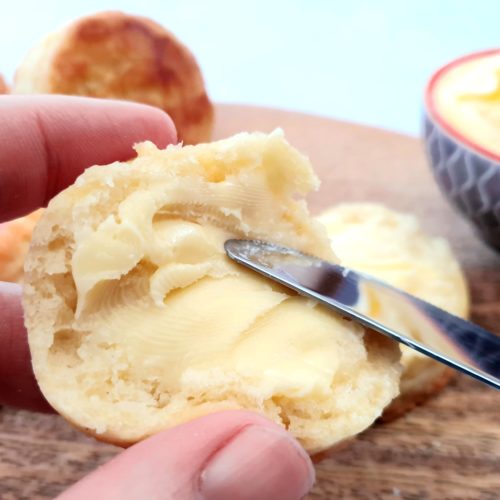
I cannot believe that I just typed that question! Use Homemade Butter wherever you would usually use butter. There is zero difference between butter you make and butter you buy.
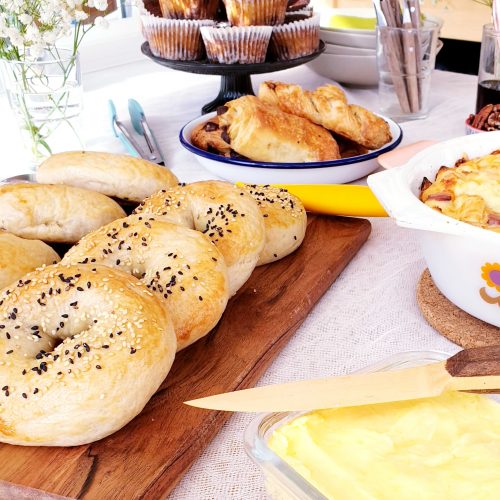
Try making some lovely Chilli & Oregano Soda Bread or Sesame Bagels and slather it on. Or use it to make the garlic butter in my Cheesy Garlic Rolls or Pull-Apart Bread. Or simply make Garlic Butter to use anywhere and everywhere!
Try using homemade butter to make my easy Puff Pastry for truly Homemade Pie, Savoury Turnovers or Sausage Rolls. Or how about making a quick shortcrust pastry for a Classic Quiche.
Obviously the uses are almost endless and I can’t possibly list all of the options to use butter or I’ll have just created an extra recipe index for this site! But do give it a go and you’ll see just how easy it is to substitute shop-bought butter.
Ingredients for Homemade Butter
This is going to be a short section!
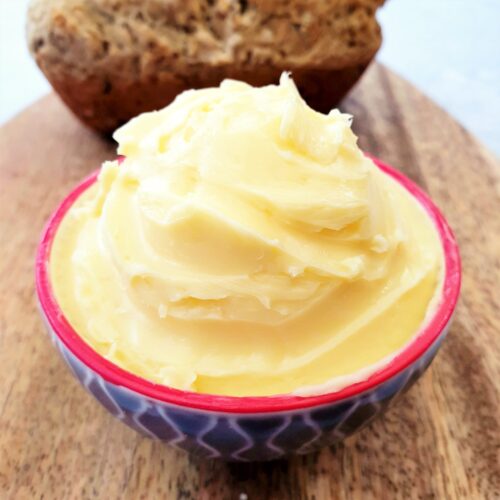
Double Cream.
I buy the 600ml tubs and make 1 batch of butter with each tub. Each batch is roughly equivalent to a regular 250g block of butter that you buy.
You can also use whipping cream but it will take a little longer to whip and separate than double. Single cream won’t however work as the fat content is just not high enough.
For those not in the UK – you need to look what cream in your country has between 30% and 50% butterfat. The higher then percentage, the more butter and less buttermilk you will get. UK whipping cream is about 30% and double cream about 50%. Heavy cream in the US would be ideal.
What about using Elmlea?
Get out. Despite a common misconception, Elmlea is not cream, it is an oil mixed with a little dairy. Think of it as the cheap margarine of the cream world.
Salt
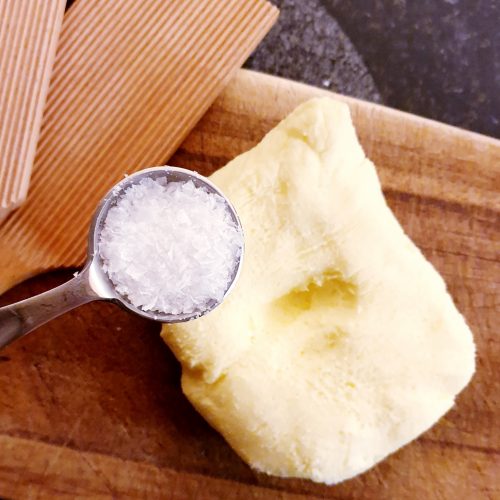
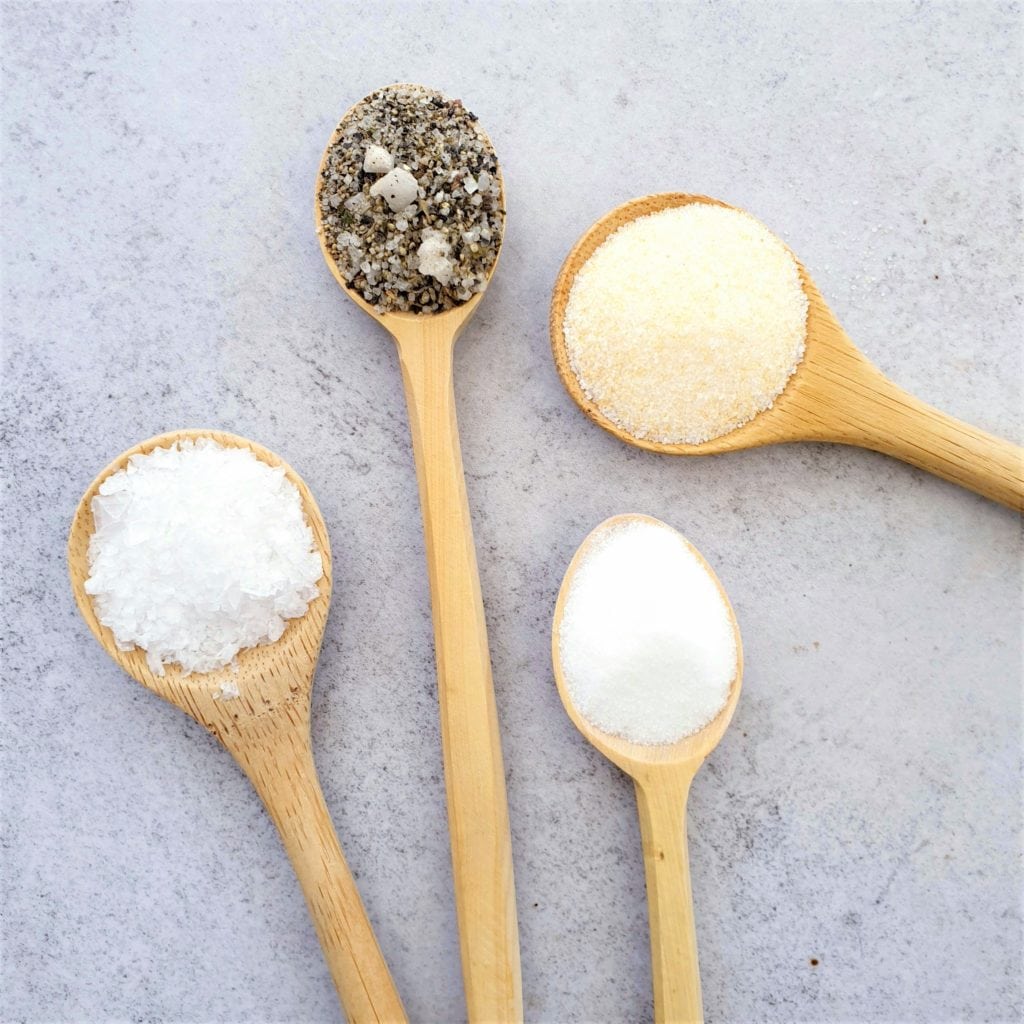
Salt is the only other ingredient to consider. I use Maldon Sea Salt Flakes for everything. That’s a bit of a lie actually – I do use cheap table salt for salting pasta and boiling vegetable water. But for adding to cooking or baking – always Sea Salt Flakes.
And that is exactly what I use in my butter. A scant tablespoon for each 600ml of double cream. It provides a beautiful rich flavour but there can be a little crunch involved.
I love that and it makes me think that I’m eating fancy ass french salted butter. But if you prefer a more homogeneous texture, you could use fine sea salt instead. Use no more than half the quantity given for flakes.
For the lowdown on using salt to properly season and enhance the flavour of your food, check out my Ultimate Guide on How to Use Salt.
There is guidance about which salt to use when, salt alternatives, using salt when baking and even what to do if you add too much salt!
Be Flexible
- To use double or whipping cream?
- To salt or not to salt?
- To use salt flakes or fine salt?
- To shape my butter into a square, rectangle or parallelogram?
These are your flexible options!
Make it Vegetarian or Vegan
Great news for vegetarians, not so much for vegans.
I tried to do some research to work out whether whipping the bejesus out of a tin of coconut milk will also make coconut butter but the internet has not been kind to me. I shall experiment next time I buy coconut cream so I will let you know how that goes!
For the time being, I’m afraid that this recipe is simply not vegan friendly. Sorry!
Make it Allergy Friendly
Butter is free from nuts, eggs and gluten.
Dairy Free: For the same reasons given above to the Vegans, there is no obvious way to make this recipe dairy free. Sorry.
On the upside, unless you have an allergy to salt (in which case don’t add it), Homemade Butter is otherwise allergen free.
Please note that this recipe may contain other allergens not referred to above and any variations suggested have not been tested unless otherwise stated. For more information regarding any dietary information provided on this website, please refer to my Nutritional Disclaimer.

Equipment Notes for Homemade Butter
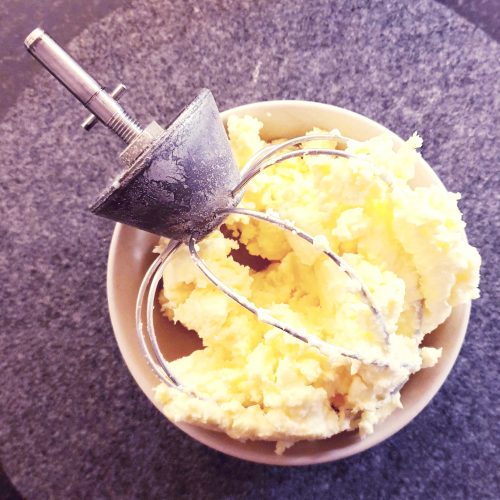
My number one preferred method for making butter is to use a stand mixer. Ideally one with a splash guard. You can see what you are doing, you won’t make a mess (mostly) and it is super easy.
If you don’t have a stand mixer, you can use an electric hand whisk. Just be extra careful about the buttermilk splashing over. I would use a large high sided bowl if possible.
Technically if all mechanical options aren’t available, you can put the cream in a large jar. Make sure it is VERY well sealed and shake like hell. I have not tried this and don’t intend to but both lore and the internet tell me that it is entirely possible.
If the jar trick works, I can’t see why a regular old hand whisk wouldn’t work. Or what about one of them windy hand whisks that make me think of Victorian kitchens?
And if you really love Homemade Butter and Gadgets, you can buy a special hand whisk/kilner jar combo. I think you should save your money and buy an electric hand whisk personally!
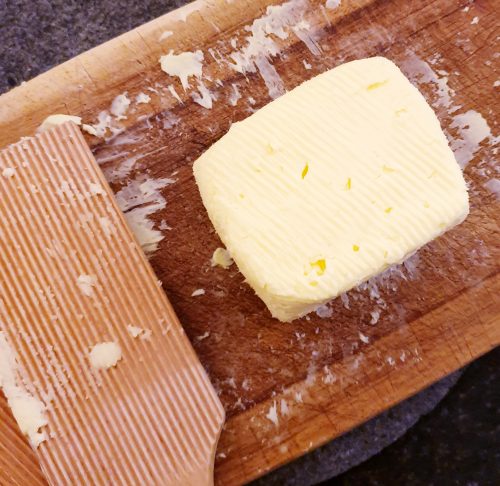
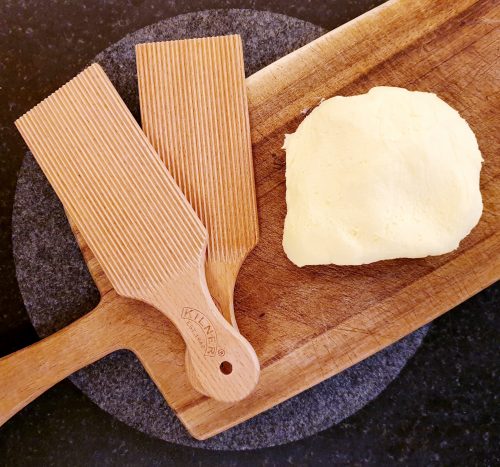
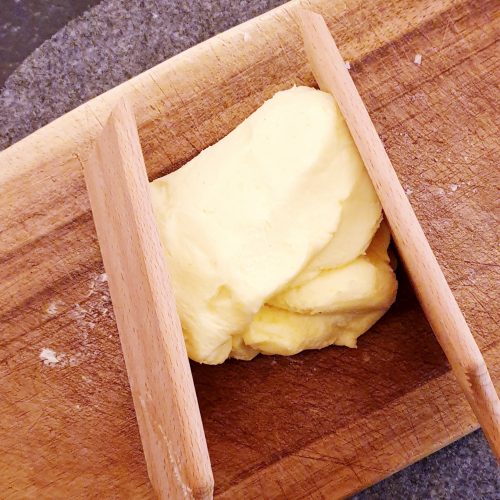
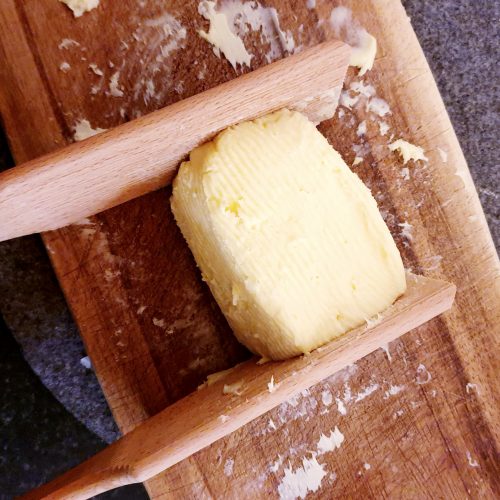
Noticed my fancy butter paddles? Total extravagance and wholly unnecessary. But gosh darn, don’t they look cute! I actually did use them to shape the butter but more through sheer determination to justify my purchase than requirement!
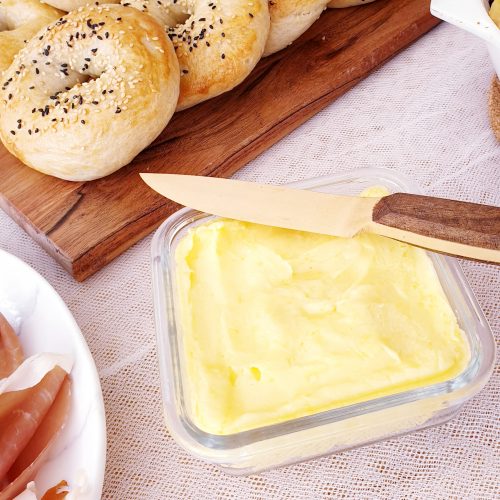
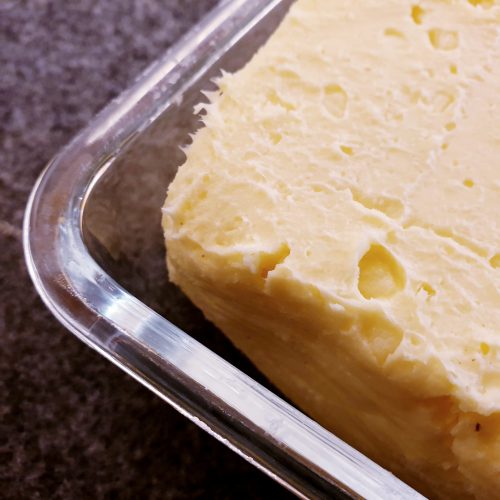
I have an Ikea version of this small lidded glass container which I find the perfect size for pressing my butter into. I do line the glass dish with cling film first so I can easily turn it out onto a dish.
A comprehensive list of the equipment used to make this recipe is included in the main recipe card below. Click on any item to see an example. There are no hard and fast rules so many items can be sensibly substituted to achieve the same results.
Get Ahead
All butter freezes like a dream.
I like to line my butter dish with clingfilm then pop the butter in. I press it into shape, wrap the remaining cling over the exposed butter then take it out and freeze. That way when I defrost each batch, the butter just slots right in the dish. Genius.
I regularly make several batches at once and freeze some to save long term washing up. You don’t need to wash your mixing bowl between batches.
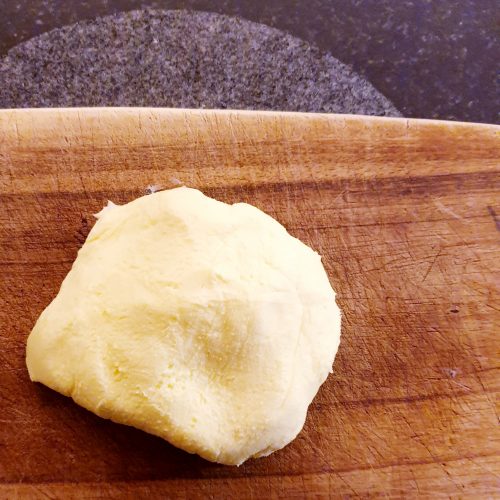
Homemade Butter Tips
When using my stand mixer, I usually use my whisk attachment. You will get exactly the same result using the ‘normal’ paddle attachment. But maybe give the dough hook a miss for this one!
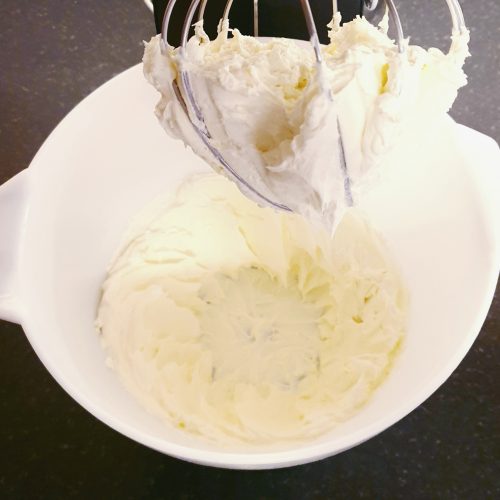
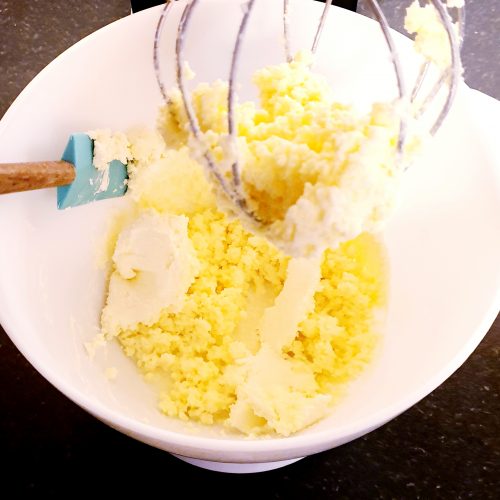
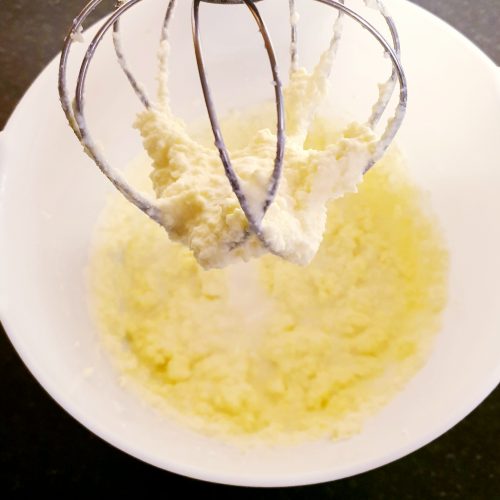
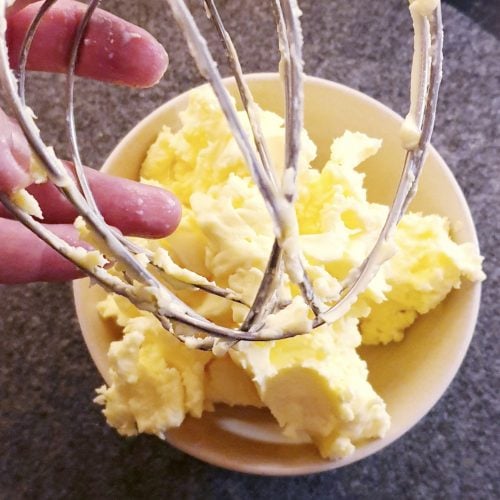
You will know when the butter is ready. If you are staring at your mixing bowl and wondering, then it isn’t ready – keep whisking. Trust me, you will know when you’re there.
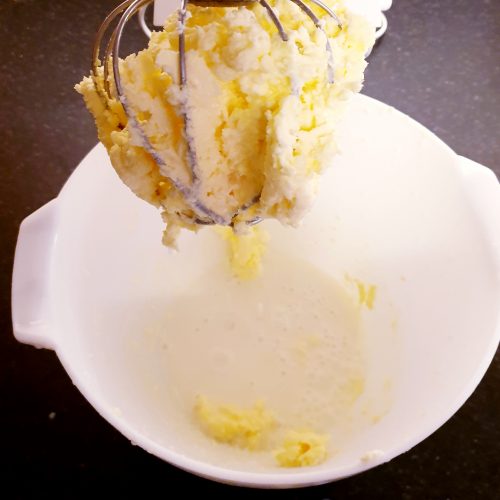
And you’ll know for sure because of the noise and/or splash. As the fat separates from the liquid, it will clump on the whisk and bash the side of the bowl. It has a distinctive noise! As it does the bashing, it will splash said liquid!

Do be careful of the splash. It will happen and whilst you know its coming, it has an incredible way of still catching me by surprise. And it will breach the splash guard on my mixer too. A tea towel carefully placed may help – especially if you have no splash guard!
You must use cold water to rinse the butter no matter how much your hands protest! Its butter – warm water will melt it. And then you are in all kinds of trouble!
If you are struggling with warm weather, just pop the butter into the fridge to chill at any point it starts to feel too soft to handle.
Do make sure to squeeze all of the milky liquid from the butter before moving on to salting and shaping. If any of the buttermilk remains, it will turn the butter sour, much faster than nature will when properly rinsed.
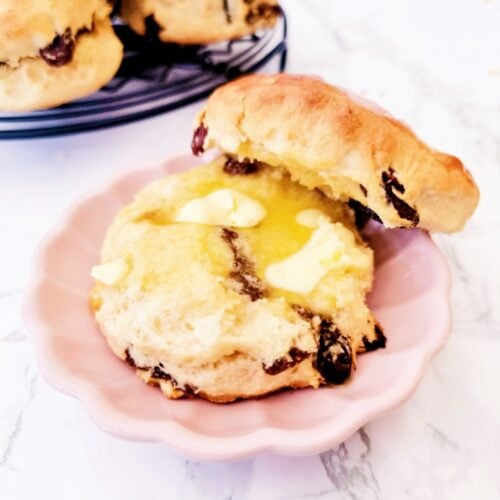
So, bread and butter anyone?
Don’t forget to let me know in the comments if you try making this recipe – I want to know what you think and if you made any substitutions, how did it turn out?
Still Have Questions?
Simple! Just contact me and I will do my best to help as quickly as I am able. Head over to my Contact Me page, any of my social media channels or post a comment at the bottom of this page and I’ll see what I can do.
Pin Homemade Butter For Later
Hit one of the share buttons to save this page to your Pinterest boards so you can come back and find it at anytime!
Keep Up to Date
Make sure you SUBSCRIBE to my newsletter and avoid missing out on any of my newest and bonus content. Don’t worry, I promise not to spam you or bombard you too often. Plus you’ll receive a copy of my FREE 7 Day International Meal Plan!
Also please don’t forget to follow me over on my social media channels over at Facebook, Twitter, Instagram and Pinterest. I love to interact with my followers and I’d love you to share my content with your friends too.
The Recipe
Homemade Butter Recipe
Equipment
Ingredients
- 600 ml Double Cream (Heavy Cream) - Or whipping cream
- 1 tbsp Sea Salt Flakes - Optional
Instructions
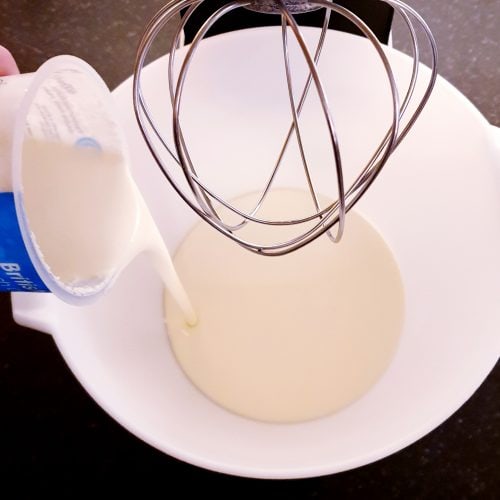
- Add 600ml Double Cream to your mixing bowl

- Whisk on a medium speed.

- Stop the mixing and scrape down the sides of the bowl after a minute or two.

- Repeat the bowl scraping exercise every minute or two.

- Keep checking it….

- You are ready to stop mixing when the liquid separates entirely from the .

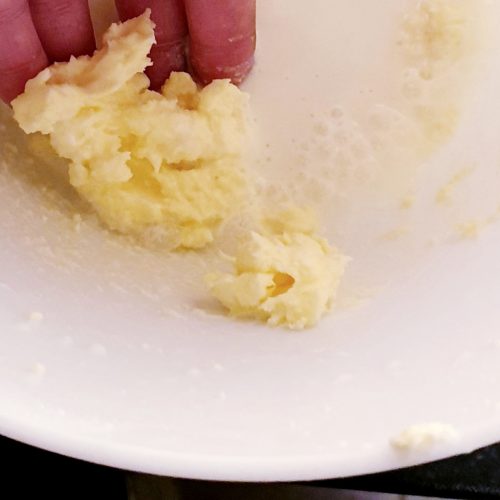
- Scrape the fat from the whisk into a small bowl or onto a board.

- Fish out any remaining lumps of fat from the mixing bowl and add to the rest of the fat.

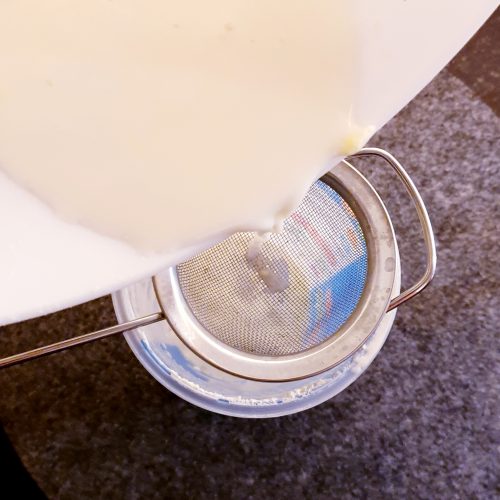
- Strain the liquid buttermilk into a container to keep for later.

- Add any remaining lumps of fat sieved out to the rest.

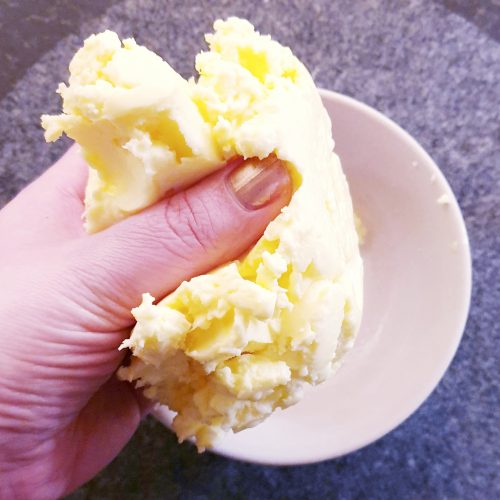
- Use your hands to squeeze the bulk of any liquid out of the butter. You can add that liquid to the rest of the buttermilk.

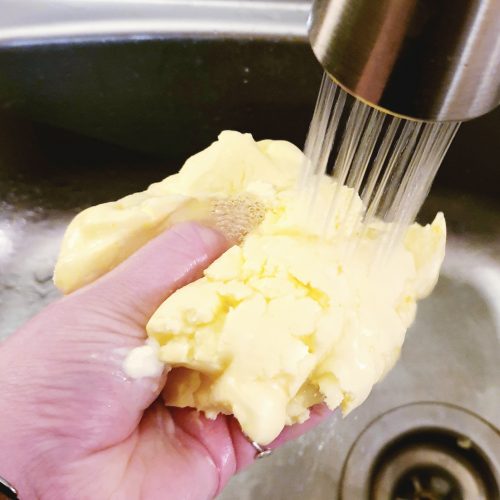
- Rinse the lump of butter under the running cold tap for a minute or two. Use both hands and continually manipulate and squeeze the butter. You will be ready to finish once the water runs off clear and not cloudy.

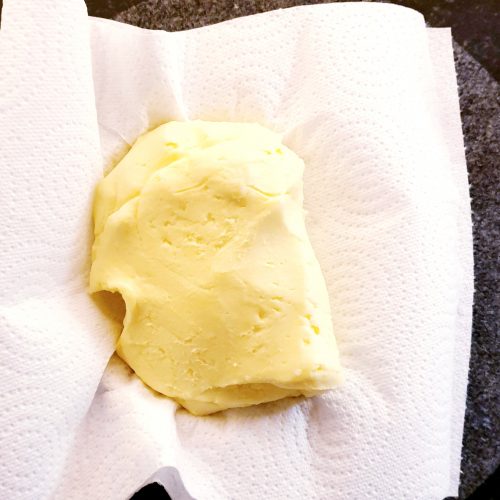
- I like to pat off any remaining water with a paper towel for maximum dryness.

- Add a scant 1 tbsp Sea Salt Flakes to the butter and knead it in.

- Some more liquid may be drawn out by the salt in which case squeeze that out and dry the butter again.

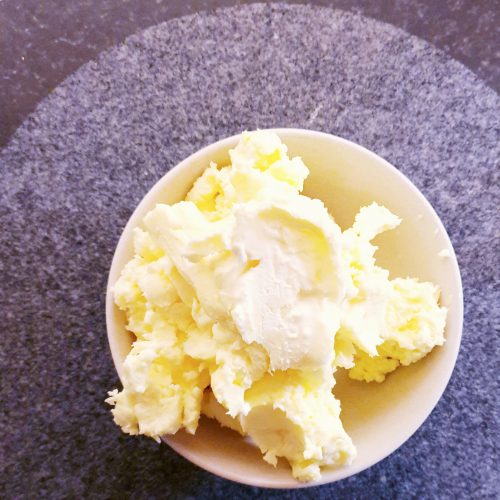
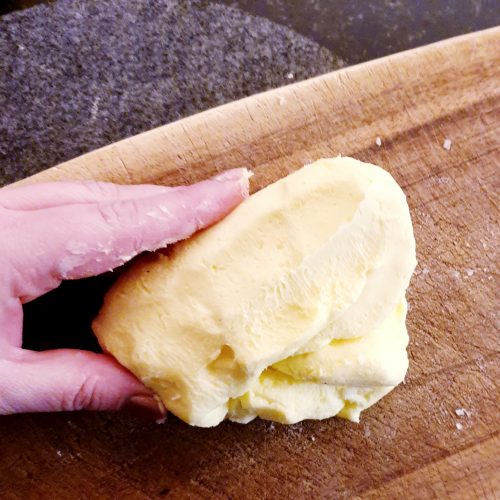
- The butter is now ready to eat. Shape it however you prefer using your hands or by pressing it into a dish.

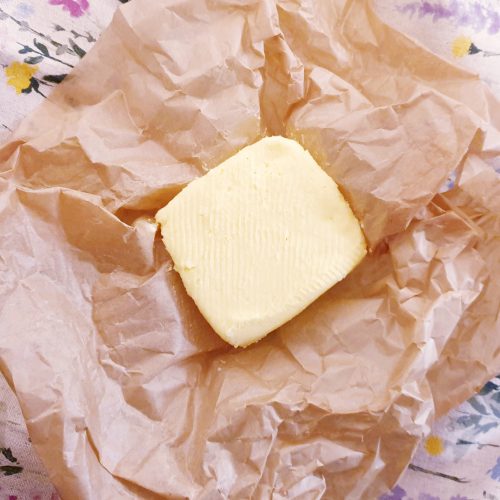
- Store by wrapping in grease proof paper.

- Or in a lidded dish.


Ahmad says
Greate recipe. I made mine using Tesco labelled double cream and a simple hand held electric mixer. I then went further to make butter ghee for cooking biryani. I got to say making your ghee from homemade butter make the biryani taste way more delicuous.
I personally will not make just butter as it is generally cheaper to buy the butter from shops. But this is the best and cheapest way to make ghee for cooking awesome biryani and veg stew.
Chloe says
Oh that’s really smart, I hadn’t actually thought about making ghee with it but yeh I’ll try that next time I make some, thanks!
Broni Sp says
I have a question. Here in Australia our heavy cream or whipping cream has Guar Gum and/or Carrageenan (what ever that is) in it. Will this effect the butter or its not an issue to worry about??
Chloe says
I just did some research and it looks like you need to look for double cream rather than heavy, whipping or thickened cream. But no, anything with a thickening agent added won’t be good for making butter I’m afraid.
Gary says
I like the way you get your ideas across, I like a bit of humour in the kitchen. I learnt how to make butter years ago so I could show children how to do it on a a farm visit. It was all manual though, no machines allowed. We used Jersey cream because the farm had an organic Jersey herd many years ago, even before the word organic was first used. The children loved making butter and were amazed when the cream separated. I read your recipe with interest but I must admit I still use the old method with the jar. One note of interest though, if the cream is at room temperature it will separate very quickly. I’ve bookmarked your site to explore at my leisure.
Caron says
Just done this using my kenwood stand mixer and wow! It’s like a science experiment watching it change. My inner geek is delighted. I also used maldon sea salt and its delicious. Thank you for this
Melodie says
I just made this with a stand mixer (that’s what my husband said it was) after shaking the cream container for ages and ages. (about 15 minutes) I squished it like you said, to get all the milk out but not much came out. There wasn’t much left in the bowl either. I don’t know what happened there. It was all butter and nearly no buttermilk. (it tasted more like milk?) I washed it too, but it was almost clear from the beginning, tho I kept washing it just to be on the safe side. I’m not salting it bc we prefer unsalted butter. It’s in a former ice cream container in the fridge. Thanks for the tips and the humour. 😁👍
(I’m not English, so idk what half the terms used meant, tho I’m sure it’s probably the same where I’m from. I’ve just never used it before. My daughter did it at school and really enjoyed it so I wanted to try too. Turned out we all had a go. 😁)
Chloe says
It sounds like you had fun! It might be that the cream where you live has a really high fat content so that might be why you ended up with much less buttermilk!
Shireen says
Hey Chloe!
Did you ever get around trying the vegan butter trick? I’d love some insight. Here’s hoping you did and I could probably pick that trick!
Thank you.
Chloe says
Oh I’m really sorry but I didn’t! Let me know if you give it a go though!
Lin says
Hi there! Do you know if this can be done with 30%-fat cream? It’s hard to find 40%-fat cream where I live and it seems the best I can get is 33%-fat cream. I can’t seem to get it into that more solid state where there’s a clear liquid-solid separation (and this went on for over 20 minutes). 🙁 Thank you!
Chloe says
In theory in you should be able to use a lower fat cream but you’ll get less butter and more buttermilk from the same quantity of cream. Lower fat creams do struggle to whip however and it sounds like this might be the problem you’re having. Or the cream might be treated in someway – uht cream or cream with any additives are unlikely to whip.
Jayne says
I followed your written instructions but maybe US English is lost in translation. I doubted your whisk instructions but as you say you make butter all the time I used the whisk Not beater attachment. It created a very fluffy cream and no liquid. When washed under cold water it dissolved. Disappointed and will not recommend. Waste of 600g of double cream.
Chloe says
Hi Jayne,
Unfortunately it doesn’t look like you followed my written instructions at all! “Step 6 – You are ready to stop mixing when the liquid separates entirely from the liquid.”. You were not ready to stop mixing. There is no mistranslation here, my instructions are clear in all versions of English. You simply stopped beating the cream far to early. What’s more, there are comprehensive images showing you exactly what the cream mixture will look like throughout the process. I’ve removed your 1* rating of my recipe because the problem isn’t the recipe, it’s your impatience and that quite frankly is not my fault.
Maggie says
You didn’t whisk it long enough!
Rosalind says
Alsi were selling 600ml cartons of double cream at 54pence!!! it had already been reduced to £2.19, so a massive saving. It was because it was the use by date. I bought 14 cartons and made approx 4.5 kg of butter. So easy & so good. I have my own business making preserves such as lemon curd & baking. So, the butter and buttermilk have been a fantastic cost saving bonus.
Rosalind says
Hi do you use supermarket own brand of double cream to make butter and not elmlea double cream?
Chloe says
Erm, Elmlea is not cream! Any actual double cream is fine to use.
Stephanie says
I JUST made this. A+++!!! It is so good. I can not believe how easy it was to make!
Barb says
oh dear, it brings some memories back. When I was a girl, many,many moons ago I used to visit family in my grandfather’s village. My aunt would seperate cream from the milk, than pour it into a wooden can with a paddle and I would beet the hell out of it and voila you had butter and butter milk.
This is what I am going to do now, no I do not have the wooden can I will use the modern tools and I will use buttermilk to bake sourdough rye bread.
Chloe says
Aw, such a lovely memory!
Kim says
I love this and have added your site to my homepage. Your humour is too funny. Two questions if I may? Can I use reduced cream…due to expire. And how long can this be kept in a freezer. Thank you so much.
Chloe says
I personally do not think my humour is generally appreciated enough so thanks 😉 You can definitely use reduced cream – that’s what I usually do. And you can freeze it for ages – at least 6 months. I’m pretty blasé about freezing times to be honest – as long as something is really well wrapped, I’ll keep things in there for a couple of years
Clive Griffiths says
Could you use a food processor
Chloe says
I’m not 100% sure, I’d need to test it. I don’t think using the blade would work but you could give it a go and see. If you have a whisk type attachment in the processor, that should work however.
Bess says
You can definitely use a food processor (using the blades) as I’ve done that before, and have also used a stand mixer. Both end up the same.
Sharon says
Great recipe. Have made it twice in two days. I just had normal salt, but will buy the flakes to try. I added garlic to my second butter I did. 🙂
Ben says
What a lovely article. So well written and it made me laugh out loud twice.
Elmlea – a character assessment and to the cognoscenti an abomination.
I shall definitely be giving the recipe a go – had once been tempted to make my own butter by some over-priced artisanal-hipster-style butter kit but then my contempt for kit’s inherent snobbery (only use cream from a local vegan cow) put me off.
THIS though is the epitome of unpretentiousness.
Thanks so much.
Chloe says
Ha, I love this – comment of the month! I’m never entirely sure if anyone appreciates my humour and personality. I try to keep things vaguely professional on the whole, but whats the point of not having anything of me on the page?! So I’m glad to know someone is reading it anyway! But definitely try the butter, it is mega. I won’t lie, sometimes I make it super salty and just nibble on bits from the fridge. No regrets 🙂
Julie says
I only used 1 T spoon of maldon sea salt and found that was plenty I don’t think I could have eaten it if I’d added a tablespoon of salt hubby loves salty stuff and even he said it was more than enough!!
Barbara Rhodes says
Chloe, there is no mention of temperature that I can see. Do you start with fridge cold cream?
Chloe says
Hi Barbara, the temperature doesn’t really matter although I usually use make it straight from the fridge just because thats where its stored and I’m not terribly organised
!
Tanta says
COOL ITS PERFECT BUTTER LOVE IT. TRIED IT WITH MY TOAST YUMMY DIDNT REALISE SOO EASY TO MAKE. THANKS TANYA🍞🍞
Choclette says
Love that you make your own butter. I haven’t done it for years. Every time I whip cream I think about over whipping it, just so that I can get some homemade butter. But I’ve got a lot better at whipping cream in recent times, so I no longer get butter.
Fabulous butter pats – very fancy!
Chloe says
I love that, no more accidental butter!
Pat says
The jar works. I had my students bring baby food jars. They shook and I served warm bread. They enjoyed it. We did not knead or form it. No salt either. Life lesson culminating activity to do in a short amount of time.
Chloe says
Hi Pat, thanks for stopping by, It sounds like a great activity for kids. I’ll definitely be continuing to use my mixer though. Standing by a river and smashing your dirty clothes against the rocks to clean them works but I’m not about to stop using my washing machine to try it! And always salt for me – I’m a big fan of flavour in my food!
David says
I can also confirm the jar method works. In fact it works much better than you would imagine. I used this method when my mixer finally kicked the bucket and was in a hurry to use the cream before it turned. Although it works well you’ll definitely get a workout if you’re using a pint or more of cream. One small tip, is that I’ve found by adding something small like a bottle cork or glass marble to the jar with the cream, it helps to speed up the process. The object bouncing around the jar replicates the plunger in the churning process of a traditional butter churn. That way your not solely relying on the density of the cream to churn itself. Hope that helps to explain. Love the article, I’ve already shared it a few times. Hope you had a nice Christmas and great New Year.
Cheers, Dave
Veronica says
I love this Chloe. I have to try it just to see it working 🙂 . Sharing to my facebook group too!!!
Chloe says
Thanks Veronica!
Kat (The Baking Explorer) says
This is so clever! And you’ve explained it so well!
Chloe says
Thanks! My only regret is that I didn’t realise how easy it was sooner!