
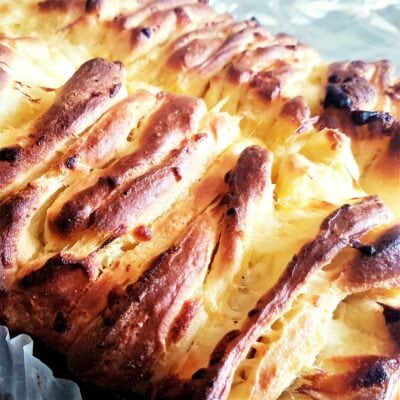
My Cheesy Garlic Rolls are the perfect grab-and-go version of my ever popular Cheesy Pull Apart Garlic Bread. The enriched bread is gorgeously soft, the cheese stringy and the garlic bordering on spicy. You’re going to want to make a double batch!

This post may contain affiliate links. Please refer to my Disclosures Page for more details.
Its no real wonder in hindsight but my Cheesy Pull Apart Garlic Bread was a surprise hit of a recipe for me. It is bloody gorgeous to be fair! It was first made it for a Band of Bakers event where is went down a storm (gone in less than 7 minutes!) and I’ve made various versions of it ever since.
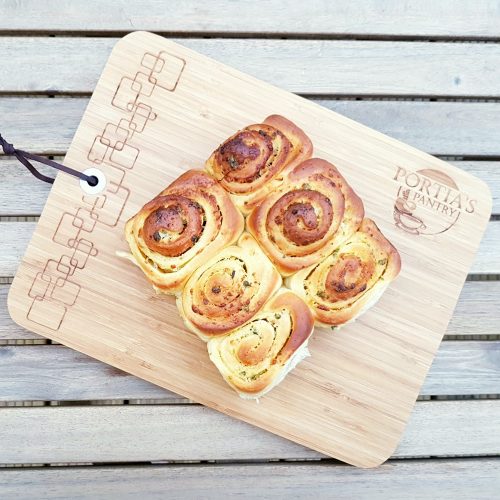
This swirl bun version is a riff on a chelsea bun but without any of that blasted cinnamon I hate so much! And MUCH MORE GARLIC!

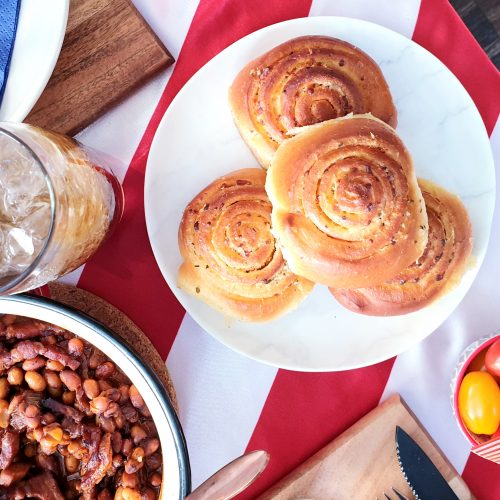
My Garlic Rolls are the ideal version of this recipe for a buffet, picnic or as I designed them for, a bake sale! My buns went down a storm on the East Dulwich WI stall at the Goose Green Fair.

Make Cheesy Garlic Rolls into a Feast
I truly believe that you can make any dish into a proper feast! Whether thats a feast for one after work on a Tuesday, a casual feast for four on a Friday evening or a feast for 12 for a special occasion!
To make a simple everyday Feast, garlic bread makes a fab accompaniment to dishes like Spaghetti Carbonara and Macaroni Cheese.

Ingredients for Cheesy Garlic Rolls
Oregano
Those of you will eagle eyes may have noted that these rolls include an extra ingredient not included in my pull-apart loaf recipe – oregano! Fresh or dried will do just fine here.
I think dried oregano is one of the best dried herbs out there with very little loss of taste or fragrance. Leave it out if you want but it really does take the garlic butter to the next level.
Cheese
Please don’t be tempted to use fresh mozzarella cheese here, it’ll be far too wet, as would cream cheese or any other soft cheese like brie.
The pre grated stuff has all the joy and stringy-ness of mozzarella but it’s quite dry. Also also best for pizza toppings I think. You could however use something stronger like cheddar or gouda but you will lose some of the gooey joy.

Garlic
I always talk about garlic paste in my recipes rather than garlic cloves. There are a few reasons for this. Firstly not all garlic cloves are made the same. I don’t think “a clove” is a good measure!.
There are two ways to end up with garlic paste. Either crush fresh cloves with a little salt using the flat of a big knife on a chopping board. Or, buy it in jars from the supermarket. Do note that I am talking about paste and not those tiny cubes of lazy garlic in oil. They smell funky to me and don’t have the right texture.
Yeast
Make sure your yeast is in date. I do not advocate paying any attention to best before or use by dates as a general rule.
But smelling yeast will not tell you if it is still alive. So only use “in date” yeast. I actually write the date I bought a box of yeast on it before putting away so I can rotate properly.

Be Flexible
I’ve already proven how easily adaptable this recipe is changing it from a loaf to rolls. I’ve also used the same dough to make my Chocolate Monkey Bread. There are so many possibilites, it blows my little mind!
I will let you into a secret – this dough and cheese/garlic butter makes for stuffed dough balls that will blow your mind. Pizza Express who?
If you want to play with the filling ingredients, feel free to do so, just have a quick gander at my ingredient notes above. I don’t want you to have soggy buns. No one wants a soggy bun.
Make a loaf rather than rolls –
Cheesy Pull Apart Garlic Bread Recipe
Make it Vegetarian
Simply make sure that the cheese you choose is suitable for vegetarians and you are good to go. Veggie-tastic!

Make it Vegan
Now then. I am convinced that you can make this recipe vegan. But there are a lot of substitutions:
- Switch out the butter for vegan baking block.
- Use a vegan cheese – I hear they’re pretty good nowadays and you can even get mozzarella substitutes with a bit of that classic meltiness.
- Substitute each egg with 1 tbsp of vegetable oil.
- Use a plant-based milk instead of regular milk.
Maybe not so difficult as these are likely your staple ingredients anyway right? Let me know!

Make it Allergy Friendly
This recipes does not contain any nuts.
Dairy or Egg Free: As usual, I will refer you to the vegan substitutions to make these Garlic Rolls suitable for those with a dairy allergy. To suit an egg allergy, only the eggs need to be substituted. Obvs.
Wheat Free: I regularly make these super-soft buns using spelt flour for my friend who is unable to eat wheat. Be careful as spelt isn’t a suitable swap for all wheat allergies and it isn’t gluten free.
Gluten Free: For gluten free rolls, you will need to use a gluten free flour. Like vegan cheese, the number of varieties of gluten free flour you can now buy is quite impressive! The rice free flour from Free From Fairy is by far my favourite option.
Please note that this recipe may contain other allergens not referred to above and any variations suggested have not been tested unless otherwise stated. For more information regarding any dietary information provided on this website, please refer to my Nutritional Disclaimer.
Equipment Notes for Cheesy Garlic Rolls
A Stand Mixer with a dough hook would be my first choice of appliance to help make any bread dough. An electric hand mixer with dough hooks would be my second. My third choice would be elbow grease.
A dough scraper is a great tool to work with when dealing with dough. It can be used to scoop, cut and scrape any dough from flat surfaces. A great alternative to the metal type are these cheap flexible scrapers.
A comprehensive list of the equipment used to make this recipe is included in the main recipe card below. Click on any item to see an example. There are no hard and fast rules so many items can be sensibly substituted to achieve the same results.

Get Ahead
Obviously you need to have a couple of hours spare before you want to eat my Cheesy Garlic Rolls fresh. Whilst they are still very good reheated, they are most fabulous fresh out of the oven. So here is how I recommend getting ahead of time.
Make the recipe up to stage 7, but line the tin with cling film before adding the dough rolls. After the tin is full, wrap the whole thing in cling film and put it straight into the freezer. Once the dough rolls are fully frozen, perhaps overnight, you can take them out of the pan, wrap as a batch or individually in cling and foil and leave in the freezer for several weeks or so.
Don’t forget to also freeze the set-aside garlic butter.
When you want to bake the rolls, take them out of the freezer, unwrap and place into the tin which you have lined as usual. Cover the top with clingfilm and leave in the fridge overnight to thaw. The second prove will happen at the same time. Once thawed and risen to fill the pan, bake as normal.
You can bake off the whole batch at once or in smaller batches Actually thats a great idea – make a batch of 18 and then bake them off 4 or 5 at a time. Fabulous for helping with self control!

Leftover Cheesy Garlic Rolls
Every time I go to write this section of my posts, I just have a proper giggle to myself! I’ve never had enough of these garlic rolls to satisfy me, never mind leftovers.
But if self-control is your thing, then you can give a roll or two a quick blast in the microwave to warm them through for a few days after baking. Even if they’re feeling a little stale, this will revive them!
After baking is another great point to freeze this recipe. Just portion up, freeze and reheat as normal.
Cheesy Garlic Rolls Tips
The dough will be quite soft and sticky – this is a good thing!
Knead the dough on a floured surface but try not to add too much extra flour to the dough as this will dry it out. If it feels like its getting a bit dry, knead in a little more milk or water.
You can just leave this on the side in the kitchen to prove but it’ll take twice as long. An airing cupboard or similar is ideal but I don’t have one so I usually put one of my ovens onto a super low heat, pop the dough in and then turn the oven off. Just don’t keep opening the door to let the residual heat out.
If you use the microwave to soften the butter as I usually do (I’m not organised enough to take it out the fridge in advance), cut it into small squares first and spread them out on a plate. Blitz for no more than 5 seconds at a time. This way its more evenly softened rather than big block which will melt on the outside and stay solid in the middle.
I have got to stop writing these recipes up without a batch of whatever I’m writing about in front of me. I would kill someone for garlic rolls right now!

Don’t forget to let me know in the comments if you try making this recipe – I want to know what you think and if you made any substitutions, how did it turn out?
Still Have Questions?
Simple! Just contact me and I will do my best to help as quickly as I am able. Head over to my Contact Me page, any of my social media channels or post a comment at the bottom of this page and I’ll see what I can do.
Pin Cheesy Garlic Rolls For Later
Hit one of the share buttons to save this page to your Pinterest boards so you can come back and find it at anytime!

Keep Up to Date
Make sure you SUBSCRIBE to my newsletter and avoid missing out on any of my newest and bonus content. Don’t worry, I promise not to spam you or bombard you too often. Plus you’ll receive a copy of my FREE 7 Day International Meal Plan!
Also please don’t forget to follow me over on my social media channels over at Facebook, Instagram and Pinterest. I love to interact with my followers and I’d love you to share my content with your friends too.
More Garlicy Recipes


The Recipe
Cheesy Garlic Rolls Recipe

Equipment
Ingredients
Dough:
- 90 ml Water
- 14 g Fast-Acting Dried Yeast - 7g dried yeast = 15g fresh yeast
- 50 g Caster Sugar (Superfine Sugar)
- 500 g Strong White Flour (Bread Flour)
- 1 tbsp Sea Salt Flakes
- 40 g Salted Butter
- 2 Egg
- 140 ml Milk
Garlic/Cheese Butter
- 250 g Salted Butter
- 3 tbsp Garlic Paste
- 1 tbsp Sea Salt Flakes
- 150 g Grated Mozzarella
- 2 tbsp Fresh or Dried Oregano
Instructions
Make the Dough
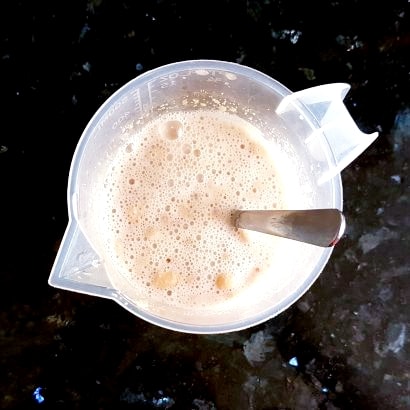
- Add 90ml fairly warm (not hot) Water to a small bowl and add 14g Fast-Acting Dried Yeast and 50g Caster Sugar. Whisk to combine a little (it won't combine properly) and set aside.

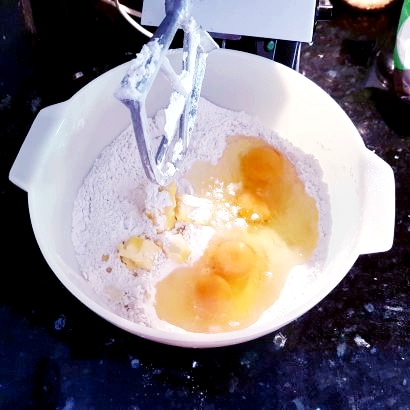
- Measure 500g Strong White Flour and 1 tbsp Sea Salt Flakes into a large mixing bowl and stir to combine.
- Add 40g Salted Butter, 2 Eggs, the by now frothy yeast and water mix and 140ml Milk to the flour and stir until a dough is formed.
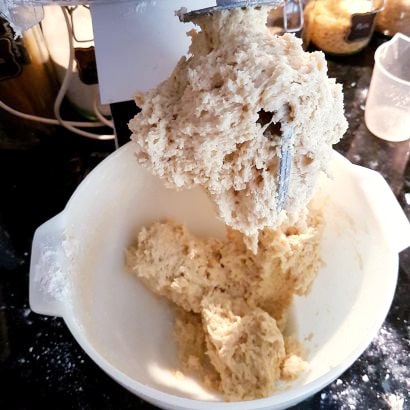
- Knead the dough until is it smooth and super stretchy. A good 10 minutes if kneading by hand, if not a bit longer. About 5 to 7 minutes if using an electric mixer.
- Leave the dough in a large covered bowl somewhere warm for about 1 hour to rise.
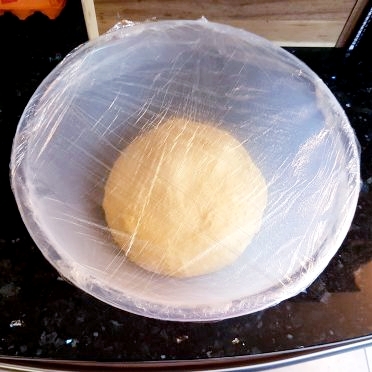

- The dough should roughly double in size. (How good and smooth does that dough look!)

Meanwhile make the Garlic/Cheese Butter:
- Take 250g Salted Butter which is room temperature or a little softer and mix in 3 tbsp Garlic Paste, 1 tbsp Sea Salt Flakes and 2 tbsp Fresh or Dried Oregano.
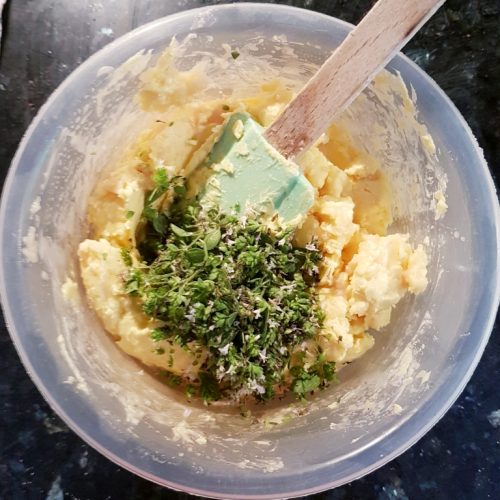

- Reserve about a 5th of the mixture and set aside.
- Stir 150g Grated Mozzarella into the remaining bulk of the garlic butter.
Construct the Rolls
- Once the dough has doubled, take off the covering and give the dough a good punch. You don’t actually need to be aggressive but these opportunities are rare so go for it.

- Tip the dough out onto a floured surface and give it a quick light knead. No need for electric power here.

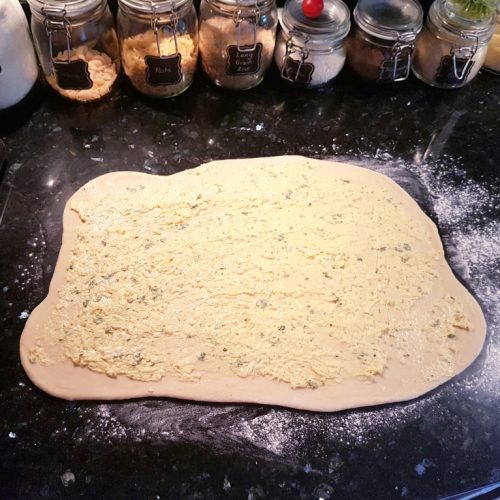
- Cut the dough into 2 equal size pieces and place one back under a covering for the time being. Roll the first into a rectangle about 1/2 cm thick. It will fight back, keep going, it will roll out and stay eventually.
- Take 1/2 of the garlic and cheese mix and spread over the rectangle of dough – try and make it a fairly evenly spread and right to the edges.
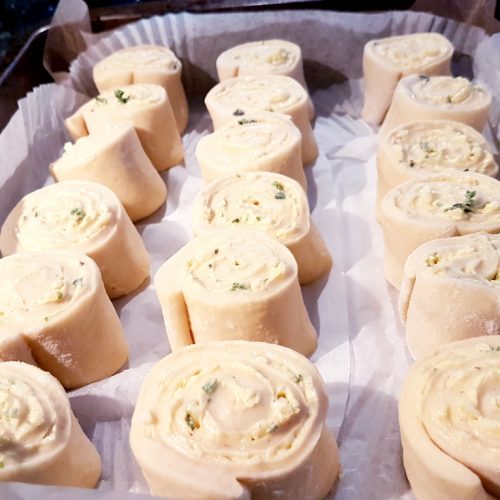
- Roll the rectangle tightly into a long sausage and then using the sharpest knife you have, cut the roll into 9 pieces of equal length. I cut the whole thing into thirds, then each third into three for maximum evenness. You can first trim the ends for neatness if you wish.
- Put the rolls on their ends in a large lined baking tray. I used a really big one but you could use 2 smaller tins with 9 rolls in each. You need to leave much more space between the rolls that you think you need to. They expand much more than you think they're going to so don't overpack them or they will end up excessively tight textured.
- Repeat with the second half of the dough until you have 18 rolls.
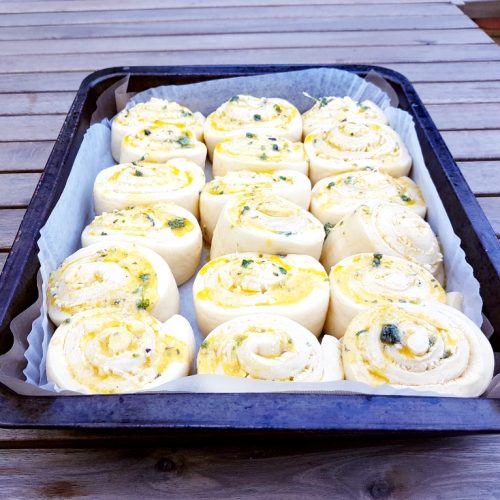
- Lightly cover the tin and leave to rise, exactly the same as before for 1 hour. The dough should puff out and fit snugly in the tin.
- After 50 minutes, preheat the oven to 200c or equivalent.
- Bake the rolls in the preheated oven for 20-30 minutes until light golden brown.
- Smear the top of the dough with the reserved garlic butter and pop back in the oven for a minute or two until the butter has melted.
- Eat warm. Woah, not all of them at once!
Eleanor Mlodecki says
Made it!!! Amazing recipe but frankly wayyyyyyy too much oregano… but otherwise was amazing!! In my family of 5 it was gone in an hour!!:) would make again.
Anne says
Wow! Just tried this recipe! The scrolls are still hot and the one I just tried is delicious! I will definitely give this one another go! Must offload this batch to the family – otherwise I will eat way too many!
Chloe says
Just lean in and eat them all mate, being realistic, you’re only going to have to make more otherwise!!!
Grace says
I want these in my belly right now!! There will definitely be no leftovers in our house either! Would garlic puree (the kind that comes in tubes) work for garlic paste?
Chloe says
Oh yes, garlic puree/garlic paste would pretty much be the same thing. I just try to look for one that doesn’t have too many other things mixed in.
Jill Colonna says
These pretty rolls look so deliciously soft and can imagine them warm out of the oven and the smell wafting around the house. Beautifully done, Chloé, especially with all the different variants you’ve given!
Chloe says
Thank you! I very rarely make the same recipe twice so it only seems fair to share some of the alternatives I try! And hopefully encourage people to experiment! And yes, the smell is pretty incredible!!!
CAMILLA HAWKINS says
Ooh, these look like the perfect rolls to have with soup or some cold food!
Chloe says
Yes that are amazing with soups – especially tomato!
Sisley White says
Bready and cheesy. What a combo. Absolutely have to try these soon.
Chloe says
Impossible to go wrong, right?!