


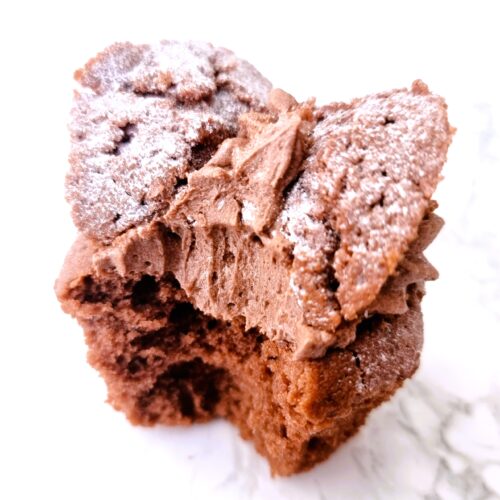
These Chocolate Butterfly Fairy Cakes are a fun twist on classic vanilla butterfly cakes. With a rich cocoa packed sponge cake and a super chocolaty buttercream, they’re simple enough to make with the kids and tasty enough to be loved by big and little kids alike!

This post may contain affiliate links. Please refer to my Disclosures Page for more details.
This simple variation of my Vanilla Butterfly Fairy Cakes is a real winner. I simply use cocoa powder so you don’t need to worry about buying or melting actual chocolate. But I have a very simple trick to make sure that the cocoa powder really packs a punch. So don’t be thinking that these butterfly cakes have anything less than tonnes of flavour.
Like with my Victoria sandwich cake recipe but unlike with my quick microwave sponges, I do recommend using the more traditional creaming method to make the cake batter. I find that the sponges are lighter when taking the extra steps and it really only adds a couple of minutes to the cooking time. Unlike with the microwave recipes, you can tell the difference in the final product.
Please don’t be put off by the fact that I’ve used a piping bag to add the buttercream to the cakes. For the first 30 odd years of my life, I dolloped it on with a spoon and I never had one complaint. So you can absolutely do that too!

How to Serve Chocolate Butterfly Cakes
You can just grab and go with a butterfly cake at anytime. They don’t need any special treatment although I’m fond of warming them ever so slightly. The buttercream melts a bit and this isn’t for everyone, but I love it.
These sorts of simple fairy cakes are classic party food. Throw in some mini sausage rolls, some triangle sandwiches with the crusts cut off, a couple of bags of crisps, a bowl of super smooth hummus and you have yourself a classic little spread.

Chocolate Fairy Cake Ingredients
Butter
I’d specified salted butter in the sponge ingredients list but you can really use any butter or margarine. A light margarine is often my preferred choice when making sponges as they come out extra light. Real block butter does give a richer flavour so pick which you prefer.
However you must use proper block butter for the buttercream.
If you use an unsalted butter, add a little table salt to the batter and/or buttercream.

Sugars
Again I’ve specified to use caster sugar (US – Superfine sugar) in the sponge recipe but if you need to use regular/granulated, this will be fine. Just be sure to cream the butter and sugar together extra well so the large sugar crystals dissolve. There is quite a price disparity between caster and granulated sugar here in the UK now so I do often use granulated where I might once have instinctively reached for the caster sugar in past times.
As for the icing sugar (US – confectioner’s/powdered sugar) this also cannot be substituted. If your icing sugar is looking at all clumpy, it is a really good idea to make sure it is sieved before adding to the butter.
Please don’t swap the white sugar for brown sugar as the texture is different and the recipe isn’t tested with brown. You can however use golden sugar if you wish.
Eggs
I don’t often specify what size eggs you need to use in my recipes unless it is actually important. Here it isn’t going to make much difference at all whether you use medium or large eggs so don’t stress about it.

Flour
For ease I use white self-raising flour (US – self-rising flour). This already includes baking powder and you don’t need to add any extra in this recipe. If you only have plain flour (US – all-purpose flour), you will need to add baking powder.
Cocoa Powder
The cocoa powder is of course essential to this recipe. I’ve become more picky with the brands that I use over the years, I do believe you do get what you pay for. I’m especially not a fan of the Aldi version (it simply lacks flavour) so I tend to stick to Cadbury/Bournville, Dr Oetker or the more premium supermarket own brands like Tesco Finest.
But what is most important is that you don’t try to use anything called “drinking chocolate”. This does include cocoa but isn’t just cocoa.
In the US you want to use cocoa powder labelled as “Dutch processed”. Here in the UK all of our standard cocoas are made this way so we don’t need to distinguish.
Be Flexible
This recipe is a great base to start experimenting with. For starters the sponge and buttercream don’t need to be butterflied – just pipe or spoon the buttercream directly on top of the baked cakes.
You can add chocolate chips. chopped nuts or even dried fruit like raisins or dried cherries to the batter. Or you can add other flavours to both the sponge and/or buttercream. Using strong hot coffee to mix with the cocoa rather than water will give you chocolate coffee cakes. You can also add flavour extracts like orange or mint, both of which pair really well with chocolate.
You can also add a little extra something something. Cutting the lids a little deeper will allow you to add a spoonful of jam to each cake before adding the buttercream and the wings. I love to use my dark cherry jam with chocolate cakes.

Make Allergy Friendly Chocolate Butterfly Cakes
This recipe is free from nuts.
Gluten Free: To make gluten free cakes, swap the flour for a gluten free flour blend. Look for something that is designed to be swapped one for one with wheat flour. If it doesn’t already contain a raising agent, you will need to add baking powder.
Dairy Free: Replace the butter and milk in the recipe. Switch out the butter for a plant based substitute in both the sponge and buttercream. Make sure to use a block type substitute and ideally one that purports to have a buttery flavour. You will also need to switch the milk in the sponge for a plant based milk or water – either will work fine.
Egg Free: Use a vegan egg replacer instead of the regular eggs. I usually recommend choosing a liquid egg replacer if possible but if you can’t, you can use 1 tbsp vegetable oil in place of each egg. The texture of the sponge won’t be quite the same but they should be perfectly fine.
Please note that this recipe may contain other allergens not referred to above and any variations suggested have not been tested unless otherwise stated. For more information regarding any dietary information provided on this website, please refer to my Nutritional Disclaimer.
Vegetarian or Vegan Chocolate Butterfly Cakes
These cakes are suitable for vegetarians.
To make them vegan, you will need to follow my suggestions above to make the cakes both dairy and egg free.

Equipment Notes for Butterfly Cakes
I mostly make cakes with an electric hand mixer and I do still largely stick with this method. But I do sometimes use my Kenwood stand mixer with paddle attachment.
You can of course make cakes with a mixing bowl and a wooden spoon. This is still an absolutely valid way of doing it, especially for beginners. But you will get a lighter sponge with electrical assistance and the buttercream especially will thank you.
I pipe the buttercream using a large disposable piping bag and a set of nozzles. But you can simply spoon on the buttercream and flatten it a little with the back of a spoon. I certainly never wielded a piping bag until a couple of years ago!
Generally I use a standard 12 hole muffin tin rather than a small bun tin. I think the higher sides of the muffin tin help to shape the cakes, even if you use cake cases smaller than the cake cases I used.
A comprehensive list of the equipment used to make this recipe is included in the main recipe card below. Click on any item to see an example. There are no hard and fast rules so many items can be sensibly substituted to achieve the same results.

Get Ahead
You can bake the sponge cake and then freeze them. You can also make and freeze the buttercream but it will need a quick rewhip before you use it.
If you’re not planning on freezing the components, it is best to make the cakes up no more than a day before you plan to serve them. Keep in an air-tight container and they will last for a couple of days but are better then the fresher they are.

Leftover Fairy Cakes
If you find the cakes do go a little stale, warming them through a little will help revive them. You can even serve them with hot custard.
The other option is to cut up the cakes and use them as a layer in a trifle. Or blitz them, form into balls and roll in melted chocolate. Put a stick in them and call them cake pops. Don’t and call them truffles! Add a splash of booze and you’ll have something akin to my Russian slice recipe.
Chocolate Butterfly Cake Tips
If the cake batter splits, simply don’t worry about it and just keep going. After many years of the fear being drilled into me about split batters, I discovered that by far some of the best sponges I’ve ever made were as a result of them splitting.
Make sure to fold the flour in rather than whisk it in. Using electric beaters at this stage is how you end up with tough sponge.
I don’t generally recommend decorating the cakes while they’re still in the tin. It makes for easy storage but they are quite difficult to get out the tin once the buttercream is added.

Don’t forget to let me know in the comments if you try making this recipe – I want to know what you think and if you made any substitutions, how did it turn out?
Still Have Questions?
Simple! Just contact me and I will do my best to help as quickly as I am able. Head over to my Contact Me page, any of my social media channels or post a comment at the bottom of this page and I’ll see what I can do.
Pin Chocolate Butterfly Fairy Cakes For Later
Hit one of the share buttons to save this page to your Pinterest boards so you can come back and find it at anytime!

Keep Up to Date
Make sure you SUBSCRIBE to my newsletter and avoid missing out on any of my newest and bonus content. Don’t worry, I promise not to spam you or bombard you too often. Plus you’ll receive a copy of my FREE 7 Day International Meal Plan!
Also please don’t forget to follow me over on my social media channels over at Facebook, Instagram and Pinterest. I love to interact with my followers and I’d love you to share my content with your friends too.
More Chocolate Recipes

The Recipe
Chocolate Butterfly Fairy Cakes Recipe

Equipment
Ingredients
For the Fairy Cakes
- 3 tbsp Cocoa Powder (Dutch Processed)
- 3 tbsp Boiling Water
- 175 g Salted Butter
- 175 g Caster Sugar (Superfine Sugar)
- 3 Egg
- 2 tbsp Milk - any
- 175 g Self Raising Flour (Self-Rising)
For the Buttercream
- 3 tbsp Cocoa Powder (Dutch Processed)
- 3 tbsp Boiling Water
- 125 g Salted Butter
- 250 g Icing Sugar (Confectioner’s Sugar) - Plus extra for dusting
Instructions
Make The Fairy Cakes
- Put a kettle of water on to boil.
- Preheat the oven to 180c fan | 190c | 375f.
- Put 12 paper cake cases into a muffin tin and set aside.


- Add 3 tbsp Cocoa Powder into a small mixing bowl. Add 3 tbsp Boiling Water from the kettle. NOTE: If you are planning to make the buttercream the same day, you could double the quantity and make the paste for the buttercream at the same time.

- Gentle mix until the cocoa is all dissolved in the water and it makes a paste.

- Weigh 175g Butter and 175g Caster Sugar into a mixing bowl.
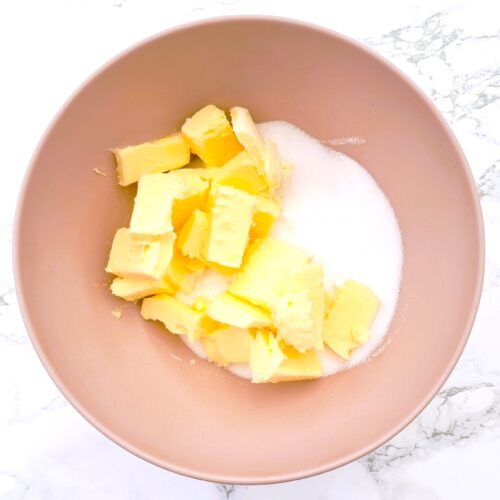
- Use an electric whisk or stand mixer to beat the butter and sugar until it's light and fluffy. Make sure to scrape down the sides of the bowl a couple of times to make sure nothing is missed.
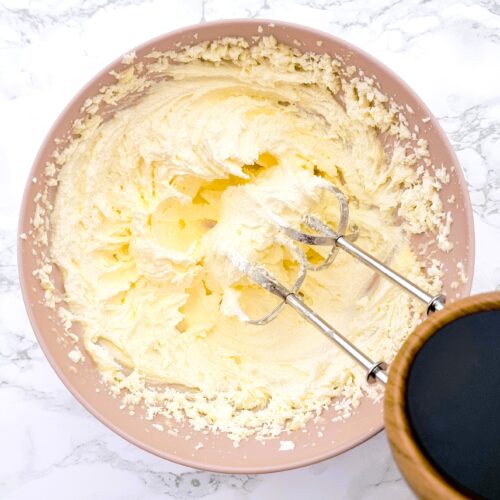
- Add the cocoa paste and beat in. Again make sure to scrape down the sides of the bowl at least once.

- Add 3 Eggs one at a time. Give the eggs at least one minute of beating before adding the next egg. This is where the batter gets lovely and light. Don’t worry if the batter splits. Keep going.

- Stir through 2 tbsp Milk.

- Weigh 175g Self Raising Flour into the bowl.

- Use a spatula to fold in the flour – you do not want to use any electric power here.

- Use an ice cream scoop or two spoons to divide the batter between the 12 paper cases. Try to make them fairly evenly filled but don’t panic about it.

- Bake the cakes for 18-22 minutes. Take them out when they spring back when pressed.

- Leave the cakes to completely cool.

Make the Buttercream
- Repeat the process of making a paste with 3 tbsp Cocoa Powder and 3 tbsp Boiling Water.
- Add 125g Butter and 250g Icing Sugar along with the cocoa paste to a mixing or stand mixer bowl.

- Mix until everything is well combined and the buttercream has started to go a little fluffy – only a minute or two.

- Spoon the buttercream into a piping bag. I fold the piping bag over the edge of a glass to help make this less messy. Skip this step if you just want to spoon on the buttercream.

- You can use any nozzle, or no nozzle at all.

Assemble the Butterfly Cakes
- Once the cakes are cool, use a small sharp knife to cut out a little of the top of the cakes.

- Keep the knife quite flat and don’t cut all the way to the edge.

- Replace the top straight back onto the cake so they don’t get mixed up!

- Take one cake at a time and cut the lid piece in half.

- Pipe buttercream to fill the cake hole.

- Replace the two halves of the cut lid by shoving them into the buttercream. Keep the cut side facing the middle and angle the pieces upwards to look like wings.

- Repeat for the rest of the cakes. You can work in small batches as long as you're careful not to mix up the cakes and their lids!

- Dust the cakes with icing sugar and serve!

Janice says
It was fun to make these retro classic fairy cakes with my grandchildren. They disappered very quickly!
Lesley says
I loved butterfly cakes as a child and your chocolate version is perfection – just the right ratio of buttercream to cake.