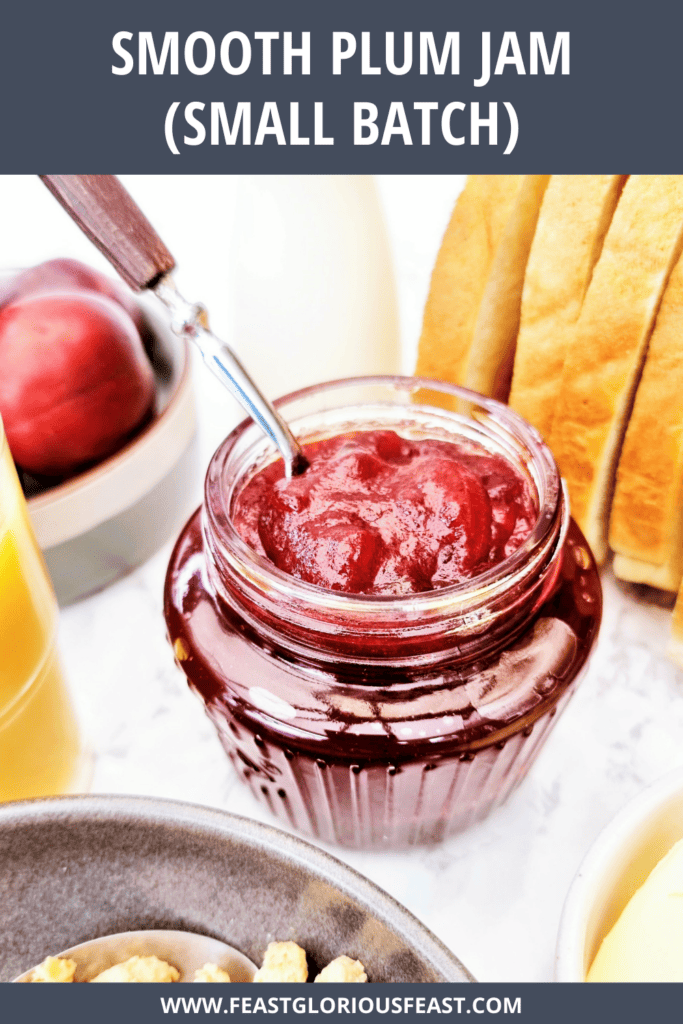
This Smooth Plum Jam recipe is super simple to make and is delicious to eat with no pesky lumps or little pieces of skin to get stuck in your teeth! The flavour of plum jam is simply divine and with my detailed step by step instructions, anyone can make this small batch of homemade jam in barely any time at all.

This post may contain affiliate links. Please refer to my Disclosures Page for more details.
I’m obsessed with creating delicious smooth jam recipes. I usually refer to them as “seedless” jams but in this case, plum jam wouldn’t come with seeds in any event. But like with most fruit preserves, it can contain more prominent chunks of fruit and the skin will be included too.
Peeling the skin off the plums before cooking would just result in an unpleasant colour jam as the skin is where most of the glorious purple or red colour is contained. By first cooking the fruit down and then sieving it, we can have the best of both worlds.
I rarely made jam for a very long time as recipes often seem to want you to make enough jam of a single flavour to keep you going for a solid 18 months of continual jam eating.
I like a bit more variety in my life so I now make and write recipes for small batches of jam. You can always scale the recipe up if you have more fruit you wish to use.

- How to Serve Smooth Plum Jam
- Ingredients for Small Batch Smooth Plum Jam
- Equipment Notes for Smooth Plum Jam
- How to Sterilise Jars and Preserve/Can Jam
- Discover More Homemade Jam Recipes
- Get Ahead
- Homemade Plum Jam Tips
- More Plum Recipes
- Still Have Questions?
- Keep Up to Date
- The Recipe
- Full Step-By-Step Recipe
How to Serve Smooth Plum Jam
Opened jars of jam should be kept in the fridge but I always try to bring jam to room temperature before eating. It is easier to spread and the flavour can be dulled when cold.
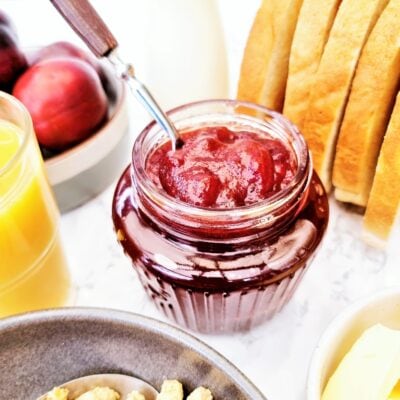
There are a million ways that you can enjoy, eat and bake with jam. The most classic option of course is to spread it straight onto buttery toast for the most delicious breakfast.
But you can mix things up too. Spread it on Scotch Pancakes and add some whipped cream, slather it onto toasted sourdough slices, Sesame Bagels or buttered crumpets for a delicious snack or breakfast.
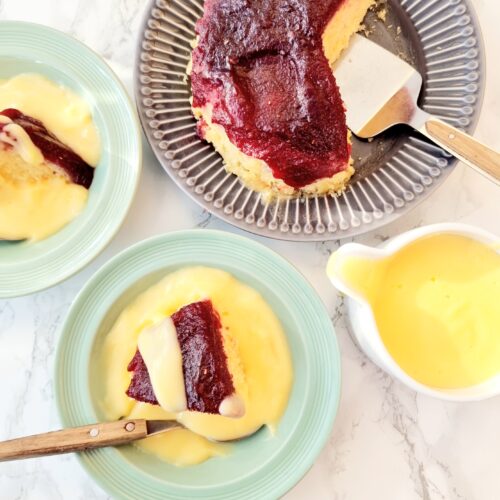

Its easy to incorporate into cakes too. I like to add both jam and a light buttercream to my Victoria Sandwich Cake. And my Microwave Jam Sponge Pudding is simply delicious.
Plum jam makes a delicious alternative to the more classic Strawberry or Raspberry Jam when piled onto homemade Plain or Fruited Scones with lots of clotted cream for a classic afternoon tea.

Ingredients for Small Batch Smooth Plum Jam
Plums
One of the most popular varieties here in the UK is the Victoria plum which is ideal. But you can use any purple or red skinned plums you like.
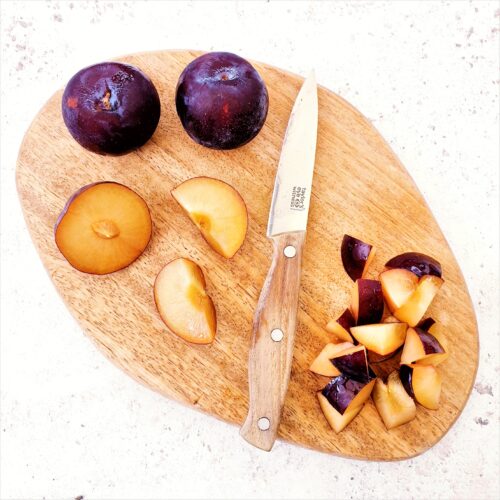
The variety I used was red/purple skinned and yellow inside. The skin was more than enough to give it a gorgeous colour. You could also use a yellow variety like mirabelle, greengages or damsons – just expect the colour to be different overall.
Ripe plums or even overripe plus are great to turn into jam. But I also find that jam is a great way to use up any fruits that are really struggling to ripen. That means those yellow sticker reduced plums are ideal.
I’ve written the recipe by weight of plums because they can wildly vary in size. The only thing you need to do is remember to remove the stone.
If you have frozen plums, you can use them in place of the fresh without any problem.

Sugar
To make jam, all you need is regular white sugar. There is no need for expensive specialist jam sugar that contains added pectin, which isn’t necessary for this recipe. Plums are already fairly high in pectin as it is.
It’s actually irrelevant whether you use regular or caster/superfine sugar since it will melt in the pan. I personally opt for granulated sugar as it is a more economical choice. Save the pricier caster sugar for when it’s truly required.
Avoid the temptation to use brown sugar or sugar alternatives as they will impart an unusual flavour or texture to the jam, respectively.
Lemon Juice
The addition of lemon juice does two things. Firstly it does provide a little extra pectin to help the plum jam to set. Secondly it adds a bright zing of acidity to cut through a little of the sugar/sweetness.
I rarely bother to squeeze a fresh lemon when making jam although of course you can. Bottled lemon juice which I buy and keep in the fridge is what I normally grab and use.
Using too much lemon juice can result in jam becoming overset. For this reason it is important to measure the juice you’re using and try to be fairly accurate about it. If you want to add more actual lemon flavour, you can add some fresh and very finely grated lemon zest instead.

Be Flexible
You can be super versatile when making jam. Sub some of the plums for another fruit like blackcurrants or blackberries or another stone fruit like peaches.
You can also add extra flavours. I love orange combined with plums so some added orange zest would be delicious.
Alcohol can make a great addition. Cointreau or another triple sec would add an orange tang. Bourbon or whisky would add deep rich smoky notes and rum would make things a little tropical.
Whilst its not my preference, plums work well with spices like star anise and cinnamon. A little British mixed spice will make for a Christmassy jam. Add a little of the ground spice when cooking down the plums at the start of the recipe.
Is Plum Jam Allergy Friendly?
This recipe is free from egg, dairy, gluten and nuts.
Please note that this recipe may contain other allergens not referred to above and any variations suggested have not been tested unless otherwise stated. For more information regarding any dietary information provided on this website, please refer to my Nutritional Disclaimer.

Equipment Notes for Smooth Plum Jam
Jam doesn’t require any specialist equipment. The most important thing is to have a good sized pan. This recipe using just over a pound of fruit (600g) makes a fairly small amount of the finished product but you still need to use a good large saucepan.
You might think that I’m being excessive when you first see the amount of fruit in the pan but it bubbles up so much when boiling, you’ll soon understand why.
There are a few things that will help make your jam making easier although they’re not essential. A thermometer is one of them. It turns out that I own quite a selection and they are all suitable. My laser thermometer (centre) is mess free and fun to use.
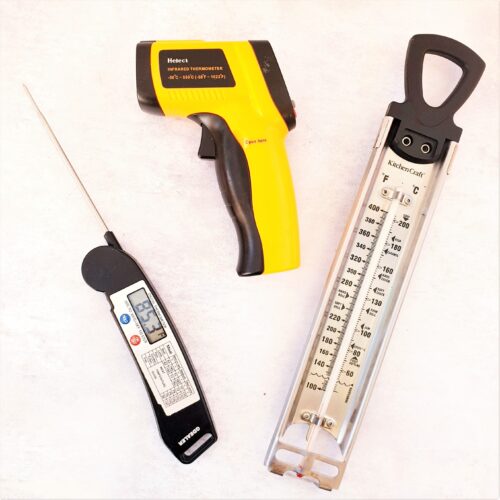
My meat thermometer (left) posed a little more peril as I needed to hold it in the jam until it registered the temperature. And my old fashioned sugar thermometer (right) just happily sat in the pan the whole time. But it was harder to wash up!
And don’t forget something the store the jam in. I love my super cute quilted jam jar set. But you can simply use old jam jars that you’ve thoroughly cleaned.
A comprehensive list of the equipment used to make this recipe is included in the main recipe card below. Click on any item to see an example. There are no hard and fast rules so many items can be sensibly substituted to achieve the same results.

How to Sterilise Jars and Preserve/Can Jam
There is a whole world of variations and advice for how you should prepare your jars and deal with the jars once they’re sealed. They vary from person to person and country to country.
Here in the UK we largely make sure that the jars are properly sterilised, fill the jars with the hot jam, seal them and that’s that. In the US it is almost a given that the jars will then be “processed” to complete the “canning” process. I have purposely provided no links here – if you’d like to learn more about canning, Google is your friend.
There are a lot of strong feelings about this in the “jam community” (yes there is one) which I have no interest in being drawn into. All I know is that UK cooks have been making jam for a very long time without any issues. Therefore I am more than happy to follow the UK process for my jams.
Jar Sterilisation Options
There are several ways that you can sterilise your jam jars.
- Run the jars and lids through a hot wash in the dishwasher.
- Bake the jars and lids in the oven on a baking tray.
- Microwave the jars and boil the lids in water.
- Boil the jars and lids in water.
Whichever method you choose the only important thing is to make sure that the jars and lids are left to dry without being touched. And that you do not under any circumstances touch the inside of the jars or lids as this can contaminate them and undo your sterilisation. Tongs are your friend.
For the record, I usually use the dishwasher method.
How to Tell if the Jar is Sealed
It is essential to add the lid to the hot jars filled with the hot jam straight away. As the jam and jar cool, a vacuum is created in the jar and the lid will be pulled downwards. To help this, I often turn my jars upside down to cool.
This means that when you press the lid, it doesn’t move or pop. When you open a jar of properly sealed jam the lid will then pop. And an opened or not properly sealed jar will pop when you press it.
If your jars don’t seal properly, you can either keep the jar in the fridge and eat it relatively quickly or go though a canning process to seal them. The choice is yours.
Discover More Homemade Jam Recipes
Smooth & Seedless Jam Recipes
Here you’ll find all of my fabulous jam recipes in one easy place. With no pesky pips, my recipes are all written to make small batches but can easily be scaled up to make larger quantities.
Featuring mixed berry, plum, blueberry, blackberry, strawberry, and raspberry, fig and dark cherry jams plus some ideas how to use it.
Get Ahead
You can make jam a solid year ahead of time if you do sterilise and store your jars properly.
The more immediate concern is that you need to take into account that it will ideally need to be made the day before you want to use it. 24 hours cooling at room temp is the best plan but you can get away with 12 to 16 hours cooling in the fridge.

Homemade Plum Jam Tips
Do not touch the hot jam. I cannot stress this enough. I don’t care how tempting it looks. Or if that little bit on the side looks a bit cooler. Do. Not. Touch. It. You will regret it.
If you are using a thermometer, you can simply rely on the jam hitting temperature and not worry about doing the wrinkle test on a cold plate. I like to take a belt and braces approach so I use both testing methods. But you can just use one or the other.
I mentioned before to use a good big saucepan. This is worth repeating here!
If you don’t need to keep your jam for any length of time, you can skip the jar stage and use any old container and keep your jam in the fridge.
If you aren’t bothered about the jam being super smooth, skip the blending and sieving stage but cut the plums a little smaller and give them a good mash down with the spatula while they are cooking.
Don’t forget to let me know in the comments if you try making this recipe – I want to know what you think and if you made any substitutions, how did it turn out?
Still Have Questions?
Simple! Just contact me and I will do my best to help as quickly as I am able. Head over to my Contact Me page, any of my social media channels or post a comment at the bottom of this page and I’ll see what I can do.
Pin Smooth Plum Jam (Small Batch) For Later
Hit one of the share buttons to save this page to your Pinterest boards so you can come back and find it at anytime!

Keep Up to Date
Make sure you SUBSCRIBE to my newsletter and avoid missing out on any of my newest and bonus content. Don’t worry, I promise not to spam you or bombard you too often. Plus you’ll receive a copy of my FREE 7 Day International Meal Plan!
Also please don’t forget to follow me over on my social media channels over at Facebook, Twitter, Instagram and Pinterest. I love to interact with my followers and I’d love you to share my content with your friends too.
The Recipe
Smooth Plum Jam (Small Batch Recipe)
Equipment
Ingredients
- 600 g Plums
- 100 ml Water
- 350 g Sugar
- 1 tsp Lemon Juice
Instructions
- Pop two ceramic or china plates into the freezer.
- Prepare and sterilise your jars or container for your jam. How you chose to do this is up to you. Further details are provided in this recipe post.
- Rinse and dry 600g Plums. Run a sharp knife around each plum and twist apart to reveal the stone.
- Remove the stone and cut the plum into rough chunks around 1-2cm (½-⅔") big.

- Put the cut plums into a large saucepan with 100ml Water.

- Cook over a medium high heat until the plums have fully softened. You will want to keep stirring regularly while this is happening.

- This can take 5 to 10 minutes depending on how ripe the plums are. Turn the heat down if it is bubbling too hard. Most of the water will have evaporated by the time the fruit has cooked down but if the fruit is looking dry, you can add a little more.
- Tip the plums into a heatproof jug or bowl. Make sure it is big enough to prevent anything from splattering out when being blended. You should also be very careful when doing this as the fruit will be very hot.

- Blitz the fruit really well until as smooth as possible. I prefer to use a stick blender but you can use any blender or food processor.

- Sieve the puree back into the saucepan. Use a spatula to push the pulp through the sieve.

- This will take a few minutes but have patience as this is how we get a smooth jam. You should be left with a fairly dry lump of bits of skin in the sieve. Don’t forget to wipe the underside of the sieve into the pan.

- Add 350g Sugar and 1 tsp Lemon Juice to the plum puree.

- Put the pan on a medium heat, stir well as the mixture warms and allow the jam to come up to a rolling boil.

- Allow to boil for 6-7 minutes or until the jam reaches the 105c or 220f. You can give it a gentle stir and scrape off the sides and bottom every minute or so to keep things even.

- Take the jam off the heat and take one of your very cold plates out of the freezer. Use a small spoon to dollop a small amount of jam onto the plate. Leave it for 1 minute and then push the jam towards the centre of the dollop.

- If you get wrinkles, the jam is ready. If you don’t, put the pan back on the heat for another minute.

- Repeat the cold plate test as many times as is needed. Make sure to put your first plate back in the freezer in case you need it again.

- Carefully pour the jam into your prepared jars or container.

- Seal and leave to cool upside down or continue the canning process if you have chosen to.




Cat says
I love how simple this was to make. It’s much nicer not having bits of skin in your jam! Delicious.
Hazel says
This was such an easy recipe to make and really makes a lovely smooth spread.
Sisley says
I loved making this. The smell of the plums was intoxicating and the result was delicious.
Moira feeney says
Can I add ginger to this recipe?if so, when should I add it
Chloe says
You could add fresh or ground ginger at the very start of the process for a deeper but more subtle flavour as it will cook out some. Or add nearer the end of the boiling stage for a fresher spicier flavour. Fresh and ground ginger are themselves slightly different in flavour so choose and add accordingly to the vibe you’re looking for.
Lesley says
I love the smooth texture of this jam and it tasted absolutely delicious. So much better than store bought jam.