


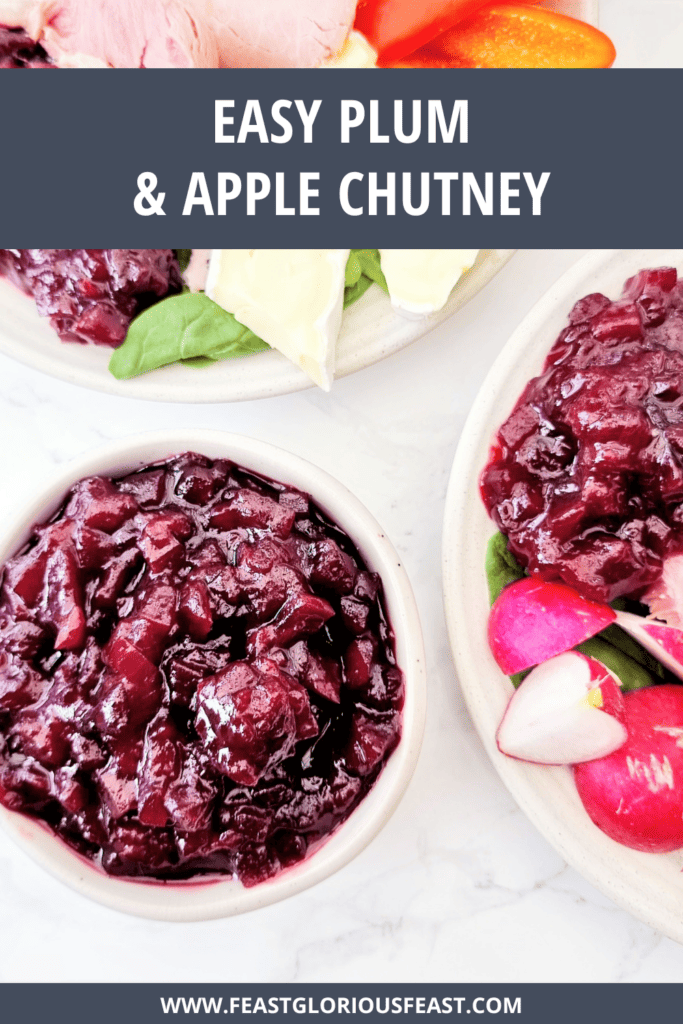
All that’s needed to make this Easy Plum & Apple Chutney is a little bit of chopping and then its simply a case of leaving it to simmer with the odd therapeutic stir. You’ll have the most delicious small batch of faff free plum chutney in no time!

This post may contain affiliate links. Please refer to my Disclosures Page for more details.
I’ve really enjoyed exploring the world of chutney making. I’ve made several over the last few years that haven’t quite made it to this site but when I recently came into a little haul of plums, I knew this was one I simply had to try.
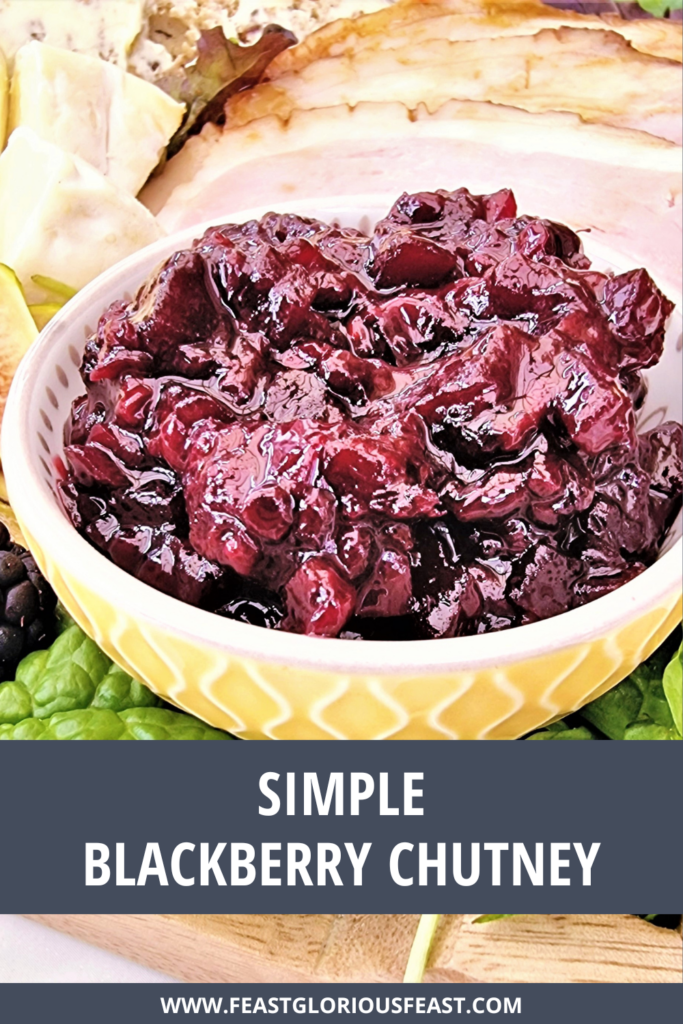
The joy of recipes like chutney is that once you’ve hit on a formula that works, it is really easy to adapt it for other varieties. In this case I took my Simple Blackberry Chutney recipe and decided which vinegar and which sugar would likely complement the fruit flavour the most.
For these plums I actually stuck with the red wine vinegar and light brown sugar. This provided the perfect balance of sweet and sour whilst really letting the plum flavour shine through.
The recipe also calls for apple which provides some body to the chutney but also a little sharpness to counteract the sweetness of the plums.
I’ve written this recipe to make a fairly small batch of chutney. It doesn’t require you to have a tonne of fruit and it doesn’t leave you with enough chutney that you need to start a small market stall. Saying this, use the toggle on the recipe and the recipe can easily be doubled and tripled.

How to Serve Plum & Apple Chutney
Just like with every other jam, preserve, curd or chutney, it is best served at room temperature. Keep opened jars in the fridge but try to take out what you’re going to use a good half hour before you want to eat. This will ensure that the flavour isn’t dulled and the texture isn’t too set/gelatinous.
As you’ll see from the images on this page, I do love to use a chutney with a classic ploughman’s style meal. Some salad, a bit of cold sliced meat (in my case I had some of my Ginger Beer Boiled Ham), a nice cheese and a some tasty buttered bread.
Any chutney is fabulous in pastries like my Chutney & Cheese Sausage Rolls. Add to a cheese toastie/grilled cheese sandwich or go slightly more unusual and serve with a roast dinner in place of a more classic sauce like Homemade Cranberry Sauce.

Apple & Plum Chutney Ingredients
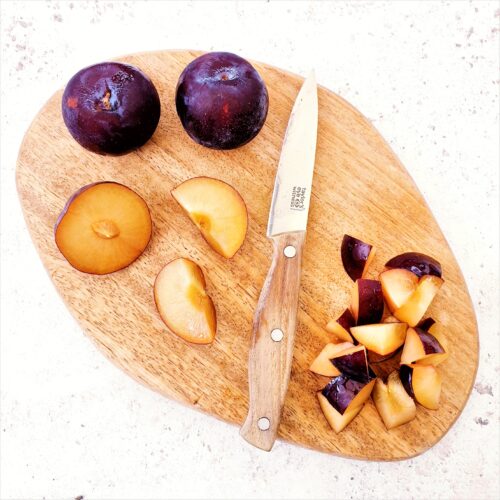
Plums
You can use any plum that you have to hand for this chutney. I had a mixture of purple skinned plums, some with bright ruby red insides and some that were yellow like victoria plums.
If you’ve previously frozen plums these can be used too. I’ve not seen frozen plums available to buy but you can buy them canned if you need to. The riper the plums the better but you can really use ones that are a tad under ripe too.
You don’t need to peel the plums but of course you do need to remove the stone. I find the easiest way if they are a bit resistant is to cut the plum all the way around the stone one way as normal. And then do the same going in the other direction so the plum is now in quarters. Peel each quarter away from the stone. You can very carefully use a small knife if you need.
The other way is to halve the plum as normal and then use a pair of (clean) plyers to twist the stone out of the second half. This is oddly satisfying.

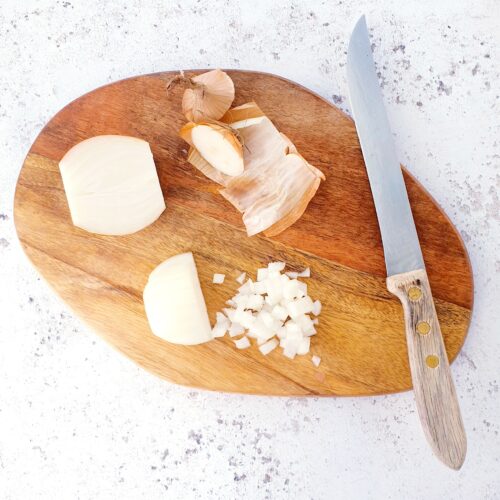
Onion
Use whatever white/brown or red/purple onions you have on hand, either will provide the desired savoury note.
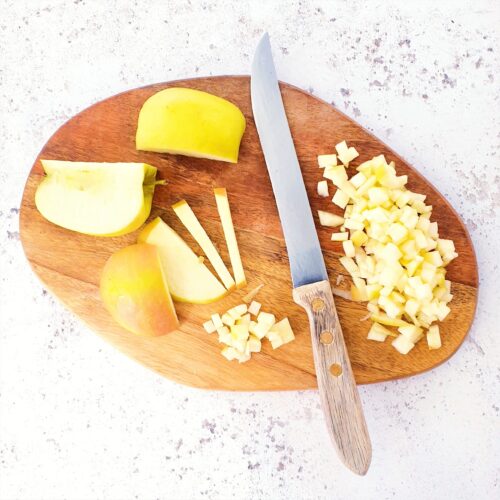
Apple
Again you can use whatever type of apple you have on hand. Cooking apples like bramley apples or any eating apple will work in this recipe – it is pretty flexible.
You do not need to peel the apples but you will need to cut out the core and seeds.

Vinegar
I chose red wine vinegar as my vinegar of choice for this recipe. The rich flavour complements the plums perfectly. I didn’t use balsamic as I thought it might overpower the fruit flavour. You could try this as an alternative for a deeper richer chutney.
You could also use a white wine, cyder or rice vinegar. Please avoid malt vinegar – that isn’t so appropriate for chutney making.
Sugar
Again for reasons of complementing rather than overpowering, I’ve chosen light brown sugar for this chutney. You could choose something lighter instead but I avoided muscovado sugar to not overpower.

Be Flexible
Using this as a basic recipe, you can really vary it to your heart’s content. Keep the base of onion and apple then add almost any fruit or berry. If you have a few odds and sods of various fruit to use up, you can also mix them up.
You can also vary the types of sugar and vinegar that you use. The darker and richer of each you use, the darker and richer the chutney. And vice versa of course. You do need to consider the type of fruit you’re using so you don’t overpower it.
For starters, try my other chutney recipes:-
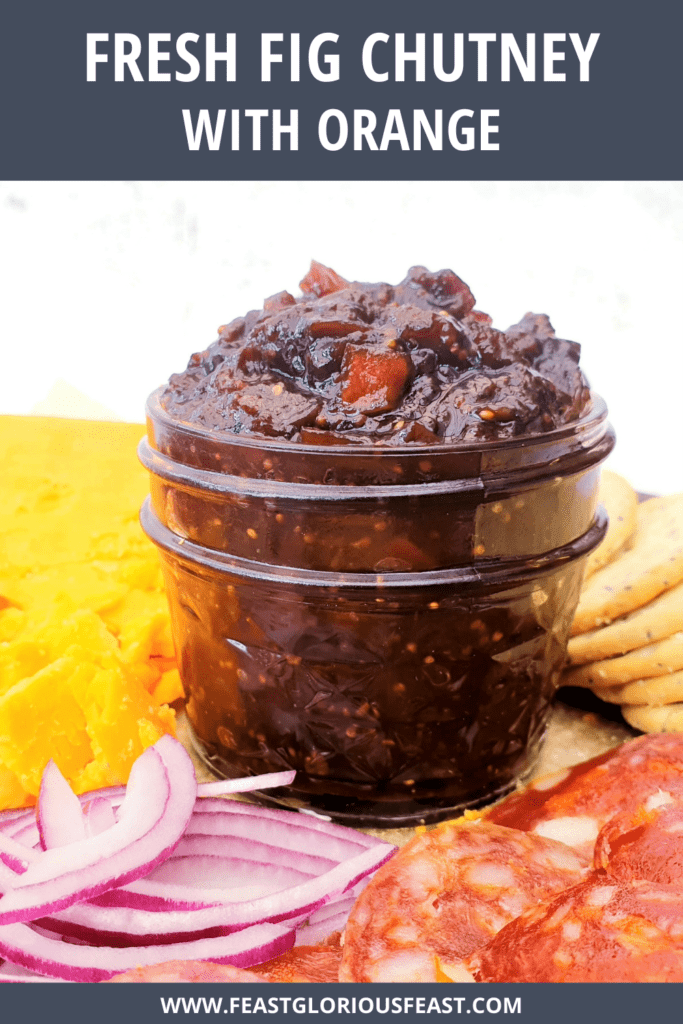
Sticking with the plum chutney, there are other ways to add different flavours. Adding orange zest like I have with my fig chutney is a lovely option which pairs well with the plum.
Adding alcohol is a classic flavour addition to chutneys and I totally approve. Brandy, whisky and rum work nicely with plum – especially something a little rich and smoky like a bourbon or spiced rum. Red wine adds a dark wintery twist. Simply replace some of the water in the recipe with the alcohol but be careful to go easy, a strong booze can easily take over.
Adding spices is again a classic, especially the wintery and eastern spices like cinnamon and star anise. These honestly aren’t for me but its easy to experiment. My advise to go easy also applies here.

Vegetarian or Vegan Fruit Chutney
This plum and apple chutney recipe includes no animal products and is therefore suitable for both vegetarians and vegans.
Allergy Friendly Plum Chutney
This recipe is free from egg, dairy, gluten and nuts.
Please note that this recipe may contain other allergens not referred to above and any variations suggested have not been tested unless otherwise stated. For more information regarding any dietary information provided on this website, please refer to my Nutritional Disclaimer.

Equipment Notes for Apple & Plum Chutney
Unlike with jam, you don’t need to use an extra large pan to make chutney. As long as the ingredients fit in and there is room to stir without chutney spilling everywhere, a regular saucepan is big enough.
As always, basics like scales, measuring spoons and a silicone spatula will be needed. Silicone means that you can properly scrape chutney from the sides of the pan which will prevent burning.
A comprehensive list of the equipment used to make this recipe is included in the main recipe card below. Click on any item to see an example. There are no hard and fast rules so many items can be sensibly substituted to achieve the same results.

Get Ahead
You really must get ahead when making chutney. You can eat it straight away, hot even, but its not going to be great. Once the chutney sits and matures, the vinegar sharpness starts to soften and all the flavours start to blend and become richer.
If you are going to properly can and seal the jars, you can make chutney many months in advance. This is ideal for gifting etc.
If you do want to make the jars shelf stable, you will need to sterilise your jars and follow procedures to make sure they are sealed properly.
It will keep for years sealed and many months in the fridge once the jar is opened. You must be careful to ensure that you don’t cross contaminate however – a bit of rogue butter on a knife or a crumb of cheese can make a preserve spoil much earlier than it should.

How to Sterilise Jars and Preserve/Can Chutney
There is a whole world of variations and advice for how you should prepare your jars and deal with the jars once they’re sealed. They vary from person to person and country to country.
Here in the UK we largely make sure that the jars are properly sterilised, fill the jars with the hot chutney, seal them and that’s that. In the US it is almost a given that the jars will then be “processed” to complete the “canning” process. I have purposely provided no links here – if you’d like to learn more about canning, Google is your friend.
There are a lot of strong feelings about this in the “canning community” (yes there is one) which I have no interest in being drawn into. All I know is that UK cooks have been making jams, chutneys and preserves for a very long time without any issues. Therefore I am more than happy to follow the UK process for my chutneys.
Jar Sterilisation Options
There are several ways that you can sterilise your jam jars.
- Run the jars and lids through a hot wash in the dishwasher.
- Bake the jars and lids in the oven on a baking tray.
- Microwave the jars and boil the lids in water.
- Boil the jars and lids in water.
Whichever method you choose the only important thing is to make sure that the jars and lids are left to dry without being touched. And that you do not under any circumstances touch the inside of the jars or lids as this can contaminate them and undo your sterilisation. Tongs are your friend.
For the record, I usually use the dishwasher method.
How to Tell if the Jar is Sealed
It is essential to add the lid to the hot jars filled with the hot chutney straight away. As the jar and contents cool, a vacuum is created in the jar and the lid will be pulled downwards. To help this, I often turn my jars upside down to cool.
This means that when you press the lid, it doesn’t move or pop. When you open a jar of properly sealed chutney, the lid will then pop. And an opened or not properly sealed jar will pop when you press it.
If your jars don’t seal properly, you can either keep the jar in the fridge and eat it relatively quickly or go though a canning process to seal them. The choice is yours.

Leftover Chutney
An open jar of chutney will keep for a pretty long time in the fridge so I’m not entirely sure that there is such a thing as leftover chutney.
But if you do find yourself with more chutney than you want to store, you can use it by adding to savoury bakes. Anything with cheese and/or a rich meat is a good idea. Add to Puff Pastry Asparagus Wraps, Shortcrust Pastry Sausage Rolls or Chorizo Rose Tarts.
Easy Plum Chutney Tips
You don’t need to stand and stir the chutney the whole time it is cooking. But it is important to make sure it is given a stir as everything is melting together. And then I tend to hover a little more towards the end of cooking as it is starting to thicken up.
The actual cooking time will vary depending on the quantity you make and the size pan you use. A pan where there is less visible surface area will take longer to evaporate some of the liquid. A wider pan like the one I used will be quicker.
The trick is to make sure that the chutney cooks for at least half an hour. This gives the onion and apple enough chance to soften. If it is still quite thin after this time, then you can turn up the heat to boil off the liquids faster.
I cut the onion and apple very fine in this recipe because whilst they do provide bulk and body to the chutney, I don’t like large visible chunks. They also cook down faster. The hero of this chutney is the plum.

Don’t forget to let me know in the comments if you try making this recipe – I want to know what you think and if you made any substitutions, how did it turn out?
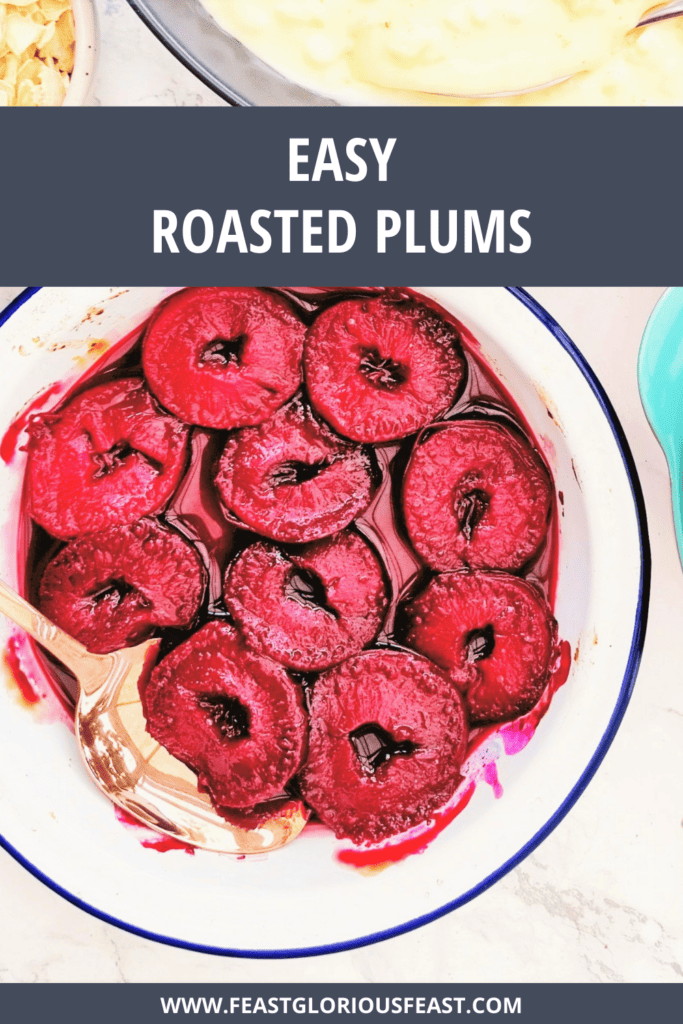
More Plum Recipes
Still Have Questions?
Simple! Just contact me and I will do my best to help as quickly as I am able. Head over to my Contact Me page, any of my social media channels or post a comment at the bottom of this page and I’ll see what I can do.
Pin Easy Plum & Apple Chutney (Small Batch) For Later
Hit one of the share buttons to save this page to your Pinterest boards so you can come back and find it at anytime!

Keep Up to Date
Make sure you SUBSCRIBE to my newsletter and avoid missing out on any of my newest and bonus content. Don’t worry, I promise not to spam you or bombard you too often. Plus you’ll receive a copy of my FREE 7 Day International Meal Plan!
Also please don’t forget to follow me over on my social media channels over at Facebook, Instagram and Pinterest. I love to interact with my followers and I’d love you to share my content with your friends too.
The Recipe
Easy Plum & Apple Chutney (Small Batch Recipe)

Equipment
Ingredients
- 100 g Onion
- 250 g Apple
- 180 ml Red Wine Vinegar
- 150 g Light Brown Sugar
- ½ tsp Sea Salt Flakes
- 500 g Plums
- 150 ml Water
Instructions
- Finely chop roughly 100g Onion. Add to a medium saucepan.

- Remove the stones and roughly chop 500g Plums. There is no need to peel. Add to the pan.
- Finely chop 250g Apple – do not include the core but there is no need to peel. Add to the pan.
- Also add 180ml Red Wine Vinegar, 150g Light Brown Sugar, ½ tsp Sea Salt Flakes, and 150ml Water to the pan.


- Place the pan on a medium high heat and keep stirring until the mixture starts to boil.

- Turn the heat down so it is just simmering and cook for around 30 minutes. Give it a stir every 5 or 10 minutes to make sure nothing is sticking.You will need to stir more regularly towards the end of the cooking time to ensure that nothing is catching on the bottom of the pan.

- The chutney is ready once you can drag your spatula through and the gap doesn’t immediately fill with liquid. If you need to, you can turn the heat up a little and continue to cook any excess liquid away until it is done.


- Carefully spoon the hot chutney into jars or your preferred container.

- Ideally allow a minimum of 3 days to help the flavours develop before tucking in.
Lesley says
The chutney was delicious and very easy to make. I enjoyed it with a cheeseboard and it complimented the cheese perfectly.
Cat says
I love to add chutney to my cheese toasties and this worked excellently. So tasty!
Karen says
This quick and easy recipe resulted in a delicious chutney which I really enjoyed with a cheeseboard. It worked really well with my favourite blue cheese.
Sisley says
We made this for a cold cuts feast and it was divine!
Janice says
Delicious fruity chutney and so easy to make following your very clear instructions.