


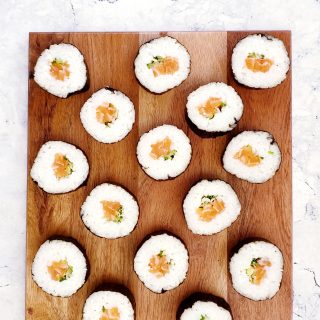
These Salmon Maki Sushi Rolls are my take on the most classic looking sushi. Raw fresh salmon is wrapped in stickyfeast sushi rice and crispy seaweed. The bite-size rolls are a world away from dodgy supermarket sushi and surprisingly easy to make.
This post may contain affiliate links. Please refer to my Disclosures Page for more details.
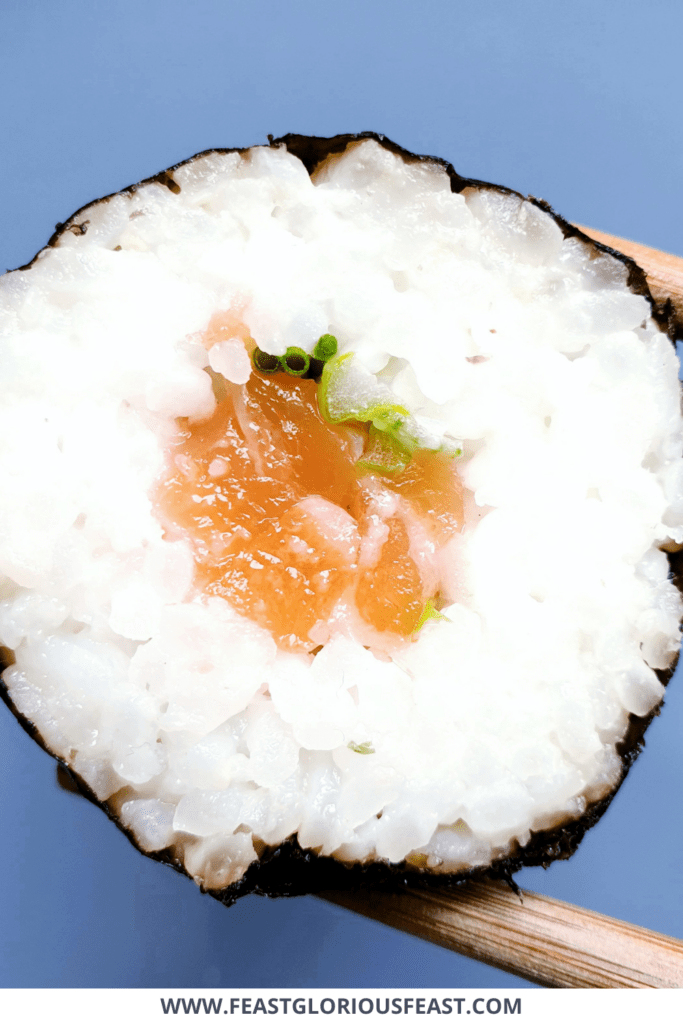
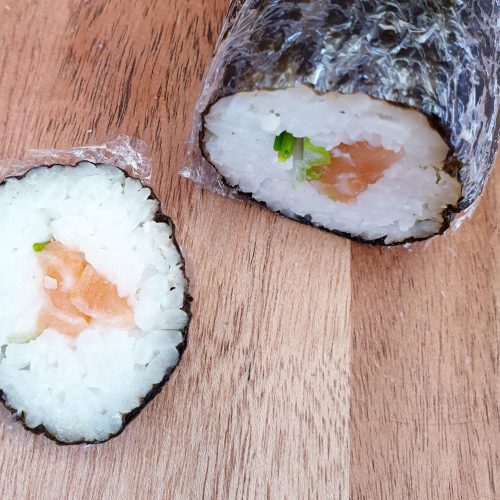
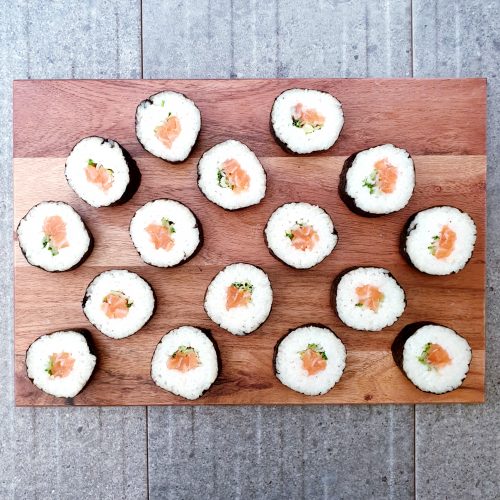
Salmon Maki Rolls are the most recognisable form of Sushi. They’re the classic rolls of sushi rice stuffed with raw fresh salmon and spring onion and wrapped in nori (seaweed). These rolls are really simple to make, rather fun and WAY cheaper than buying them!
Sushi is also an excellent way to make a very small amount of fish go a very long way and is therefore much more of a frugal food than the new supermarket sushi counters would lead you to believe.
I always forget just how filling they are though so be warned, you might not need quite as many as you think!

How to Serve Salmon Maki Rolls
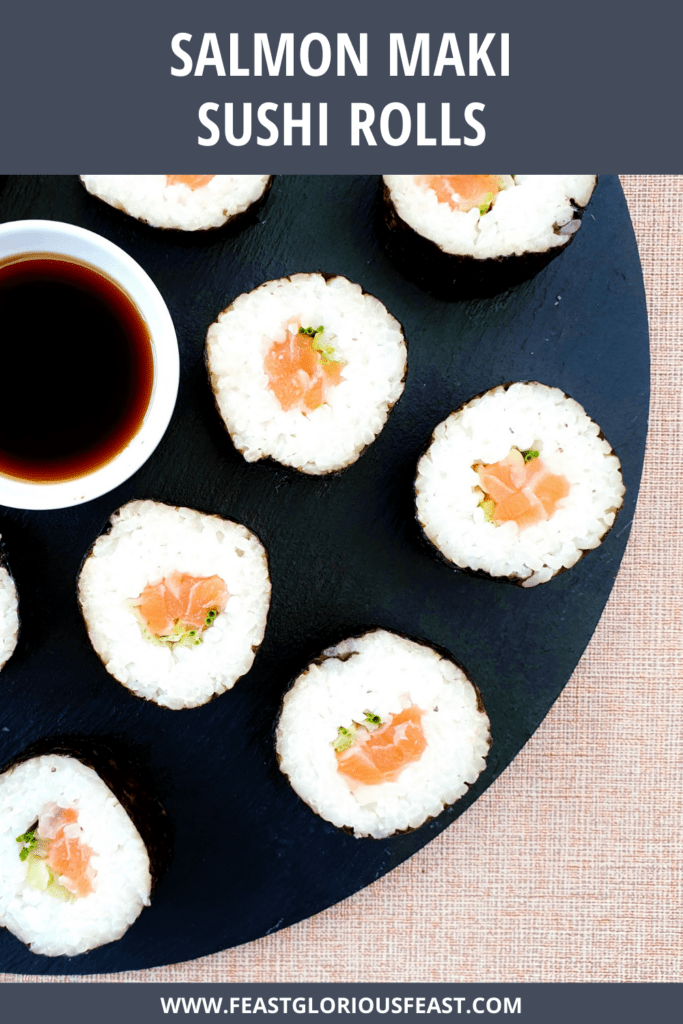
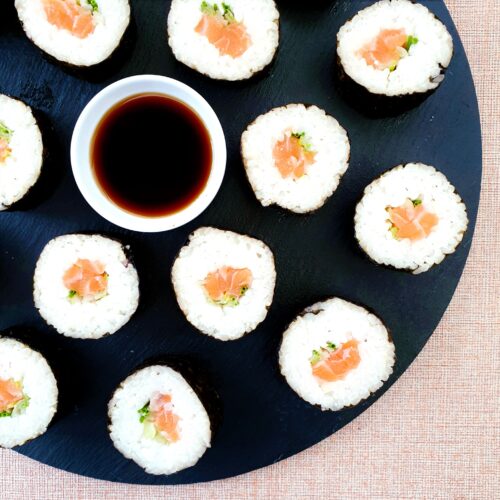
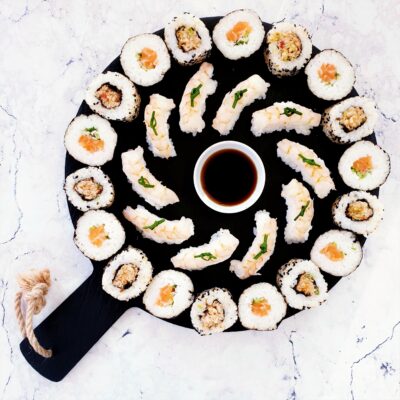
Like with all of my sushi recipes, I like to serve a selection of different sushi rolls together. Variety really is the spice of life. A dipping sauce is essential and I tend to stick with simple light soy sauce.
Pickled ginger is also traditional although technically you are only supposed to eat the ginger between pieces of sushi to cleanse the palate. With apologies to any highly trained and easily offended sushi chefs around the world, I like to eat a piece of ginger right on top! Pickled ginger can be bought in jars from supermarkets or Asian groceries.
I tend to serve sushi on plain dishes, slates and the like. I love Japanese minimalism and clean lines and I think it complements the lovely colours of the sushi perfectly.
I’d usually eat sushi with chopsticks but it is actually supposed to be eaten with your fingers so feel no shame in just digging in.

Ingredients for Salmon Maki Sushi
Salmon
With regards to buying the fish, this is one of the occasions I always try to purchase it on the day or the day before making and serving the rolls. This is unfortunately not a great prepare ahead dish.
I like to buy my fish from my local artisan fishmongers. Yeh right! I could probably go to Japan for the same cost – sad times. Luckily for me I now live back in Grimsby which is very much known for its fish and I have some cheeky ways of getting myself a decent supply of freebies.
But previously I always went to the fish counter in my nearest supermarket. most of them get their fish fresh from Grimsby so that was perfect for me and I would suggest that you do the same.
If raw salmon is really a step too far, just cook it first. A quick pan sear or oven bake won’t summon the authenticity police.

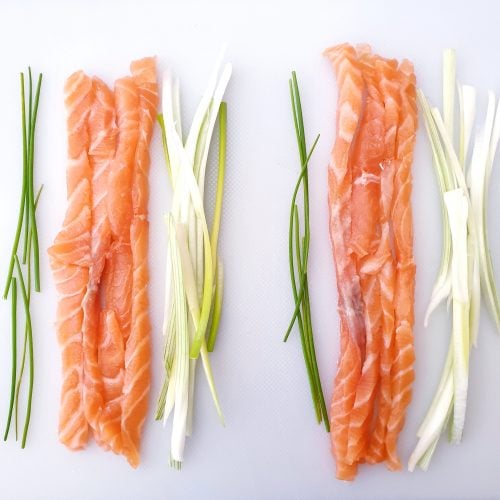
Chives
It is my preference to use Chinese chives in my rolls. They are bigger and more flavorful that regular chives. But I admit that they are rather hard to get hold of unless you live near a great Asian Supermarket. My local grocers have great pantry items but very little in the way of fresh.
And so I generally just use regular chives which still provide a nice fresh flavour in the maki rolls.

Sushi Rice
Sushi rice is an essential ingredient. Check out my How to Make Sushi Rice post to find out all you need to know. The post also includes full instructions exactly how to cook the rice.
How to Make Sushi Rice

Nori
Nori sheets are intrinsic to many sushi rolls. They contain the filling and add another texture but if we are honest, not a whole lot of flavour.
Nori sheets are available to buy in packs from any supermarket and I have been unable to discern any real different in the varieties available. They also tend to be of a relatively standard size.
There is no real alternative to the Nori so I would suggest sourcing some if you plan on making any sushi rolls.

Be Flexible
My sushi rolls are chunky. If you prefer a smaller, more delicate roll, use less rice and spread itin a thinner layer over the nori sheet.
As with most of my recipes, it is really easy to add to or amend this Salmon Maki into ‘whatever-you-want-or-have Maki’.
Thinly sliced avocado would be a great (and fairly classic) addition and/or finely sliced cucumber or carrots. You could remove the salmon entirely if raw fish isn’t your thing and add something like (cooked) marinated chicken or katsu prawns. Or even cooked salmon – try my easy how to air fry salmon fillets instructions.
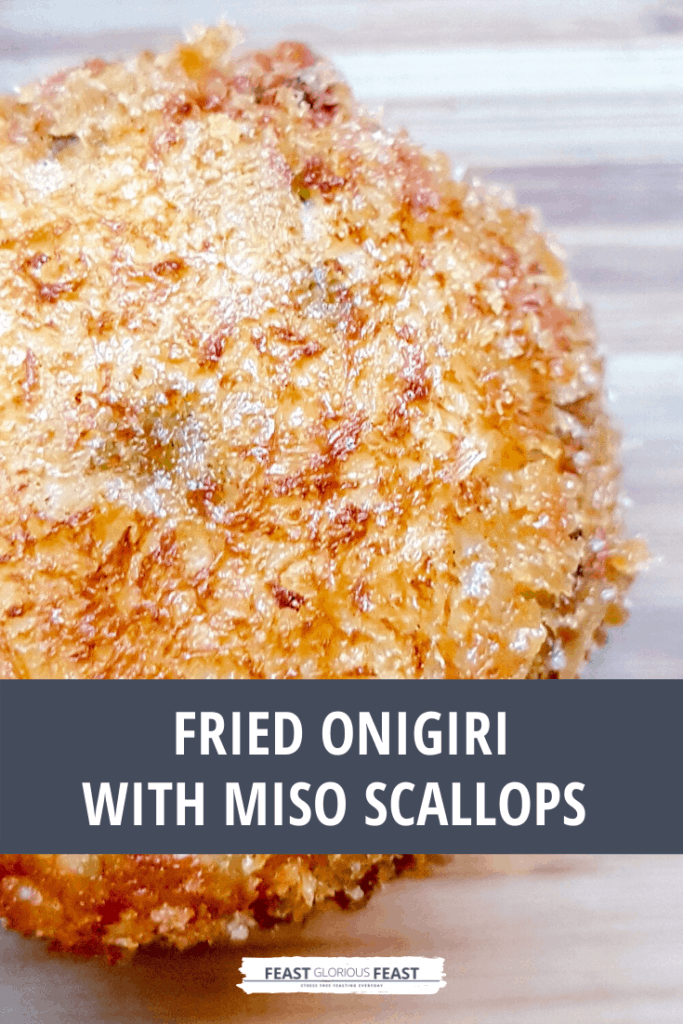
To be honest, there are a million and one potential fillings here, I’ve even seen ‘pulled pork maki’! If you like your ‘sushi’ hot, take a look at my Miso Scallop Onigiri with Miso Mayo for something a little different. Or for really different, you could thinly slice Oven Fried Chicken Thighs!
You could also make these into uramaki rolls but following my instructions for my Uramaki Sushi with Chilli Crab to make them inside out.

Make it Vegetarian or Vegan
Everything but the salmon in this recipe is suitable for vegetarians and vegans. My best suggestion for substituting would be to use marinated and fried tofu, much like to tofu that I use in my Vegan Vietnamese Summer Rolls.
Otherwise you can simply pack the roll with more veggie fillings like avocado, cucumber and carrot.

Make it Allergy Friendly
This Salmon Maki Roll recipe is free from nuts, gluten, egg and dairy.
Please note that this recipe may contain other allergens not referred to above and any variations suggested have not been tested unless otherwise stated. For more information regarding any dietary information provided on this website, please refer to my Nutritional Disclaimer.

Equipment Notes for Salmon Maki Sushi Rolls
A beautifully sharp large knife really is needed to get crisp and sharp cuts on the rolls. Along with a set of decent knives, I bought myself a vintage knife steel which I swear by to keep all of my knives easily razor sharp. Every kitchen should have one.
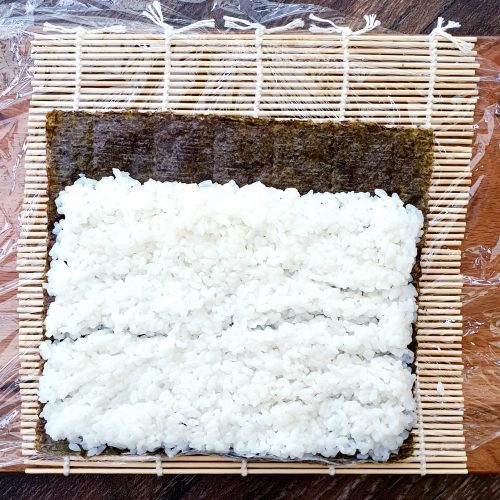
A Sushi Rolling Mat isn’t actually essential but really is helpful in ensuring that the maki roll is lovely and tightly rolled. They are available in the supermarket world food aisles as well as online and in Asian grocers. They are a couple of quid max and can be reused again and again. Bargain!
A comprehensive list of the equipment used to make this recipe is included in the main recipe card below. Click on any item to see an example. There are no hard and fast rules so many items can be sensibly substituted to achieve the same results.

Get Ahead
Sushi rolls aren’t the best prep-ahead food but providing you make them the night before you plan to eat them, with the freshest of fish, they are fine for an office lunch. I’d make some extra though because your colleagues will want to try some – trust me!
Sushi does not freeze well and I’m not a fan of recommending that you keep fresh fish for more than about 24 hours before eating. But you can still make sushi the day before you plan to eat it. This makes it a great option for serving with minimal effort needed just before serving.
I would generally leave the sushi as a full roll until just before serving. I would then slice and serve but it can be left in the fridge for a couple of hours sliced.

Leftover Salmon Maki
Leftovers are again best eaten as soon as possible. They’re fine the next day for lunch but aren’t great much after that.
I am aware that it sounds kind of crazy but you can treat a sushi roll like onigiri. Follow the breading and frying instructions for my Scallop Onigiri. Sometimes I like to mix it up!

Salmon Maki Sushi Roll Tips
Sushi obviously isn’t something to serve warm but when it is fridge cold, the flavours tend to be dulled. It is however easier to slice when very cold and firmed up.
Bring the sushi back up to just below room temperature before serving to get the maximum flavour.
Slice the rolls while they are still in their cling film and unwrap each piece – it does just slip off.
Don’t waste the trimmings – just eat them.
Liberally wet your fingers before handling the rice. It will be stickier than any other substance you have touched in your life otherwise.
Spend a little bit of time trying to get the rolls nice and neat. The overall outcome will really benefit from a few seconds extra effort!

Don’t forget to let me know in the comments if you try making this recipe – I want to know what you think and if you made any substitutions, how did it turn out?
Still Have Questions?
Simple! Just contact me and I will do my best to help as quickly as I am able. Head over to my Contact Me page, any of my social media channels or post a comment at the bottom of this page and I’ll see what I can do.
Pin Salmon Maki Sushi Rolls For Later
Hit one of the share buttons to save this page to your Pinterest boards so you can come back and find it at anytime!

Keep Up to Date
Make sure you SUBSCRIBE to my newsletter and avoid missing out on any of my newest and bonus content. Don’t worry, I promise not to spam you or bombard you too often. Plus you’ll receive a copy of my FREE 7 Day International Meal Plan!
Also please don’t forget to follow me over on my social media channels over at Facebook, Instagram and Pinterest. I love to interact with my followers and I’d love you to share my content with your friends too.
More Sushi Recipes


The Recipe
Salmon Maki Sushi Rolls Recipe
Ingredients
- 250 g Cooked Sushi Rice
- 90 g Fresh Salmon Fillet
- 2 Spring Onions (Scallions)
- 8 stems Fresh Chives
- 2 sheets Toasted Nori
Instructions
- Start by ensuring that your 250g Cooked Sushi Rice is totally cooled.
- Prepare 90g Fresh Salmon Fillet by thinly slicing it as finely as possible into long strips. I prefer thinner strips rather than a large chunk as I think it makes the sushi roll nicer to eat. Set aside.
- Prepare 2 Spring Onions by trimming the ends, removing the very outer layer and carefully slicing them length-ways into quarters. Keep slicing into sixths or eighths if they are especially fat. Set aside.
- Split the salmon strips, prepared spring onions and 8 Stems Fresh Chives into two even piles.

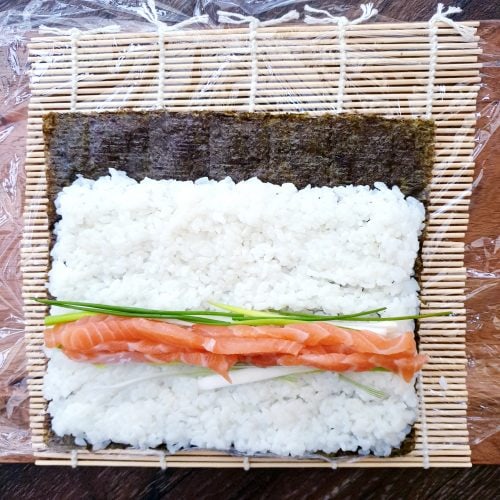
- Cover your sushi rolling mat with clingfilm and lay 1 of the 2 Sheets of Toasted Nori onto the clingfilm.

- Tip on half of the cooked sushi rice and evenly spread it over three quarters of the nori sheet.
- Leaving a small border, lay one of the bundles of fillings horizontally over the rice. I like to make sure that the spring onion is evenly spaced with the white and green ends spread out nicely.
- Using the rolling mat to assist, roll the nori and rice around the salmon and fillings.
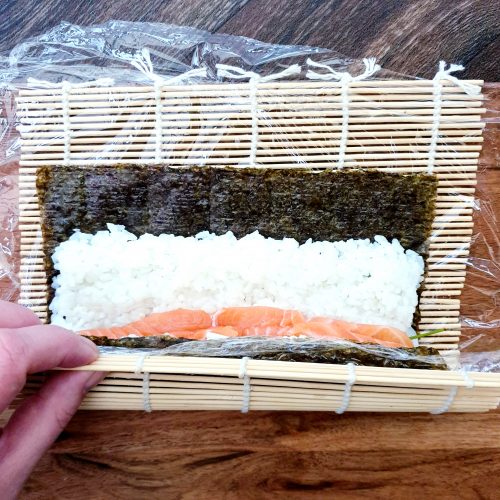
- Use the rolling mat to squeeze the filling tight into the rice roll. You may find that your rice has spread too far, in which case use a sharp knife to trim any excess. I prefer to do this rather than create a spiral effect but that wouldn't be the end of the world.
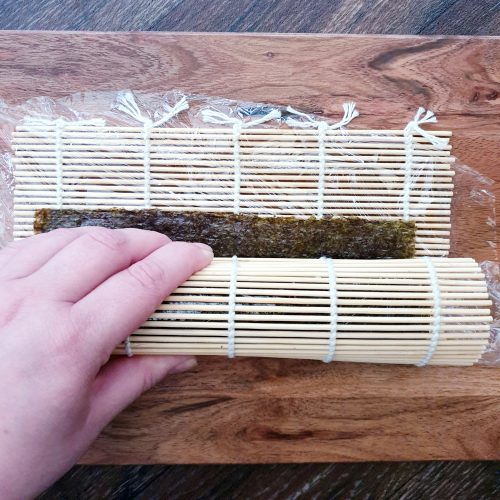
- Use a little cold water to dampen the visible nori.
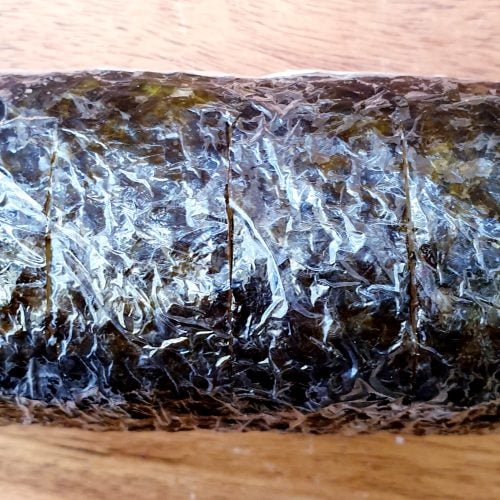
- Wrap the loose end of nori around the roll making sure it is as tight as possible.
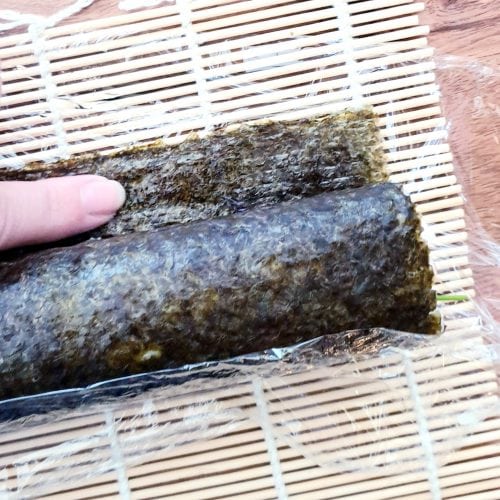
- Wrap the roll in the cling film and twist the ends to ‘burrito roll’ and tighten it.

- Leave in the fridge for at least 60 minutes or in the freezer for only 15 minutes. Repeat with the second roll.
- Take the rolls out of the fridge and slice them about half an hour before serving.
- Start by cutting a little off each end.
- Make a little mark halfway down the roll, then again at each quarter point. Make another mark to half each of the quarters.
- Cut through the roll at each marked points starting from one end.
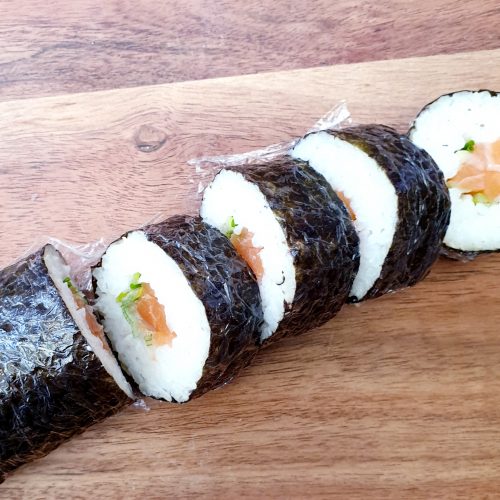
- Remove the clingfilm from each roll.
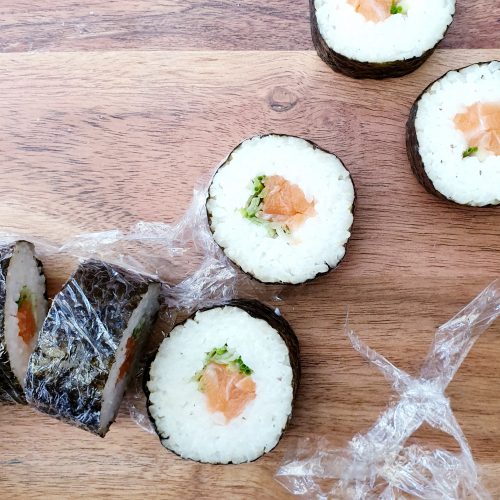
- Serve the sushi at room temperature.
Janice Pattie says
Thank you for such clear photographs and instructions, you have given me the confidence to make sushi at home.
Chloe says
Aw thats great to know! Let me know when you get cracking!