
Chocolate Monkey Bread isn’t really traditional in the UK but it should be! Made in tray bake form for more even cooking, this sweet chocolate bread is really easy and fun to make. Its a sweet and sticky chocolatey treat with a tangy cream cheese filling perfect for little and big kids alike!

This post may contain affiliate links. Please refer to my Disclosures Page for more details.
The sweet bread recipe that I use for my Cheesy Garlic Pull Apart Bread and Cheesy Garlic Rolls is so utterly delicious that I just had to use it to make a sweet recipe. And voila! My Chocolate Monkey Bread was born! No regrets folks, no regrets!
Monkey Bread or Monkey Puzzle Bread as its sometimes known is primarily popular in the US but originated from a Jewish-Hungarian pastry known as arany galuska.
The standard US version consists of balls of dough, dipped in butter, cinnamon and sugar which is layered and baked. Cinnamon! Colour me surprised! That is never going to be my bag so of course I’ve made a more modern chocolate flavoured version with an extra element of tangy cream cheese.

Ingredients for Chocolate Monkey Bread
Yeast
Make sure your yeast is in date. I do not advocate paying any attention to best before or use by dates as a general rule. But smelling yeast will not tell you if it is still alive. So only use “in date” yeast. I actually write the date I bought a box of yeast on it before putting away so I can rotate properly.
Chocolate
I use cheap 50p per 100g bars of dark chocolate for recipes like this. Of course if you prefer to use 90% cocoa solid chocolate that is 10 times the price, then please use what you prefer. I don’t think its the kind of recipe where it will make a whole lot of difference though! Milk chocolate would also work just fine.
Cream Cheese
I have used full fat cream cheese. I do most of the time buy lighter cream cheese and that would be fine to use to. It can however sometimes be a little watery so it may be worth breaking it up a little and leaving on some kitchen towel for half an hour to drain any excess liquid.

Be Flexible
If you’re short for time or don’t have any cream cheese to hand, there is no issue with just omitting the filling part of the recipe entirely. Un-stuffed chocolate dough balls are pretty tasty too!
You could of course go down the more traditional US route of making the Monkey Bread in a bundt tin or indeed coating the little blighters in cinnamon as well as cocoa. The possibilities are endless really!
Don’t forget that making a double batch of the dough and making half into Cocoa Monkey Bread and half into Cheesy Garlic Rolls or Pull-Apart Bread is a great way to maximise your baking time with doubly tasty results!
Make it Vegetarian or Vegan
Ensure that the cream cheese is suitable for vegetarians and you are good to go for veggies.
There are a few substitutions that you will need to make for this Monkey Bread to be suitable for vegans:
- Switch out the butter for vegan baking block.
- Use a vegan cream cheese – I hear they’re pretty good nowadays!
- Substitute each egg with 1 tbsp of vegetable oil.
- Use a plant-based milk instead of regular milk.
- Make sure your chocolate is dairy free.
Pretty easy really!
Make it Allergy Friendly
This Monkey Bread recipe is free from nuts.
Dairy or Egg Free: As usual, I will refer you to the vegan substitutions to make this Chocolate Monkey Bread suitable for those with a dairy allergy. To suit an egg allergy, only the eggs need to be substituted.
Wheat Free: I regularly make this super-soft dough using spelt flour for my friend who is unable to eat wheat. But this isn’t a suitable swap for all wheat allergies and it isn’t gluten free.
Gluten Free: For gluten free balls, you will need to use a gluten free flour. Like vegan cheese, the number of varieties of gluten free flour you can now buy is quite impressive but the version from Free From Fairy is so brilliant you wouldn’t even know its gluten free.
Please note that this recipe may contain other allergens not referred to above and any variations suggested have not been tested unless otherwise stated. For more information regarding any dietary information provided on this website, please refer to my Nutritional Disclaimer.

Equipment Notes for Chocolate Monkey Bread
I used my basic model Kenwood Stand Mixer to mix and knead the dough with the dough hook attachment. Some electric hand mixers also come with dough hooks which I used in my pre-Kenwood days.
This is such a soft dough you could easily knead the dough by hand, it will just take a little longer and be a little bit messier.
A bundt tin makes for a traditional alternative to making the monkey bread in a roasting tin. Make sure to grease it very well.
A comprehensive list of the equipment used to make this recipe is included in the main recipe card below. Click on any item to see an example. There are no hard and fast rules so many items can be sensibly substituted to achieve the same results.
Get Ahead
Obviously you need to have a couple of hours spare before you want to eat my Chocolate Monkey Bread. Whilst it is still very good reheated, it is most fabulous fresh out of the oven.
Because of the nature of the chocolate cream cheese filling, I don’t really recommend freezing the monkey bread before or after baking. What you can do however is to make the dough up to step 4 the night before you want to bake and eat it.
Leave the dough to prove in the fridge overnight then continue with the recipe in the morning. Its will get you a little way ahead at least!
Leftover Chocolate Monkey Bread
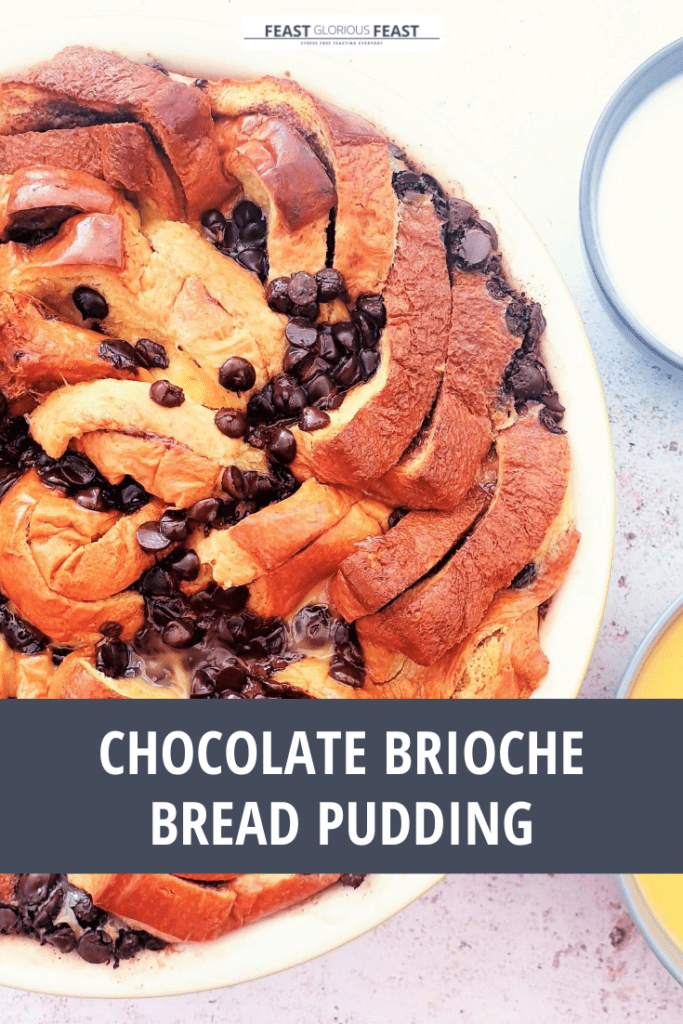
Sometimes I dream about making a bread and butter type pudding with these chocolate dough balls but I’ve just never had any left to try it out!

Chocolate Monkey Bread Tips
The dough will be quite soft and sticky – this is a good thing!
Knead the dough on a floured surface but try not to add too much extra flour to the dough as this will dry it out. I use a flour shaker to get a nice thin but even layer of flour on my wooden board. If it feels like its getting a bit dry, knead in a little more milk or water.
You can just leave the dough on the side in the kitchen to prove but it’ll take twice as long. An airing cupboard or similar is ideal but I don’t have one so I usually put one of my ovens onto a super low heat, pop the dough in and then turn the oven off. Just don’t keep opening the door to let the residual heat out.
Don’t forget to let me know in the comments if you try making this recipe – I want to know what you think and if you made any substitutions, how did it turn out?
Still Have Questions?
Simple! Just contact me and I will do my best to help as quickly as I am able. Head over to my Contact Me page, any of my social media channels or post a comment at the bottom of this page and I’ll see what I can do.
Pin Chocolate Monkey Bread For Later
Hit one of the share buttons to save this page to your Pinterest boards so you can come back and find it at anytime!

Keep Up to Date
Make sure you SUBSCRIBE to my newsletter and avoid missing out on any of my newest and bonus content. Don’t worry, I promise not to spam you or bombard you too often. Plus you’ll receive a copy of my FREE 7 Day International Meal Plan!
Also please don’t forget to follow me over on my social media channels over at Facebook, Instagram and Pinterest. I love to interact with my followers and I’d love you to share my content with your friends too.
More Chocolate Recipes


The Recipe
Chocolate Monkey Bread Recipe

Equipment
Ingredients
For the Dough:
- 90 ml Water
- 14 g Fast-Acting Dried Yeast
- 50 g Caster Sugar (Superfine Sugar)
- 500 g Strong White Flour (Bread Flour)
- 1 tbsp Sea Salt Flakes
- 40 g Salted Butter
- 2 Egg
- 140 ml Milk
For the Filling:
- 200 g Dark Chocolate (Bittersweet)
- 250 g Cream Cheese
- 50 g Icing Sugar (Confectioner’s Sugar)
For the Coating:
- 40 g Cocoa Powder (Dutch Processed)
- 80 g Sugar
Instructions
Make the Dough
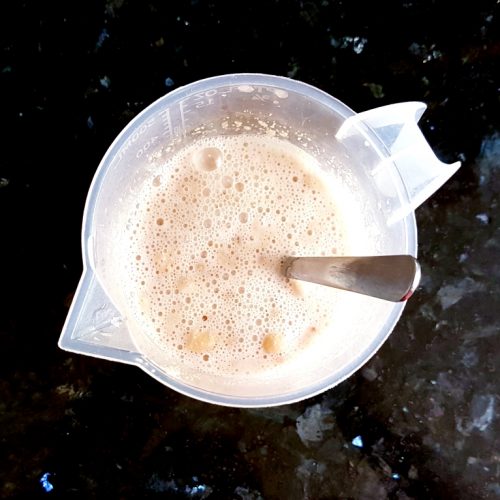
- Add 90ml of fairly warm (not hot) Water to a small bowl and add 14g Fast-Acting Dried Yeast and 50g Caster Sugar. Whisk to combine a little (it won’t combine properly) and set aside.

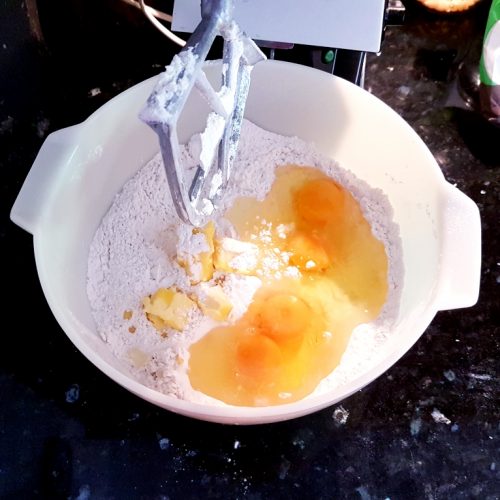
- Measure 500g Strong White Flour and 1 tbsp Sea Salt Flakes into a large mixing bowl and stir to combine.
- Add 40g Salted Butter, 2 Eggs, the by now frothy yeast and water mix and 140ml Milk to the flour. Stir until a dough is formed.
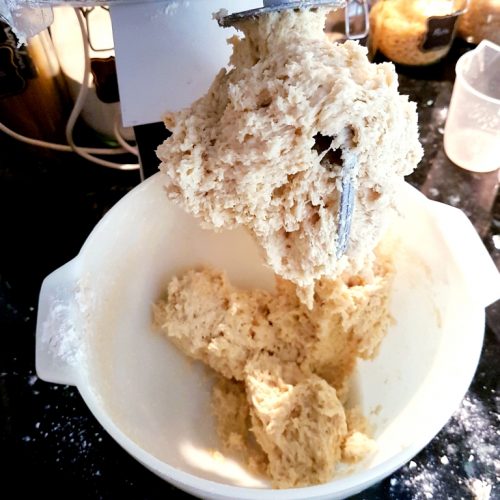
- Knead the dough until is it smooth and super stretchy. A good 10 minutes if kneading by hand, if not a bit longer. About 5 to 7 minutes if using an electric mixer.
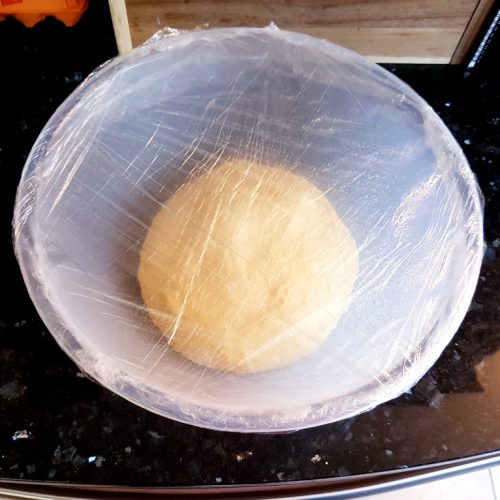
- Leave the dough in a large covered bowl somewhere warm for about 1 hour to rise.
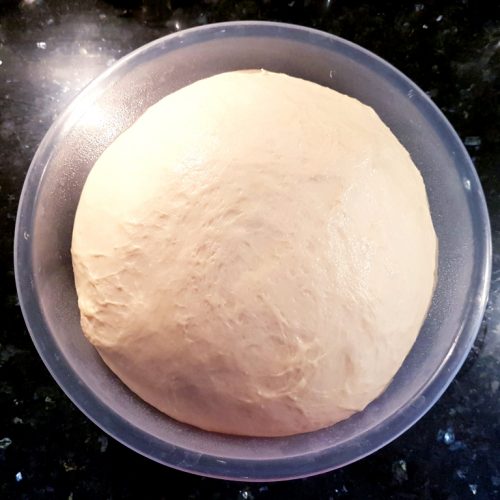
- The dough should roughly double in size. (How good and smooth does that dough look!)
Make the Filling
- While the dough is rising, make the filling by finely chopping 200g Finely Chopped Dark Chocolate and thoroughly mixing with 250g Cream Cheese and 50g Icing Sugar.
- Put the filling mixture into the fridge to chill back down and firm up a little while the dough continues to prove.
Make the Coating
- Prep the coating by combining 40g Cocoa Powder and 80g Granulated Sugar in a shallow bowl. Set aside.
Assemble & Bake
- Once the dough has doubled, take off the covering and give the dough a good punch. You don’t actually need to be aggressive but these opportunities are rare so go for it.
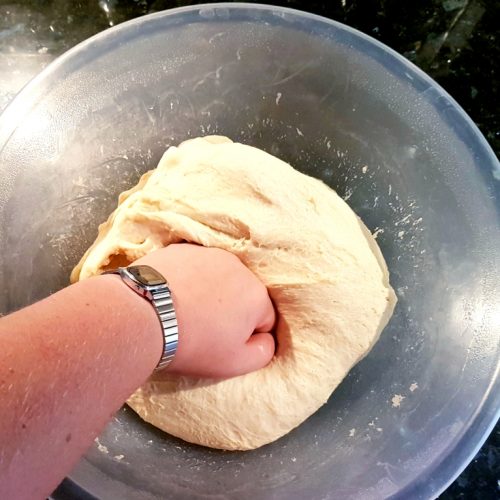
- Tip the dough out onto a floured surface and give it a quick light knead. No need for electric power here.
- Split the dough into thirds and roll each third into a long sausage. Aim for about the thickness of a 2p piece. Cut each sausage into about 15 pieces. The exact number is not cause for concern.
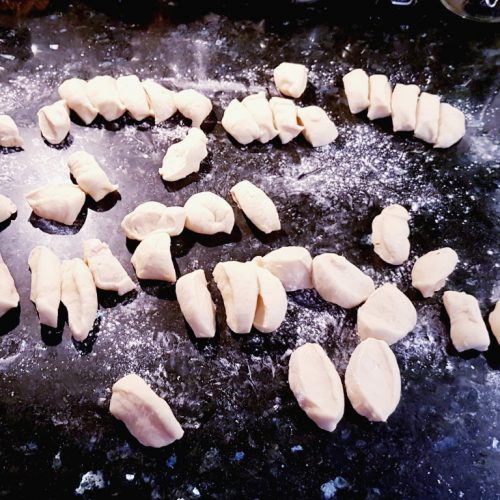
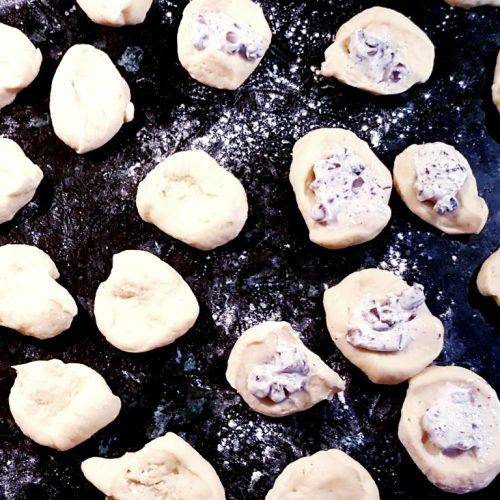
- Roll each piece of dough into a very rough ball and place out on a floured work surface (you could do this in two batches if needed).
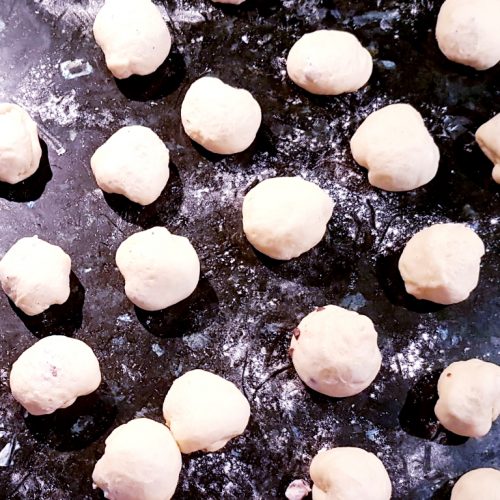
- Press each ball down a little and make a small indent in the middle of each to receive the filling.
- Take the cream cheese and chocolate mixture and put about half a teaspoon into the indent in each dough ball. (I did this en-masse rather than one at a time as I wanted to make sure that my cream cheese mix was evenly(ish) distributed though all the dough balls.)
- Pick up each piece of dough and wrap the dough around the cream cheese mix so that it is fully(ish) enclosed.
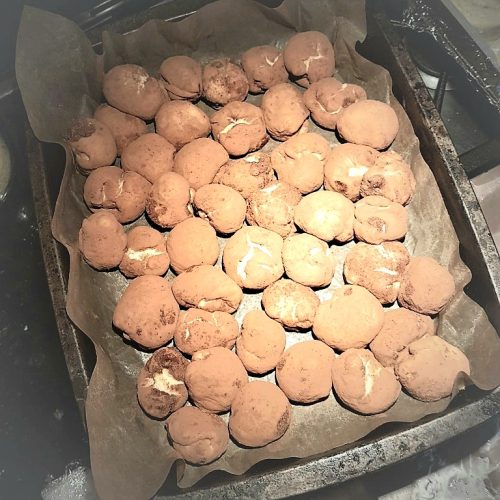
- Roll each of the dough balls in the cocoa/sugar mixture and place into a large roasting tray, or two smaller ones, or one smaller one but double layers. Or a bundt tin – whatever you fancy.
- Gently cover the tray and leave for about 40-45 minutes in a warm place to rise again.
- Meanwhile, add a little boiling water to the remaining cocoa/sugar mix until the sugar has mostly melted and it is the consistency of thick hot chocolate. Set aside.
- 10 minutes before the end of proving, pre-heat the over to 200c or the equivalent.
- Remove the cover from the tin and drizzle the cocoa and sugar syrup over the balls then put them into the hot oven.
- Check after 10-12 minutes and removed from the oven when all puffed up and cooked through (check a middle one).
- Serve a little warm.
Hannah says
cream cheese and chocolate really are the dream team! I’ve never made monkey bread with a from-scratch dough so this is definitely the recipe I’ll be starting with!
Chloe says
Ooof its a cracker! Don’t forget to save some of the dough to make some garlic bread!
Becca @ Easy Cheesy Vegetarian says
My eyes got so wide when I saw these were stuffed with cream cheese and chocolate – that sounds amazing!!
Chloe says
Its a cracking combo!