This American style Strawberry Blueberry Pie uses my flaky pie crust recipe and packs it with either fresh or frozen fruit with a little sugar for a delicious hot dessert. Ideal if you want to join in with Thanksgiving celebrations, are making the most of summer berries or just fancy making an easy and delicious lattice fruit pie!

This post may contain affiliate links. Please refer to my Disclosures Page for more details.
I watch a lot of US food and cooking shows and was always intrigued by the annual obsession with creating the perfect pie crust. The fervour is highest around October and November to serve a pie with any one or more of the many possible fillings which usually make an appearance at a Thanksgiving feast.
I wanted to find out how these pie crusts differed from the shortcrust or puff pastry that I most often use. It tuned out that it’s essentially a rough puff pastry which is basically a cheats way of making a flaky pastry but without the time involved in fully laminating the dough.
You can find the full recipe and all of my hints and tips how to make it here —> American Pie Pastry.
The first pie I made with this pastry was Classic French Silk Pie. Unlike this fruit pie recipe, it requires the pastry to be blind baked and the filling added without further cooking. This recipe bakes the pastry from raw with the filling cooked out and thickened first. Which makes things incredibly easy.
Please don’t skip this whole post and head straight for the recipe without at least checking out my notes for how to properly line your pie dish and how to create the lattice top. You don’t need to add a lattice, you could add an entire lid but I find a lattice incredibly satisfying to make and I highly recommend giving it a go.
- How to Serve American Style Pie
- Ingredients for Strawberry Blueberry Pie
- Equipment Notes for American Strawberry Blueberry Pie
- How to Line A Pie Dish With Pastry – Step-By-Step
- How to Create a Pastry Lattice Crust – Step by Step
- Get Ahead
- American Style Blueberry Strawberry Pie Tips
- More Delicious Pie Recipes
- Full Step-By-Step Recipe

How to Serve American Style Pie
Please note that you won’t want to serve the pie straight away. The filling will be incredibly hot and the slices will stay together much better if it’s allowed to sit and relax.
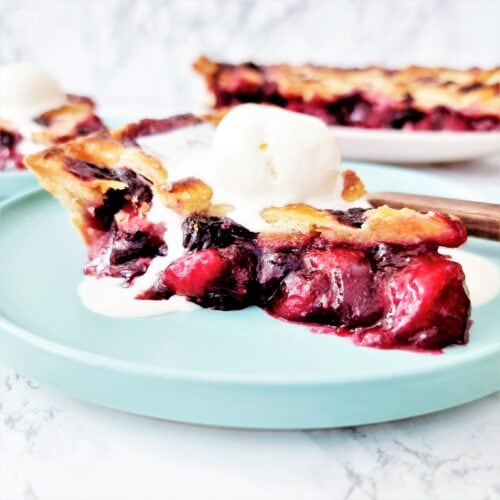
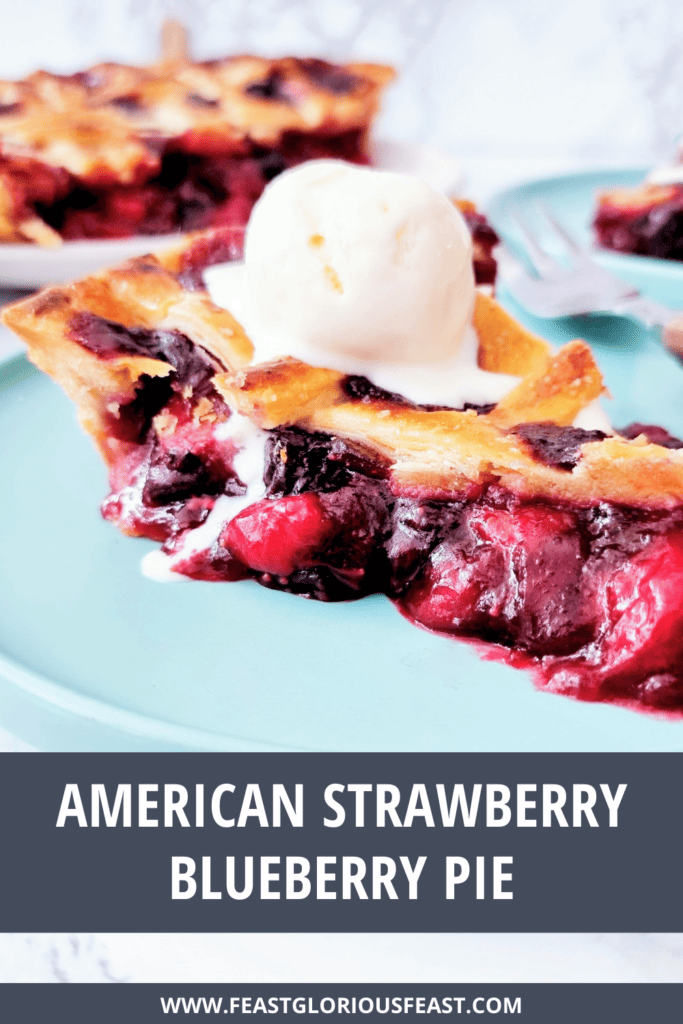
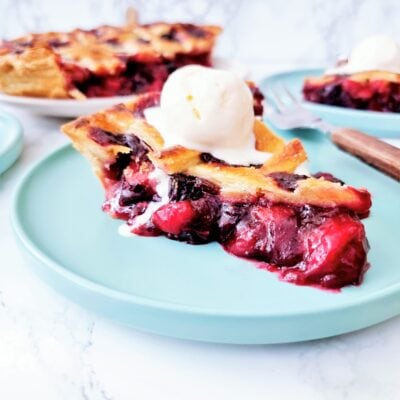
To get the true American pie experience (not that one millennials – move on) you will want to serve it “a la mode”. This means served warm with ice cream. This is how I served the pie in these photos and I think they’re really onto something to be honest.
If you want to keep things more simple, whipped cream would the the next best thing. Slightly sweetened squirty cream also provides a relatively authentic US dessert experience. You could also just go in with a good dose of un-whipped double cream or even custard.
To make things a little fancy, you can add some extra fresh fruit to the serving plate.

Ingredients for Strawberry Blueberry Pie
The Pastry
I’ve already mentioned above that I use my American Pie Pastry recipe to make this pie. The recipe makes a 900g quantity of pastry and you need half of that to make one 9″/23cm pie. You can halve the recipe but I highly recommend making the full batch of pastry. Or you can freeze the other half if you are only planning on making one pie now. You may as well save effort and clean up time in the future.
If you don’t want to make your own pastry, then buy some. Choose between shortcrust or puff pastry depending on how flaky you want your pie. I think that puff will give you something closer to the American style pie and shortcrust will make more of a British style pie.
If you buy ready rolled pastry, it is actually easier to buy the blocks and roll it yourself than buying the ready rolled variety. This is just because their rectangle shape and a round pie dish doesn’t match up very well even when you roll it a little thinner.
In the US you can buy ready rolled round pie crusts – use these if you can get them!
Lemon Juice
This is just added to the filling to add a little brightness and acidic counterfoil to the sweet sugar and berries. You can either squeeze a fresh lemon or use bottled lemon juice like I most often do.

Blueberries & Strawberries
You can use fresh or frozen berries and even mix and match.
You can even switch some of the berries for another berry. I would be a little cautious about adding blackberries unless you’re cool with the seeds.
Make sure to spend a few moments to properly prepare the berries. By this I mean slice off the green tops of the strawberries and make sure there are no rogue blueberry stalks. And of course discard any that are too past their best to be nice to eat.
Cornflour/Cornstarch
This is essential to thickening the fruit filling. The berries might look lovely and dry when you prepare them but they will release all their juice as they start to cook.
I did trial tossing the berries in the cornflour and adding them directly to the pie but it resulted in a nasty mess – please don’t try this.

Sugar
I use regular granulated white sugar for the pie filling. This adds sweetness and texture/body without adding a specific extra flavour. For this last reason I would avoid using brown sugars although a golden granulated would be fine.
You do not need to use caster/superfine sugar here as it is going to be melted.
A little demerara sugar sprinkled on top of the pie adds a nice texture and a little extra sweetness to the lattice pastry. You can use granulated white sugar if you don’t have demerara (also called turbinado sugar).
Egg
The beaten egg is used as a glue for the pastry and to glaze the top. This gives a lovely tan to the pastry as it cooks.
You can sub the egg for double (heavy) cream or milk if you need to but you won’t get quite as luscious finish as if you use egg.
Be Flexible
You could consider making mini tartlets using this pie filling – obviously the cooking times would be wildly different so you would need to keep a close eye on things.
I’ve mentioned that you can add other berries to the filling, You can change the fruit filling entirely if you like. You need to make sure that it is sufficiently thick. You can buy canned ready made pie fillings for ultimate ease.
As for extra flavours you can add to the filling, there are several options. You can add citrus zest, spices or a flavoured liquid like alcohol. Rum works well with berries, as does gin and my favourite Cointreau.

Make a Vegetarian or Vegan Pie
This strawberry blueberry pie is vegetarian as written.
It is easy to make a vegan strawberry blueberry pie. You can either follow my instructions to make the pie pastry vegan and use that.
Or you can use ready made pastry. If you avoid the “all butter” varieties and check the ingredients list, they are usually accidentally vegan.
Then the only other thing you need to do is either use a liquid vegan egg replacer to glaze the pastry or a plant milk.

Allergy Friendly Blueberry Strawberry Pie
This recipe is free from nuts.
Gluten Free Blueberry Strawberry Pie: You can either make the homemade pastry using a good gluten free flour blend or replace the pastry with a ready made gluten free option. The filling uses cornflour to thicken it and this is naturally gluten free.
Dairy Free Blueberry Strawberry Pie: You can make the homemade pastry using a dairy free butter substitute or buy a ready made pastry. Like with my vegan advice, most regular pastry is dairy free. Also make sure to use egg to wash the pastry and not milk or cream.
Egg Free Blueberry Strawberry Pie: Simply use a double cream or milk as the wash on the pastry.
Please note that this recipe may contain other allergens not referred to above and any variations suggested have not been tested unless otherwise stated. For more information regarding any dietary information provided on this website, please refer to my Nutritional Disclaimer.

Equipment Notes for American Strawberry Blueberry Pie
The main thing that you will need to make sure you have is a good pie tin. 9″ or 23cm diameter is the most standard size that you tend to find. The option linked in the recipe card for a perforated pie tin which I often use. The same size tin that I used to make this pie is more traditionally shaped with sloping sides. You can use either shape.
I do generally stick with metal pie dishes when cooking pies like this, especially where the pastry isn’t being blind baked. This is because the metal conducts the heat from the oven very efficiently which will help you avoid an under-baked bottom.
Oven-safe glass like pyrex and ceramic dishes can be used but be aware of the potential pitfalls – you may need to cover the top of the pie and bake it for a little longer.
Other than the pie dish, everything else you will need is pretty standard kitchen or baking equipment like measuring scales, a rolling pin and a saucepan.
A comprehensive list of the equipment used to make this recipe is included in the main recipe card below. Click on any item to see an example. There are no hard and fast rules so many items can be sensibly substituted to achieve the same results.

How to Line A Pie Dish With Pastry – Step-By-Step
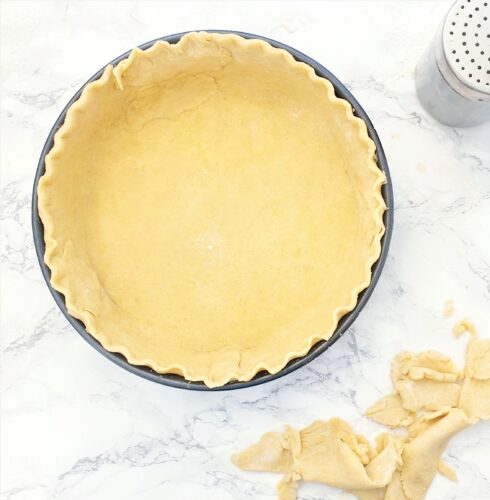
Generously flour your work surface and use a heavy rolling pin to roll the pastry out to just slightly larger than the pie dish. Remember that the pastry will need to reach up the sides of the dish.


To move the pastry into the dish, gently fold it into quarters then lift it into the dish positioning the point roughly in the middle of the dish.


Reverse the process by carefully unfolding the pastry.


Use your knuckles to carefully press the pastry into the corners of the dish.
Use your other hand to lift the pastry as you move around the edge. You don’t want to stretch the pastry and make it thin. (My other hand was holding my camera so unfortunately you’ll have to imagine this!)

Use a sharp knife to carefully cut away the excess pastry.
Do this carefully as you can use the scraps to make some strips for the lattice top.


Try to complete this process as quickly as possible and then get the pastry back in the fridge asap. If you are working in a hot environment, you might want to consider putting the pastry back in the fridge or even the freezer in between any of the steps.

How to Create a Pastry Lattice Crust – Step by Step
Roll out your pastry to a little longer than your pie dish, including the edges. You will need at least half the strips to be this length.
Use a sharp knife to cut strips. These can be varying widths like mine or all the same width. If you are not confident, you can use a ruler to help you get straight lines. Or use something like the edge of a cutting board.
I cut freehand for a slightly more rustic look.


Start by considering your design. Set aside half of your longer strips and half of your shorter strips for the second stage.
Lay the first layer of strips onto the pie. Press the end of the strips into the pastry case but only on one side.


Lay your second set of strips on a board in their intended order so they’re ready to use.
Gently pull back every other strip so it is totally clear of the pie filling. I chose a design with some double strips so we’ll count those pairs as one strip for the purposes of this tutorial.


Lay your first horizontal strip where you want it positioned. Press down both ends into the case. Gently return the first layer strips to their original position.


Repeat the process using the first layer strips that you didn’t move the first time.
Add your next horizontal strip and keep repeating the process alternating which strips you pull up each time.


Go all around the pie and firmly press the pastry down to help create a good seal.
Use a sharp knife to cut off any excess trimmings.


For this pie recipe I’ve added an extra step of pulling in the edge of the pastry and crimping it. You can see these details in the recipe card.
Get Ahead
Both the pastry and the filling can be made a couple of days ahead and chilled. Or you can make them months ahead and freeze them.
In both cases make sure the pastry is very well wrapped and isn’t going to get squashed. The filling can be stored in a well sealed freezer bag or container.
Both the pastry and filling will need to be fully defrosted before the pie is assembled.
If both pastry and filling are properly cold, you can assemble the pie the day before you want to bake it. Again it will need to be well wrapped before being stored in the fridge. I have not tried freezing the pie at this stage but I would be inclined to avoid it as the filling will likely soak into the pastry as it defrosts.

American Style Blueberry Strawberry Pie Tips
Don’t be afraid to “cheat” with this pie. Use a ready make pie filling (or mix a couple) or use ready made pastry. Or both! Baking is about ending up with delicious food, however you get there.
Cornflour can be a tricky fella and there are many things that can affect its effectiveness. If you think your filling isn’t looking luscious and thick, mix some more cornflour with a little water and stir in. Allow the mix to boil and thicken and keep adding a little bit more until the texture is right.

Don’t forget to let me know in the comments if you try making this recipe – I want to know what you think and if you made any substitutions, how did it turn out?
Still Have Questions?
Simple! Just contact me and I will do my best to help as quickly as I am able. Head over to my Contact Me page, any of my social media channels or post a comment at the bottom of this page and I’ll see what I can do.
Pin American Strawberry Blueberry Pie For Later
Hit one of the share buttons to save this page to your Pinterest boards so you can come back and find it at anytime!

Keep Up to Date
Make sure you SUBSCRIBE to my newsletter and avoid missing out on any of my newest and bonus content. Don’t worry, I promise not to spam you or bombard you too often. Plus you’ll receive a copy of my FREE 7 Day International Meal Plan!
Also please don’t forget to follow me over on my social media channels over at Facebook, Twitter, Instagram and Pinterest. I love to interact with my followers and I’d love you to share my content with your friends too.
The Recipe
American Strawberry Blueberry Pie Recipe
Equipment
Ingredients
- 600 g Blueberries
- 600 g Strawberries
- 3 tbsp Cornflour (Cornstarch)
- 150 g Sugar
- ¼ tsp Sea Salt Flakes
- 1 tbsp Lemon Juice
- 450 g American Pie Pastry – Rough Puff
- Plain Flour (All Purpose) - for dusting
- 1 Egg
- 2 tbsp Demerara Sugar (Turbinado Sugar)
Instructions
Make the Filling
- Trim the tops off 600g Strawberries and cut into slices. Around 4 slices for a large strawberry, 3 for medium and just cut small strawberries in half. Tiny ones can be added whole. Add the strawberry slices to a saucepan.

- Check through 600g Blueberries and discard any that aren’t looking their best. Remove any rogue pieces of stalk or leaf and add to a saucepan.

- Sprinkle over 3 tbsp Cornflour and add 150g Sugar, ¼ tsp Sea Salt Flakes and 1 tbsp Lemon Juice.

- Cook over a medium heat until the fruits have released their juices. Keep stirring regularly to make sure all the ingredients distribute evenly and nothing sticks to the bottom or sides of the pan.

- Turn the heat up and continue to stir constantly until the mixture has thickened. It will start to look slightly gloopy.
- Transfer the fruit mix to a shallow bowl, cover with cling film and allow to cool completely.

Make the Pastry Cake
- Meanwhile cut around ¼ off a 450g block of American Pie Pastry and place back it in the fridge.
- Lightly dust a clean surface with flour and roll out the remaining pastry block. Line the pie dish and trim any excess pastry from the edges. See the notes above for full step by step details on how to line the pie dish.

- Put the tin into the fridge to chill for at least 30 minutes. Or speed up the process and put it into the freezer for 15. Just don’t forget it’s in there.
- Layer up the pastry trimmings and add to the ¼ block that you put back in the fridge earlier. Place the whole lot back in the fridge to rechill.

Assemble & Bake the Pie
- Once the filling is cool and the pastry case is chilled you can start to assemble and bake the pie.
- Preheat the oven to 190c Fan | 180c | 350f.
- Roll out the reserved pastry and trimmings on a floured surface. Make sure it is rolled longer than the width of the pie dish. It doesn’t matter if some pieces are shorter as these can go at the edges.

- Use a sharp knife to cut narrow strips for the lattice. You can choose a variety of widths like I did or keep them even. Put the strips back in the fridge for a few moments.

- Beat 1 Egg in a small bowl.

- Carefully spoon the cooled fruit filling into the chilled pastry case. Use the back of a spoon to make sure it is pushed into all the corners and smooth as possible on top. This will make adding the lattice easier.

- Use a brush to wet the edge of the pastry with the beaten egg.

- Remove the cut pastry strips from the fridge and create the lattice. See the notes above for full step by step details on how to do this.

- Trim the edges of the pastry with a sharp knife.

- Carefully move the edges of the pastry away from the rim of the dish. Use a plastic knife to help you if needed. If you leave the pastry stuck to the rim now, it’ll be difficult to get out the dish once baked.

- Crimp the edges of pastry using your thumb on your dominant hand and two fingers on the other. This will make sure the pastry is properly sealed together and gives some decoration.

- Use the pastry brush to carefully brush more beaten egg on all the exposed pastry. Do this strip by strip as you don’t want a lot of egg dripping into the fruit. Make sure not to miss the inner edge.

- Scatter over roughly 2 tbsp Demerara Sugar. It doesn’t matter if some lands in the gaps but aim mostly for the pastry.

- Bake the pie for 60 minutes. If your oven tends to not cook evenly, make sure to turn the pie round halfway through the cooking time. If at any time the top of the pie starts to look overly brown, you can loosely cover it with foil to prevent further browning.

- Allow to sit and cool a little before carefully sliding out the tin, cutting into slices and serving.






Sally says
I decided to use shop bought pastry because this was going to be my first lattice pie and I wanted to give myself a little shortcut. My lattice turned out great and my whole family loved the pie!
Shirley says
Now this is a pie! I absolutely loved it. Who knew strawberry and blueberries were so good together.
Lesley says
Loved the flavours in this delicious pie, your pastry recipe was straightforward too and really easy to follow.
Janice says
I’ve never tried strawberry and blueberry in a pie before and it was delicious. I really appreciated the step by step instructions for the lattice, it made the pie look so impressive and my family were amazed by the results.