


Gypsy Tart is regional dessert recipe from Kent that somehow became a school dinner classic across the UK. The filling is a magic combination of just two simple ingredients whisked into a mousse then lightly baked in a shortcrust pastry case. With butterscotch notes from the dark brown sugar and a texture like nothing else, it’s an old school recipe you have to try!

This post may contain affiliate links. Please refer to my Disclosures Page for more details.
There are two camps with this tart. Those of us that grew up eating it and have huge amounts of nostalgia. And then another swathe of British people who have never even heard of it. If you were in the latter camp before then welcome – you don’t be disappointed!
There are two parts to the tart – the pastry case which is made from shortcrust pastry. You can make or buy it as you prefer. All the instructions you need to line a tart tin and blind bake it are included in the recipe. If you prefer to buy one ready made, just skip this step.
The filling is extremely interesting and I’ll be upfront and honest that I didn’t nail it on the first try. I needed to find exactly the right balance of sugar to evaporated milk, the right amount to whisk it and the right amount to put into the pastry case. And then how long to bake it for. But that’s why I’m here – I do the experimenting and testing – you just need to follow my instructions. This is one where you really need to pay attention to every word. You have been warned.

How to Serve Gypsy Tart
I find that you really don’t need to serve anything with the gypsy tart. Just a simple slice at room temperature (don’t keep it in the fridge, it’ll split) is perfect.
I know it feels natural to want to add some custard or cream. And this wouldn’t be the end of the world. But there is something about the texture of the tart filling that I don’t feel needs it.

Gypsy Tart Ingredients
Shortcrust Pastry
You have 3 main options here.
The first is to buy a ready made tart shell. If you have the option, I would suggesting choosing a non-sweet option. I feel like the filling is more than sweet enough and you don’t really need the pastry to be sweet too. Saying this, if a sweet one is the only option, grab it, it will be just fine.
The second option is to use ready made shortcrust pastry. If possible I would recommend option for an “all butter” type. It is up to you if you go for ready rolled or not. Here in the UK, ready rolled pastry comes in rectangles. Which aren’t always the best for lining a round tin. Starting with a block of pastry may actually be easiest.
Lastly, you can make the pastry from scratch. Shortcrust pastry is extremely simple to make so please don’t be put off. Whilst I do often buy puff pastry, I almost always make shortcrust from scratch.
All Butter Shortcrust Pastry Recipe
Evaporated Milk
There are two points that I want to make here – in bold:
1) Evaporated milk is different to condensed milk. Please do not confuse them. Evaporated milk is not sweetened or thick. It is available in cans pretty much worldwide.
2) The evaporated milk must be thoroughly chilled before you use it. It simply will not whip up right otherwise. Give the can at least 12 hours in the fridge or 2 hours in the freezer (but no longer, you don’t want it actually frozen).

Dark Muscovado Sugar
Ideally you’ll use true muscovado sugar which is sugar that hasn’t been refined so much and still contains a large amount of muscovado. But the tart will still work with dark brown sugar which is white sugar with the molasses added back in. Light brown sugar will not work for this recipe.
You need to make sure that the sugar has no hard lumps. It is quite common for dark sugars to go rather hard when they’ve been stored a while. If yours is especially clumpy, it is probably worth investing in a new bag for the best results.

Be Flexible
This is not a recipe for flexibility! It is in fact a recipe for sticking exactly to the recipe, both in ingredients and instructions.
The only exception is whether you use a sweet or non-sweet pastry case. I’d still advise that a non-sweet option is a better counterpoint to the sweet filling but technical success of the recipe itself won’t be affected.

Vegetarian or Vegan Gypsy Tart
This recipe is suitable for vegetarians.
This is not a recipe that I advise to try and make vegan. The dairy evaporated milk is essential to the success of the filling. Evaporated coconut milk does seem to exist but is difficult to come by. If you could source it, this may be worth experimenting with but it is untested and of course you will end up with a coconut flavour tinged tart.

Make Allergy Friendly Gypsy Tart
This recipe is free from egg and nuts.
Gluten Free: You can buy or make a gluten free pastry case.
Dairy Free: As I’ve discussed above when talking about making the recipe vegan, I actually think it would be better to look for an alternative recipe than try to adapt this one.
Please note that this recipe may contain other allergens not referred to above and any variations suggested have not been tested unless otherwise stated. For more information regarding any dietary information provided on this website, please refer to my Nutritional Disclaimer.

Equipment Notes for Gypsy Tart
There are two very important items of equipment to consider here. The first is the tart tin (unless you are using a ready made pastry case in which case skip this paragraph). This recipe makes a 25cm/10″ tart. My preference is to use a thin metal quiche tin with a removeable base. You can use another tin of the same size. If you need to use a ceramic dish, you may find that the tart case require a longer cook.
The second thing you will need is an electric mixer. A stand mixer with a whisk attachment is the ideal option. You can be hands off for what it quite a long whisking time. If you don’t have this option, you can use an electric hand whisk. This will do the job just as well, you will just need to be more physically involved and patient.
A comprehensive list of the equipment used to make this recipe is included in the main recipe card below. Click on any item to see an example. There are no hard and fast rules so many items can be sensibly substituted to achieve the same results.

Get Ahead
You can make the pastry case up to a couple of days in advance. If you want to get further ahead you can freeze it. Make sure to wrap it very well to prevent freezer burn. And be careful where you put it in the freezer so it doesn’t get bashed. Defrost thoroughly before filing and baking.
I do not recommend getting ahead with the filling in anyway. Except you do need to be organised to make sure that your evaporated milk is fully chilled in advance. You need to whisk the filling, get it into the pastry and bake it without delay.
Leftover Gypsy Tart
Once cooled, the baked gypsy tart is best eaten within the next 24-48 hours. Store it in an airtight container somewhere cool but not cold. The filling tends to split and weep if chilled.

Gypsy Tart Tips
- I’ve said it several times and I will say it again – the evaporated milk must be well chilled before you start to make the filling. You can speed this up using the freezer but don’t forget about it.
- Take care when lining the tin with pastry. You don’t want any holes or very thin patches as the filling could leak. Just use a little bit of scrap pastry to patch up if needed.
- Don’t forget to line the pastry before adding the baking beads. We’ve all done it once!
- Don’t forget to scrape down the sides of the bowl when whisking the filling.
- Don’t be tempted to overfill the pastry case. I tried this and then spent an hour scraping a sticky mess off everything in my oven.
- Don’t be tempted to overbake the tart – you are just looking to set the filling with a gentle heat, not cook it to smithereens.
- Don’t be tempted to cut the tart before it has fully cooled!

Don’t forget to let me know in the comments if you try making this recipe – I want to know what you think and if you made any substitutions, how did it turn out?
Still Have Questions?
Simple! Just contact me and I will do my best to help as quickly as I am able. Head over to my Contact Me page, any of my social media channels or post a comment at the bottom of this page and I’ll see what I can do.
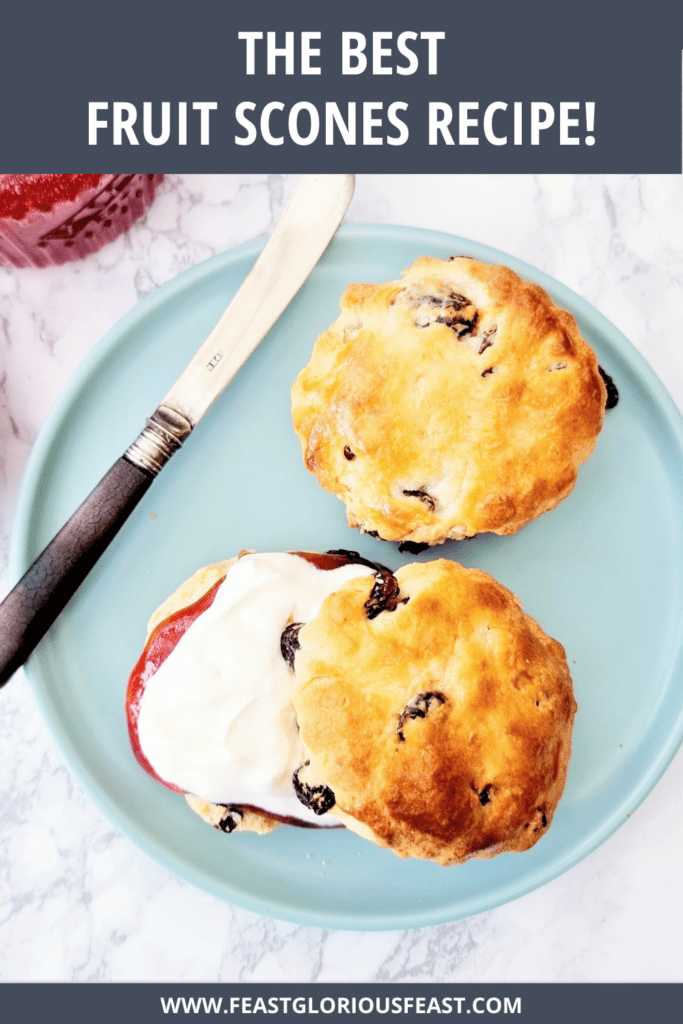
Pin Gypsy Tart – British School Recipe For Later
Hit one of the share buttons to save this page to your Pinterest boards so you can come back and find it at anytime!

Keep Up to Date
Make sure you SUBSCRIBE to my newsletter and avoid missing out on any of my newest and bonus content. Don’t worry, I promise not to spam you or bombard you too often. Plus you’ll receive a copy of my FREE 7 Day International Meal Plan!
Also please don’t forget to follow me over on my social media channels over at Facebook, Instagram and Pinterest. I love to interact with my followers and I’d love you to share my content with your friends too.
More Classic British Baking Recipes


The Recipe
Gypsy Tart – British School Recipe
Equipment
Ingredients
- 400 g Shortcrust Pastry - homemade or store-bought
- 410 g Evaporated Milk - well chilled
- 300 g Dark Brown Muscovado Sugar
Instructions
Important Note
- You will need to make sure your evaporated milk to be properly and thoroughly chilled. At least 12 hours in the fridge or 2 hours in the freezer (but no longer, you don't want it actually frozen).
Make the Pastry Case
- Preheat the oven to 190°c fan/375f.
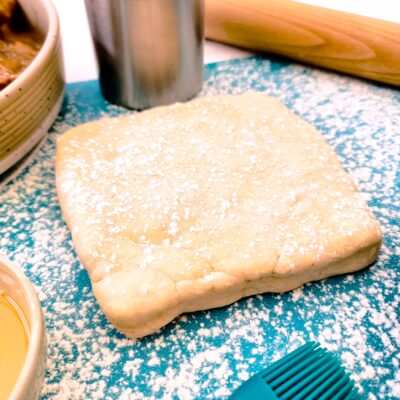
- Place roughly 400g Shortcrust Pastry onto a floured board. As you are going to roll the pastry into a circle, it is a good idea to use the palms of your hand to coax the pastry into a more round rather than square shape if it isn't already.


- Roll the pastry out until it is a little larger than the baking tin. Keep releasing the pastry from the surface and turning it/flipping it after each roll. This will make it easier to roll out and keep the thickness nice and even. You need to make sure there is enough pastry to line up the sides of the tin too. Use the tin as a guide to help you.

- Carefully life the pastry into the tin. Ease the pastry into the corners by lifting it rather than stretching it. Use your knuckle to press to make sure the pastry is fully in the corners and there aren't any air pockets underneath it.
- Use a small sharp knife to cut along the outside edge to remove any excess pasty. Or if the top edge of the tin is sharp like mine, you can roll over it with your rolling pin.

- Take this opportunity to again run around the edges with the side of your finger and make sure it is firmly pressed against the tin.
- Take a round paper liner or some cut baking paper and line the pastry case. If you are using a square of paper, scrunch it up and then flatten it a could of times to make it pliable. Make sure the paper fits snugly into the edges of the tin.

- Tip your baking beans into the tin. Ideally you want there to be enough beans to come right up to the top of the tin but don't worry too much if you don't.

- Bake the pastry for 10 minutes. Remove from the oven and carefully spoon out the baking beans – they will be very hot.

- Remove the baking paper to reveal the part cooked pastry shell. You will see that it is still dark looking on the base.

- Bake the pastry for a further 12 minutes until lightly golden all over. If the pastry puffs up a bit, don't worry, just gently press it back down when it comes out the oven.

- Set aside to cool while you make the filling.
Make The Filling
- Pour 410g Evaporated Milk into the bowl of your stand mixer along with 300g Dark Brown Muscovado Sugar.

- Whisk on high for 2 minutes. You will see that the mixture starts to lighten in colour and froth. Use a spatula to run around the sides and bottom of the bowl to make sure everything is being fully incorporated.

- Continue whisking for a further 10 – 13 minutes – until the mixture is thick, light and fluffy.

- You can see that the mixture has some body and hold itself for a second on the spatula.

Assemble & Bake The Tart
- Turn the oven down to 160c fan/320f.
- Pour the filling into the cooled pastry case
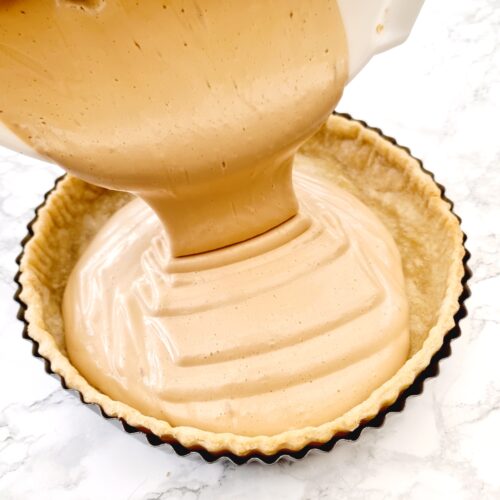
- Do not fill the tart past the pastry line, leave a little pastry showing. You will likely have some filling mixture leftover – don't be tempted to add this or it will spill all over the oven.

- Bake for 10 minutes – no longer. It will feel like the baking was pointless but the very top layer of the filling will have formed a skin and the filling will have heated enough to continue to set. Overbaking will mean that the filling splits so don't be tempted to "just give it another minute for luck"!
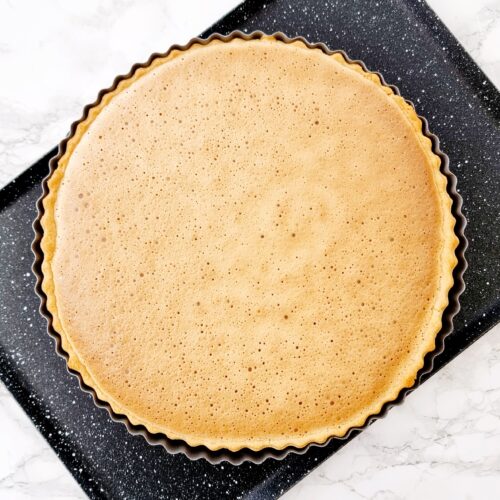
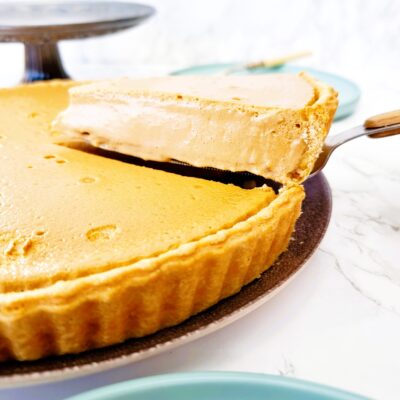
- Allow the tart to fully cool at room temperature before slicing. Putting the tart in the fridge can cause it to split and week. You will see the filling shrink a little as it cools.

- Use a very sharp knife to cut the tart into slices as needed.
Jack says
Update: made two tarts successfully! Theyre ready for eating soon. If you buy pre-made pastry like we did, then the recipe is enough for two maybe three tarts of the size of Tesco pre-made savoury pastry bases. 👌
Jack says
Thank you so much for this!
I loved gypsy tart at school enough to ask the dinner ladies for the recipe which they gave me and I promptly lost.
I was literally craving it some 30 years later and without expecting to find it I googled for a recipe.
Have got the ingredients and am having a big Friday night of making it this eve 😆
Robin says
Hi Chloe! I’m excited to try this recipe but would appreciate one verifiction first: is your measurment for evaporated milk, 410 grams, a measurement by weight? I just want to be sure. Thanks so much for your precise instructions!
Chloe says
Hi yes it is grams and it is a weird amount but it is the given unit and amount of a standard can of evap! So unless you’ve bought little ones, it should simply be the whole tin that you use!
Janice says
I really enjoyed recreating this classic tart. Although, it was never on the menu at my school in Scotland!
Lesley says
I’d never heard this called a gypsy tart, but recognised the flavours immediately. A delicious pudding, and reminiscent of the butterscotch tart I had as a kid.